Customer Portal - Wallet
Last Modified on 06/24/2026 2:36 pm PDT
Pathway: Customer Portal > Wallet
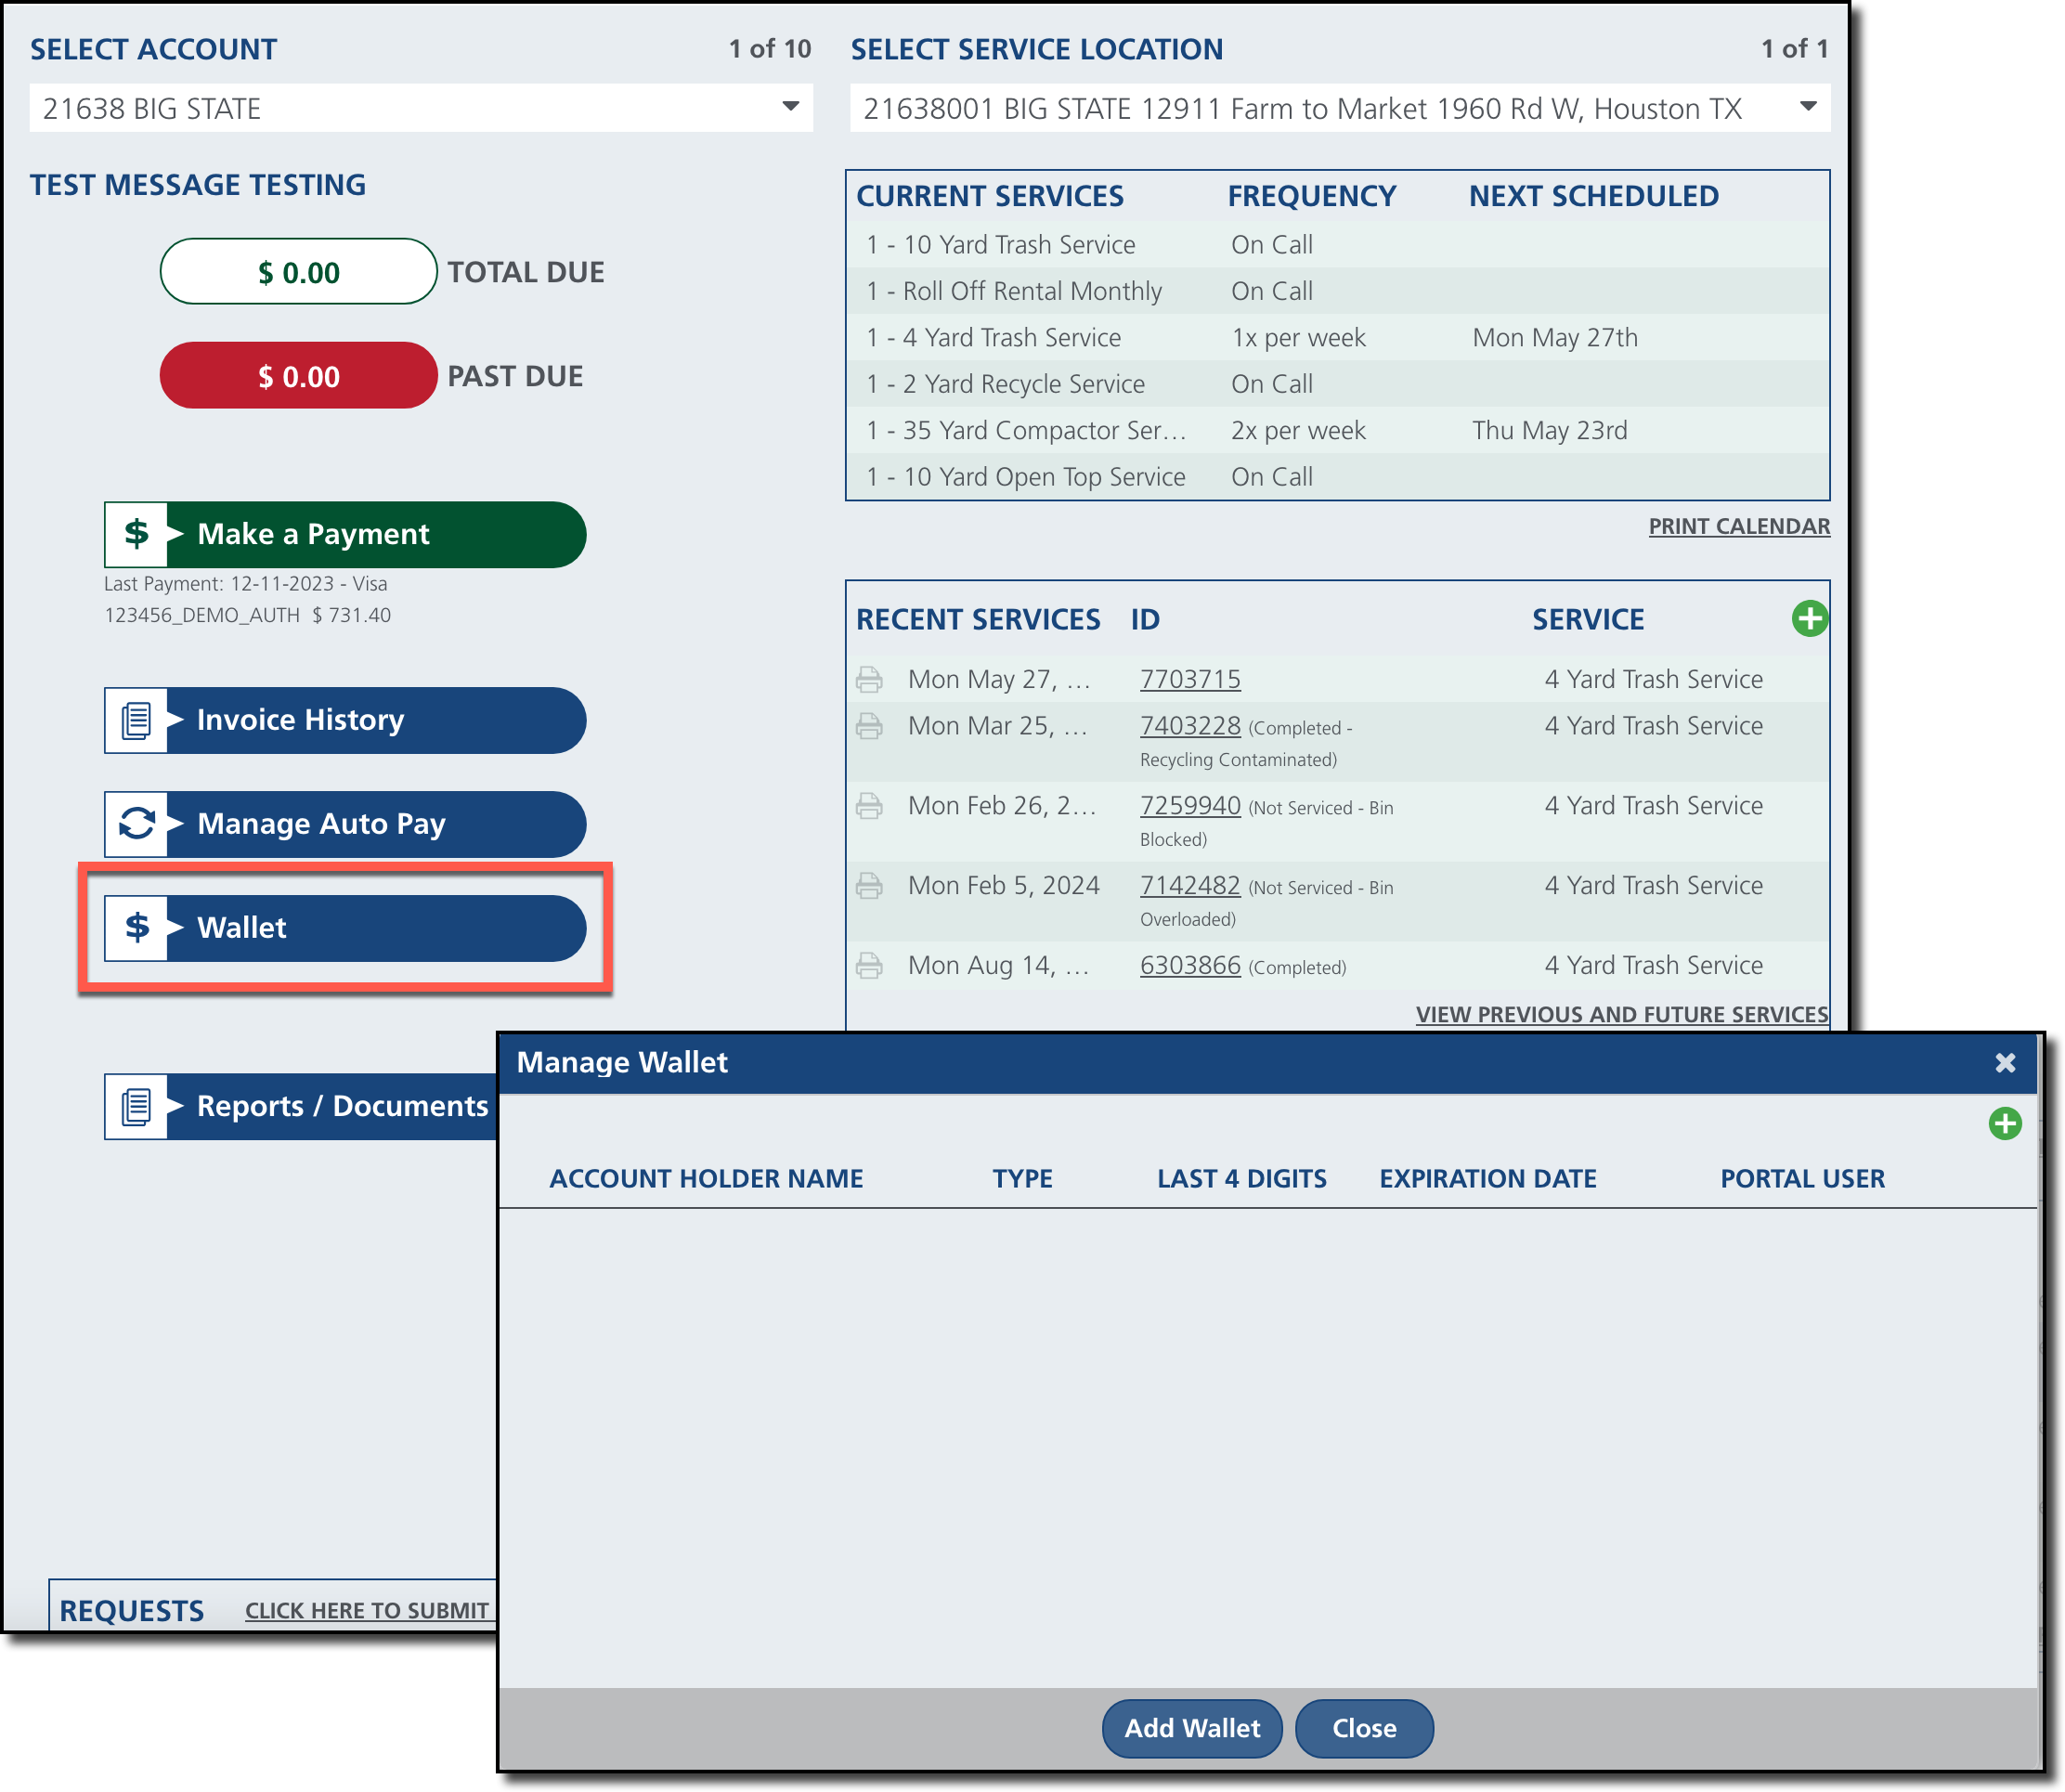
The Wallet feature displays all payment methods linked to an account, offering options to add new methods and remove any that are no longer valid.
Configurations in Setup
The following settings are required to enable the Wallet feature and manage payment methods:
Division Settings
Pathway: Setup > System > Division > Credit Card / ACH Processing (tab)
Division Setup settings control how credit card and ACH transactions are processed, as well as customer access to manage their payment methods in Wallet.

| Field |
Description and Use |
Card Not Present
|
Enable
Required |
Selections here affect the display of the Wallet and Payment features in the Customer Portal. If 'No' is selected, payment features are not displayed. Options include:
- Yes (Credit Card & ACH) - Customers can add a credit card or bank routing information to wallet, or make a payment with either option.
- Yes (Credit Cards Only) - Customers can only add a credit card to wallet, or make a payment with a credit card.
- No - Wallet is not available.
|
Processor
Required |
Select CardPointe Processor from the drop-down.
|
| Environment |
Select the type of environment this is being set up for:
- Production - Required to process live customer transactions.
- Sandbox - Testing option.
|
API Key / User Name
Required |
Enter the API Key provided by CardPointe.
|
Trans. Key / Password
Required |
Enter the password provided by CardPointe.
|
| Credit Card Merchant ID |
Enter the identification number for the credit card provided by CardPointe.
|
| eCheck / ACH Merchant ID |
Enter the identification number for the bank account provided by CardPointe. If something is entered here, then the following fields are displayed:
- eCheck / ACH Reporting Mid ID
- eCheck / ACH Reporting User Name
- eCheck / ACH Reporting Password
|
Card Present
|
| Wait for Terminal Timeout (Sec) |
Specifies how long the system will wait for a response from the credit card terminal before timing out. If the terminal does not respond within the defined number of seconds, the transaction will be canceled and may need to be retried.
|
The rest of the fields in the Card Present section are relevant to Card Present - Credit Card Terminal Setup.
|
Bottom section
|
Settlement Time
Required |
The settlement time for the payment batches. Any payments recorded after the time selected will be applied to the next day's payment batch.
|
| Credit Card Bank Account |
Select the bank account that payments are to be sent to.
Bank Accounts are created in Setup > Accounting > Bank Account
|
Payment Receipt Notification Template
Required |
Select the template that will be emailed to the customer upon receipt of payment.
Notification Templates are created in Setup > System > Notification Template
|
Declined Payment Notification Template
Required |
Select the template that should be emailed to the customer in the event a payment is declined.
Notification Templates are created in Setup > System > Notification Template
|
Payment Refund Notification Template
Required |
Select the template that should be emailed to the customer in the event a payment is declined.
Notification Templates are created in Setup > System > Notification Template
|
Chargeback Notification Template
Required |
Select the template that should be emailed to the customer in the event of a chargeback.
Notification Templates are created in Setup > System > Notification Template
|
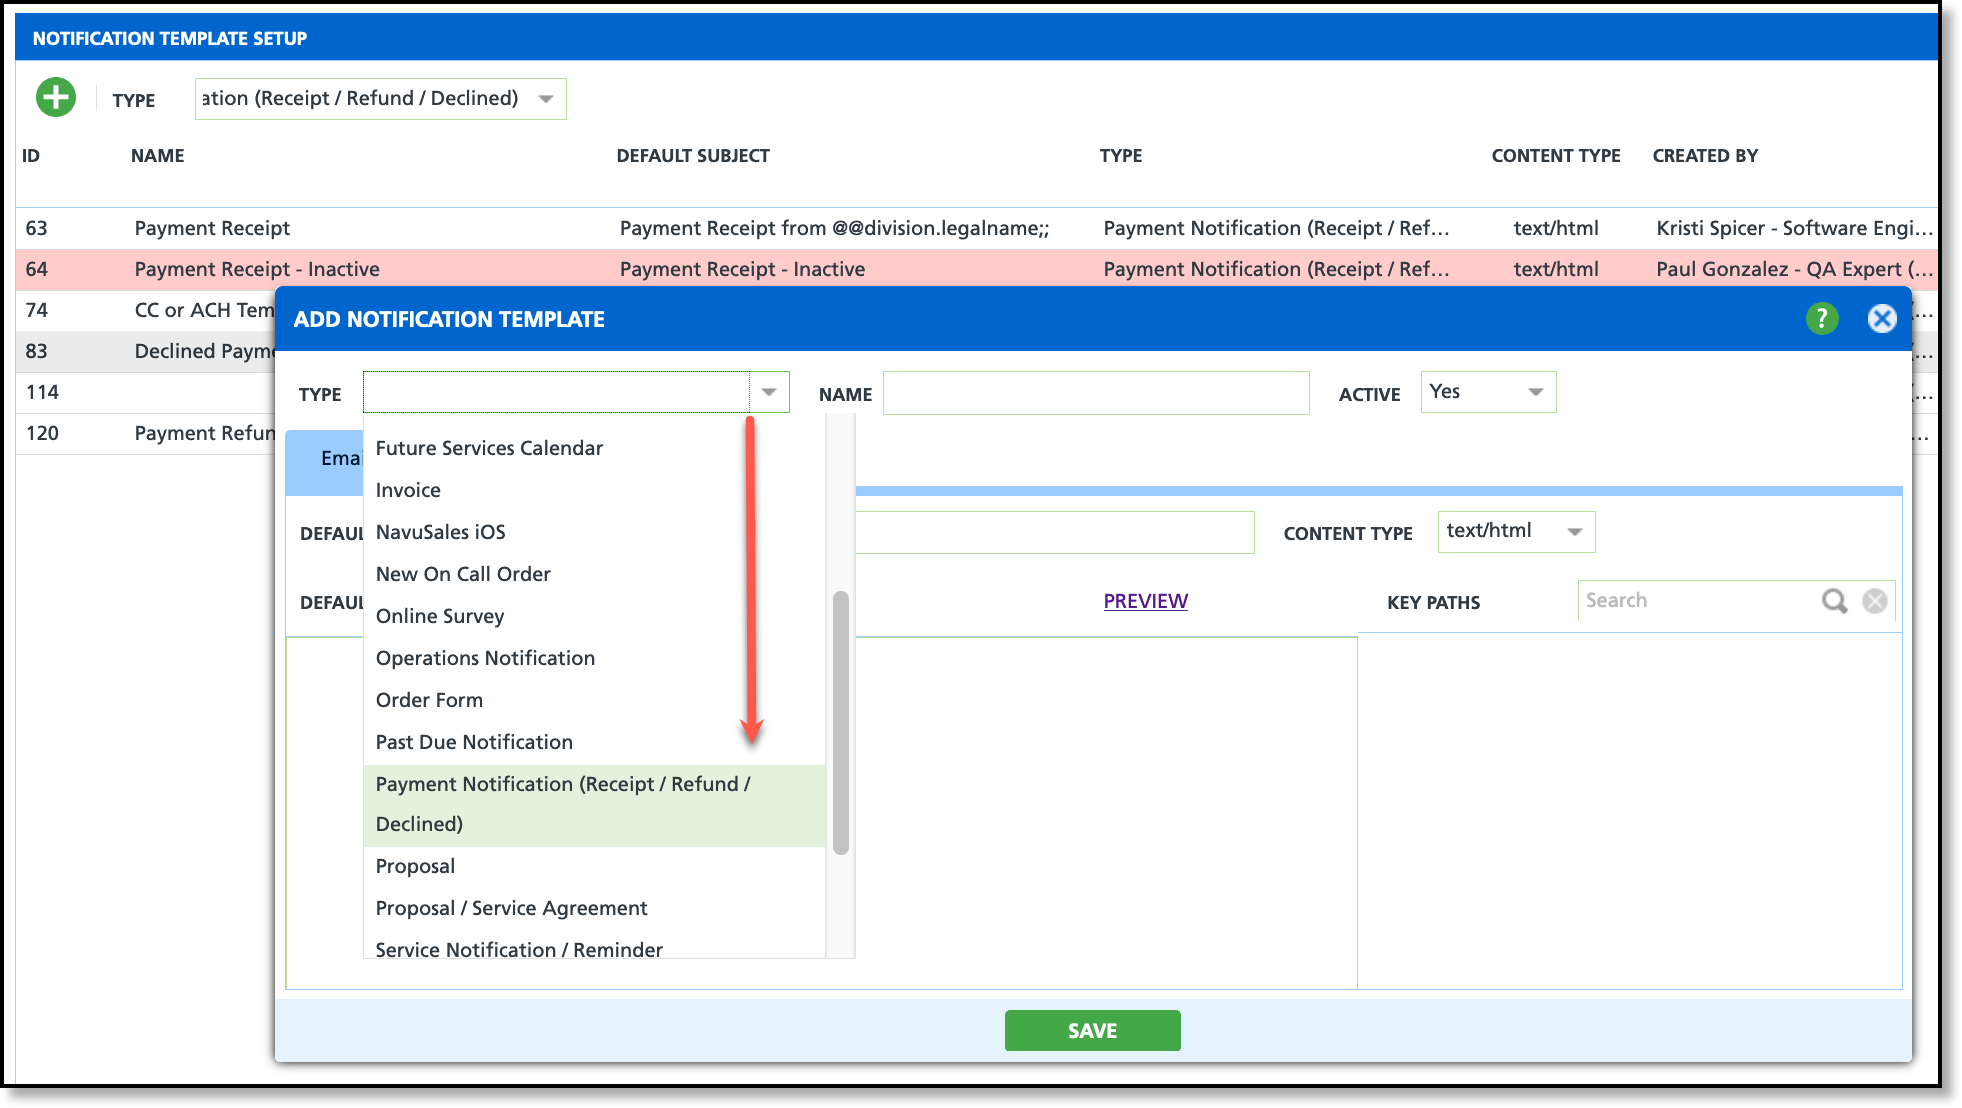
Notification Template
Pathway: Setup > System > Notification Template
Create notifications in Notification Template Setup that can be sent to the customer when a payment has been received, declined, or refunded.
| Field |
Description |
Type
|
Select the type that applies for the notification you are creating. Types that apply to Credit Card and payment processing include:
- Credit Card Expiration
- Payment Notification (Receipt / Refund / Declined)
|
Name
|
Enter a clear, easily identifiable name that will appear in the Payment Notification Template selection fields within Division Setup.
|
Active
|
Verify this field is set to 'Yes' so it is available for use.
|
Email Design
|
Create a custom email to be sent to the customer based on the notification's purpose.
|
Text Message Design
|
Create a custom text message to be sent to the customer based on the notification's purpose.
|
Manage Payment Methods
The following process outlines how a portal user can add or remove payment methods in the Manage Wallet section of the Customer Portal.

Add Payment Method
- Click the green + icon or the Add Wallet button to open the Add Wallet popup.
- Select Type to identify the wallet as either a 'Credit Card' or 'Bank Account.'
- Based on the selection, enter the details for the payment method.
- Review the Accept Payment Terms and Conditions and select the check box when finished.
- Click Save and the payment method is now available for use.
Remove Payment Method
- From the Manage Wallet screen click the red - to remove the payment method from Wallet.
- After clicking the remove icon, a confirmation message will appear to ensure the user intends to remove the payment method.
From Portal to Office: Application Visibility
Adding a type of payment to the wallet from the Customer Portal behaves identical to Add Payment Method. Whether payment methods are added from the application or from the portal, the wallet can be viewed from the AR History screen.
AR History - Wallet

Related Articles
Make a Payment
Manage Autopay
Access Invoice History


