Auto Pay - Customer Portal View
Last Modified on 01/28/2025 12:13 pm PST
Pathway: Customer Portal > Manage Auto Pay
This article provides an overview of the Manage Auto Pay feature available to customers on their portal account.

Setup Requirements/Logic
- The account must be in an Active status.
- The Manage Auto Pay option is available only for the following Customer Portal Home Pages, which are defined by the account class:
- Standard
- AR Only
- Mail Back
- Service Map and Requests
- MRF/Recycling
- Calendar View
- Brokered Account
Manage Auto Pay
Through the Manage Auto Pay tool in the Customer Portal, customers can manage their account's payment methods.
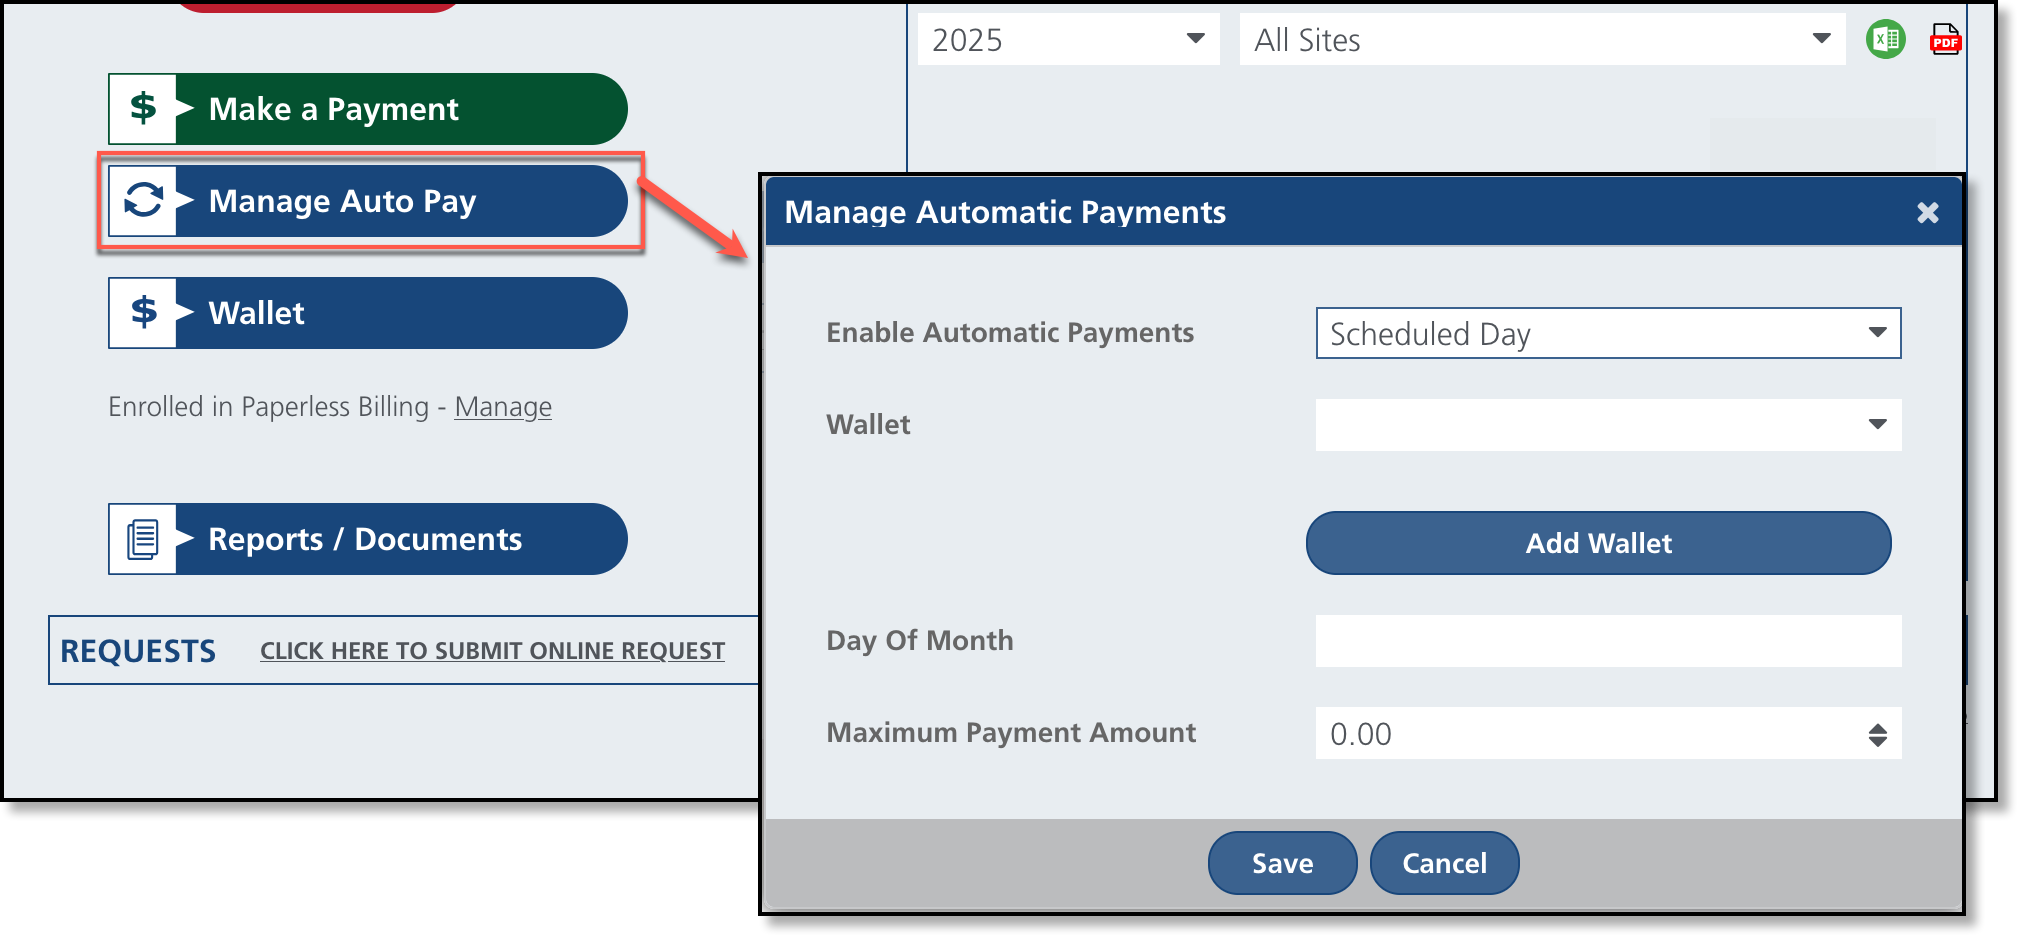
- Click on Manage Auto Pay and the Manage Automatic Payments popup editor will display.
- Select an option from the Enable Automatic Payments drop down. Options include:
- No - If selected, auto pay will not be enabled for the customer's account.
- At Billing - If selected, auto pay will process payments when the account is billed.
- Scheduled Day - If selected, auto pay will process payment for the account on the day of the month the customer has entered.
- If selected, Day of Month field displays. The customer should enter the day of the month they would like their payment processed.
- Select a payment method from the Wallet drop down.
- If no payment method is available, or a new payment account should be used, select 'Add Wallet' to add a new payment method for auto pay to use.
- Click Save when finished.
Add Wallet
Select the 'Add Wallet' option to add a bank account or credit card for automatic payment processing, or to update the current payment method.
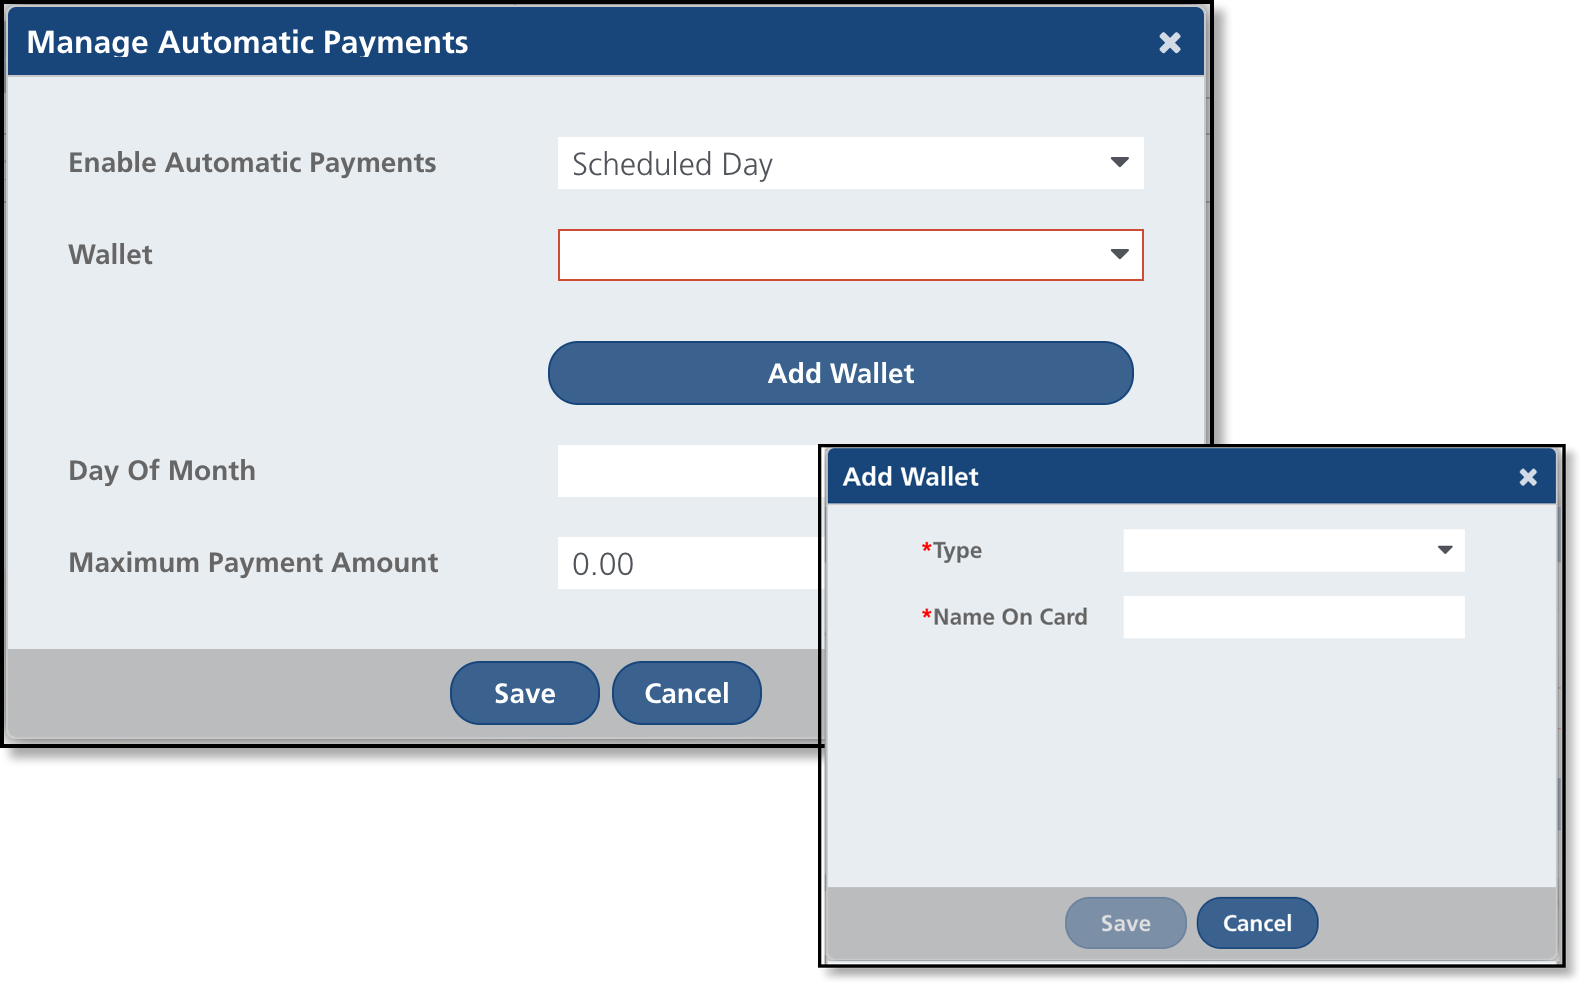
- Select Add Wallet from the Manage Automatic Payments editor.
- Select the Type of payment method. Options include:
- Complete all required payment fields for the selected payment option.
- Click Save.


