Customer Portal - Manage Auto Pay
Last Modified on 05/26/2026 8:25 am PDT
Pathway: Customer Portal > Manage Automatic Payment
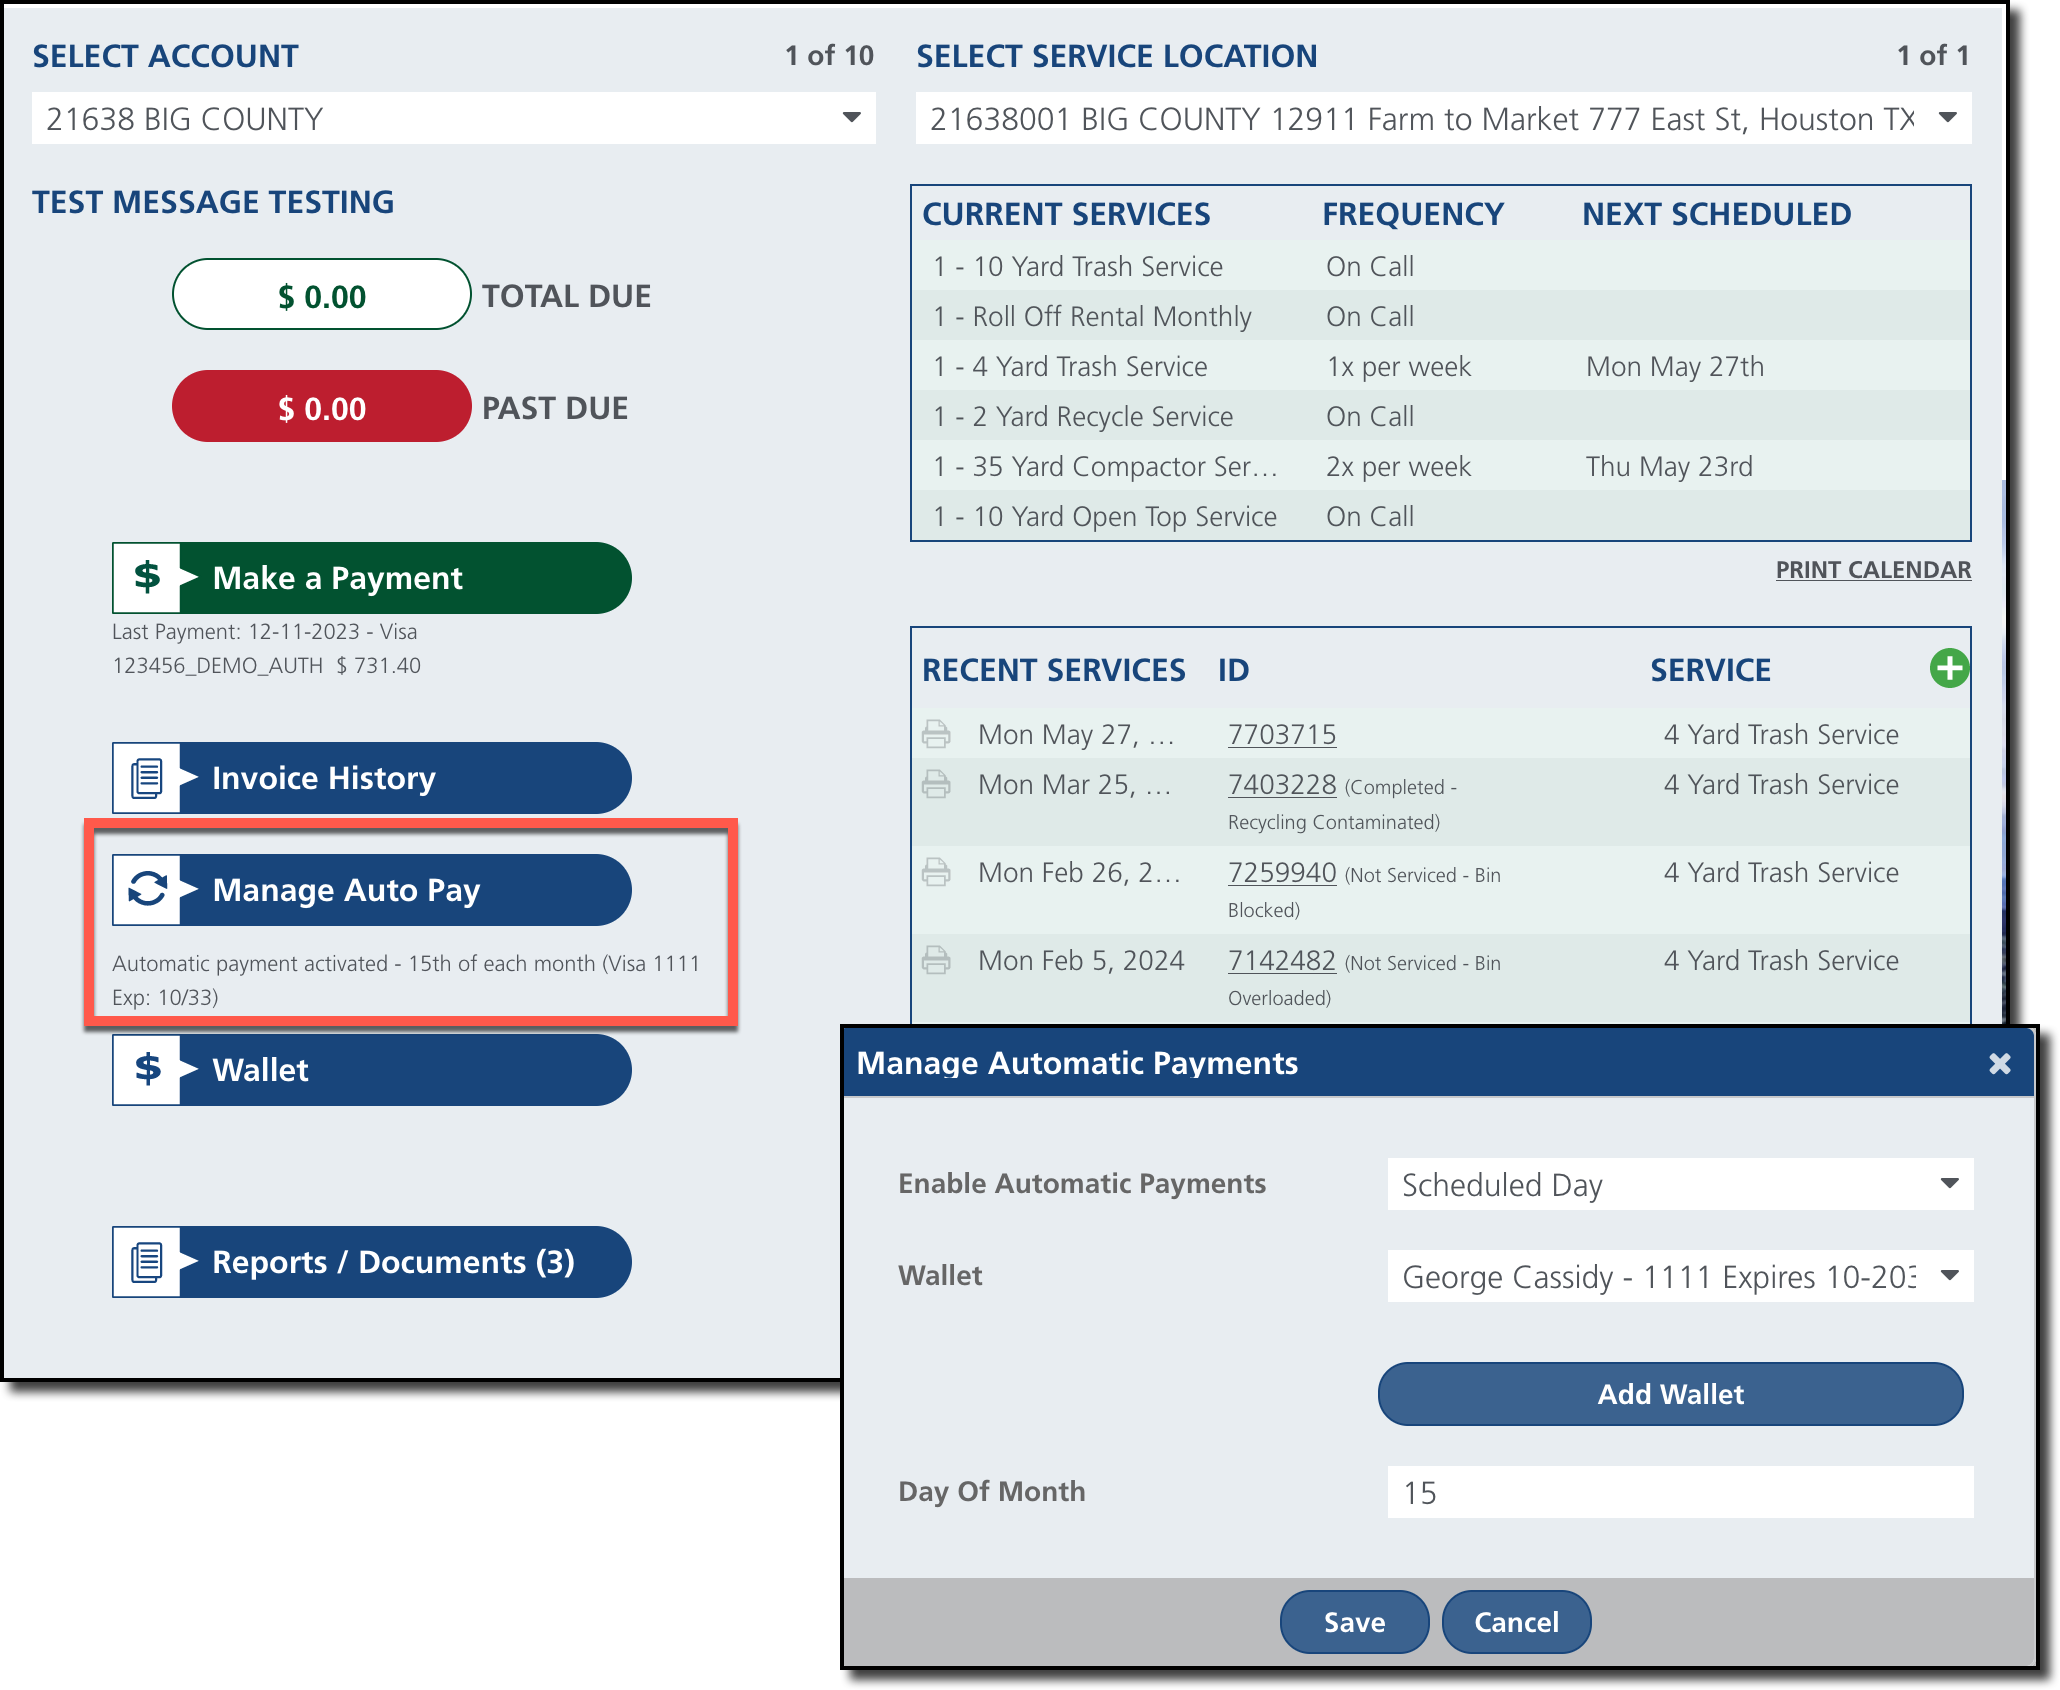
From the Customer Portal, the Manage Auto Pay feature allows customers to activate and manage automatic payments themselves choosing when the payment is made and how it is paid.
Manage Automatic Payments Field Descriptions
| Filter |
Description |
Enable Automatic Payments
|
Select from the following payment options:
- No - Automatic payments will NOT be enabled.
- Scheduled Day - Auto-pay will be processed on a set day each month identified in the 'Day of Month' field.
- At Billing - Auto-pay will be processed at the same time as billing.
|
Wallet
|
Choose an existing credit card or bank account payment method to be utilized for automatic payment processing.
|
Add Wallet
|
Option to add a new payment method for auto-pay to use if there is not an existing method available, or the payment method has changed. |
Day Of Month
|
Identifies which day auto pay will process each month if 'Scheduled Day' is used.
|
Maximum Payment Amount
|
Option to enter a maximum payment amount that auto-pay can process.
|
Setup Requirements/Logic
- The account must be in an Active status.
- The Manage Auto Pay option is available only for the following Customer Portal Home Pages, which are defined in the Account Class:
- Standard
- AR Only
- Mail Back
- Service Map and Requests
- MRF/Recycling
- Calendar View
- Brokered Account
To learn more about how to set up the customer portal with the correct Home Page so that the Manage Auto Pay is displayed in the customer portal, see Customer Portal Views.
Enable Automatic Payments
- Select 'Manage Auto Pay' from the Customer Portal home screen to open the Manage Automatic Payments window.
- Select an option from the 'Enable Automatic Payments' drop down:
- Scheduled Day - Auto-pay will be processed on a specific day each month identified by the customer.
- At Billing - Auto-pay will be processed at the same time as billing.
- Select an existing option from the Wallet drop down
To add a new form of payment, select Add Wallet. See instructions below.
- If Scheduled Day was selected from the 'Enable Automatic Payments' drop down, enter the Day of Month auto-pay should process.
- Optional, enter a Maximum Payment Amount that can be processed using auto-pay.
Note: This option must be configured during set up for it to display as shown here:
- Click 'Save'.
Add Payment Method - Wallet
The Add Wallet tool is used to store credit card and bank information for automatic payment charges. More information about Wallet and setup configurations can be reviewed here: Customer Portal - Wallet
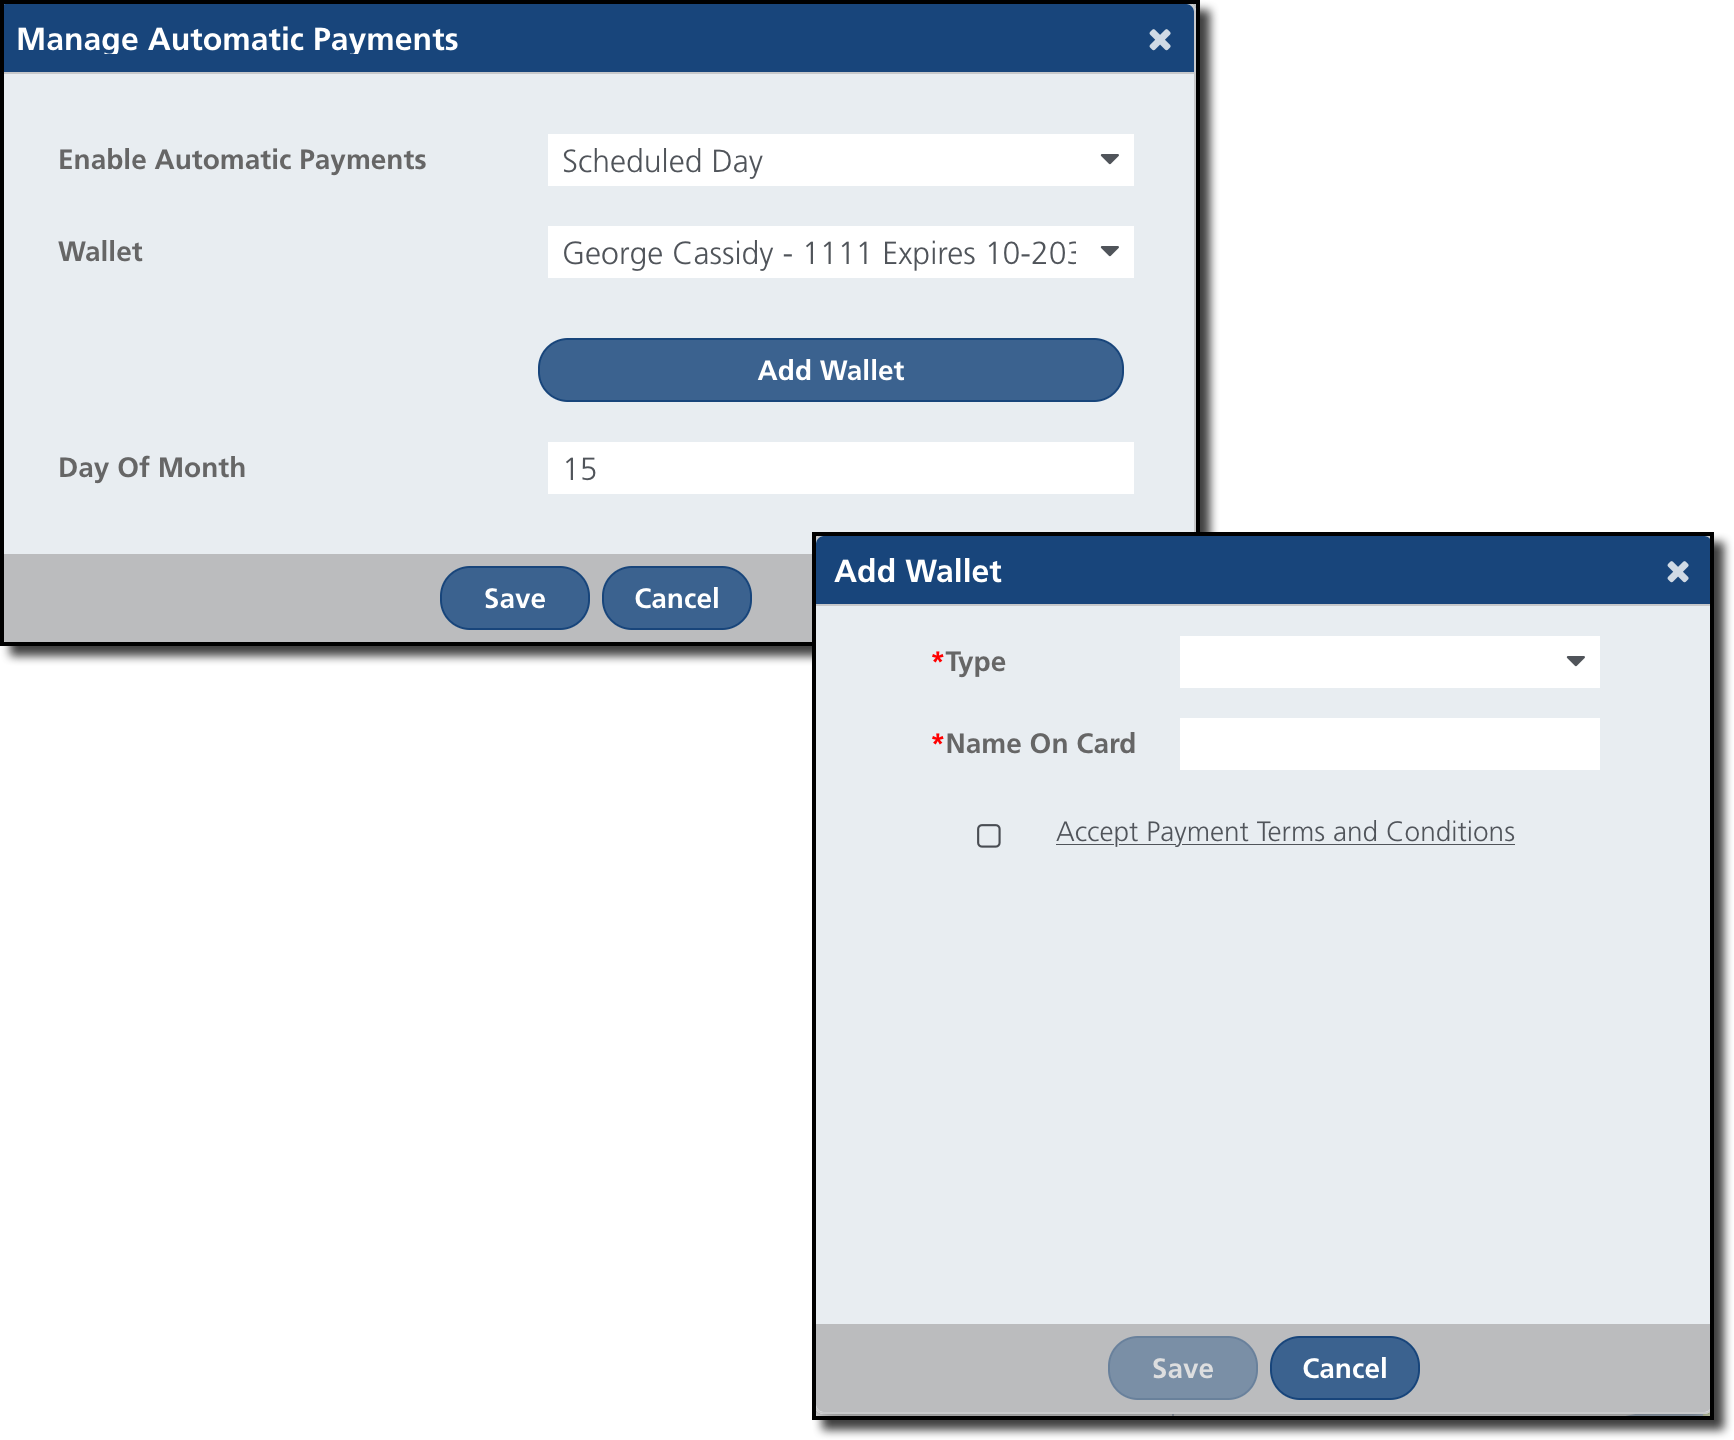
- Click the 'Add Wallet' button from the Manage Automatic Payments screen. This will open the 'Add Wallet' popup.
- Select the payment Type: Bank Account or Credit Card.
- Enter the Name of the bank account or credit card holder.
- Select the "Accept Payment Terms and Conditions" hyperlink to review the terms and conditions. Check the associated box to acknowledge and accept.
- Click 'Save' to add the payment method to Wallet.
Related Articles
Make a Payment
Invoice History
Manage Payment Methods (Wallet)
Customer Portal Views


