Truck Setup
Last Modified on 01/12/2026 12:17 pm PST
Pathway: Setup > Operations > Truck
The Truck Setup tool is used to add and edit the trucks a company uses to collect waste. Upon open, all trucks are listed. Use the Division and Line of Business filtering options located at the top of the screen to limit the trucks that display.

Permissions
The following permissions are required to use the Truck Setup screen:
| Permission ID | Permission Name |
24
| Setup \ Operations |
Add Truck
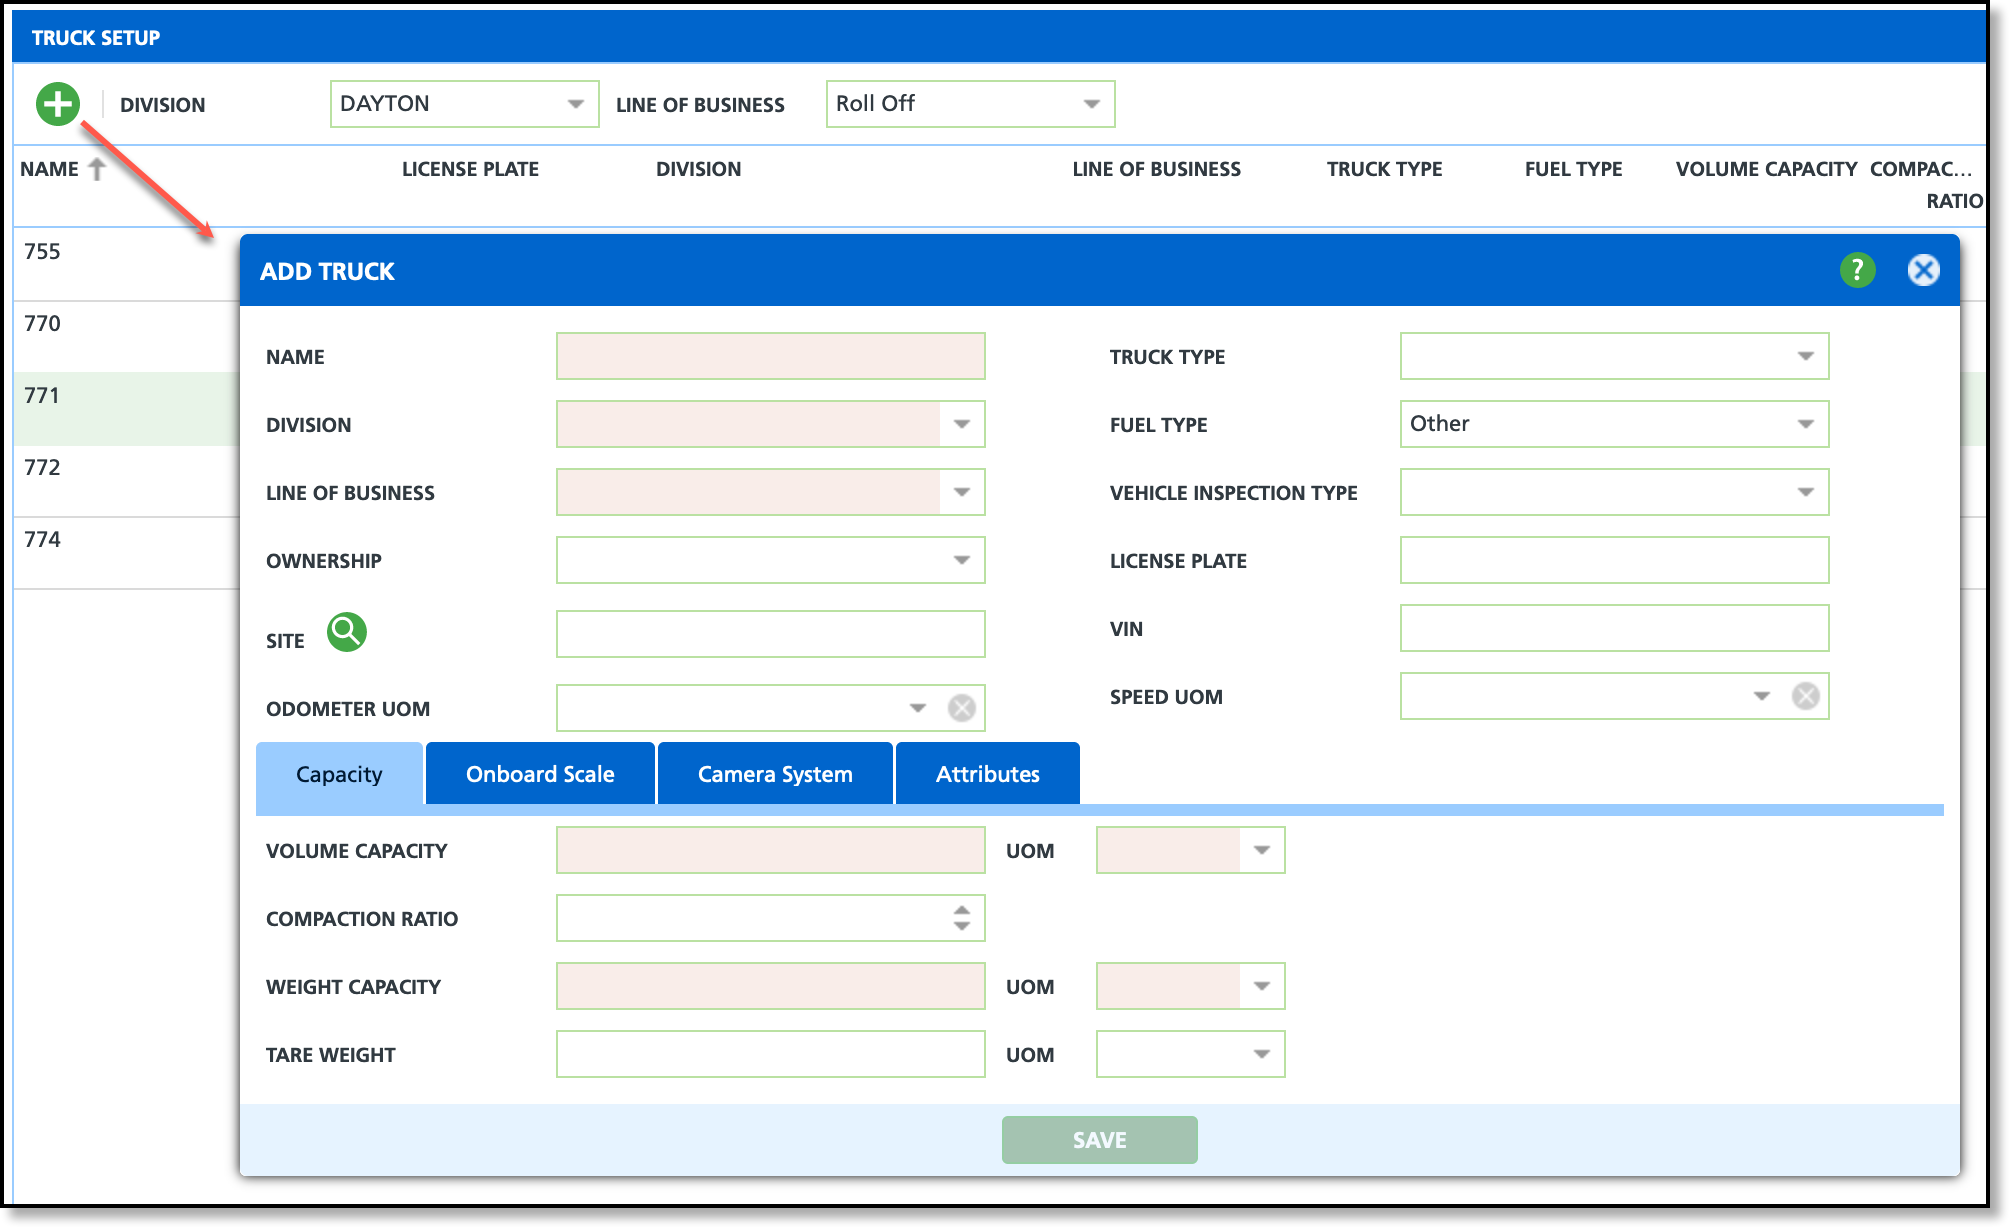
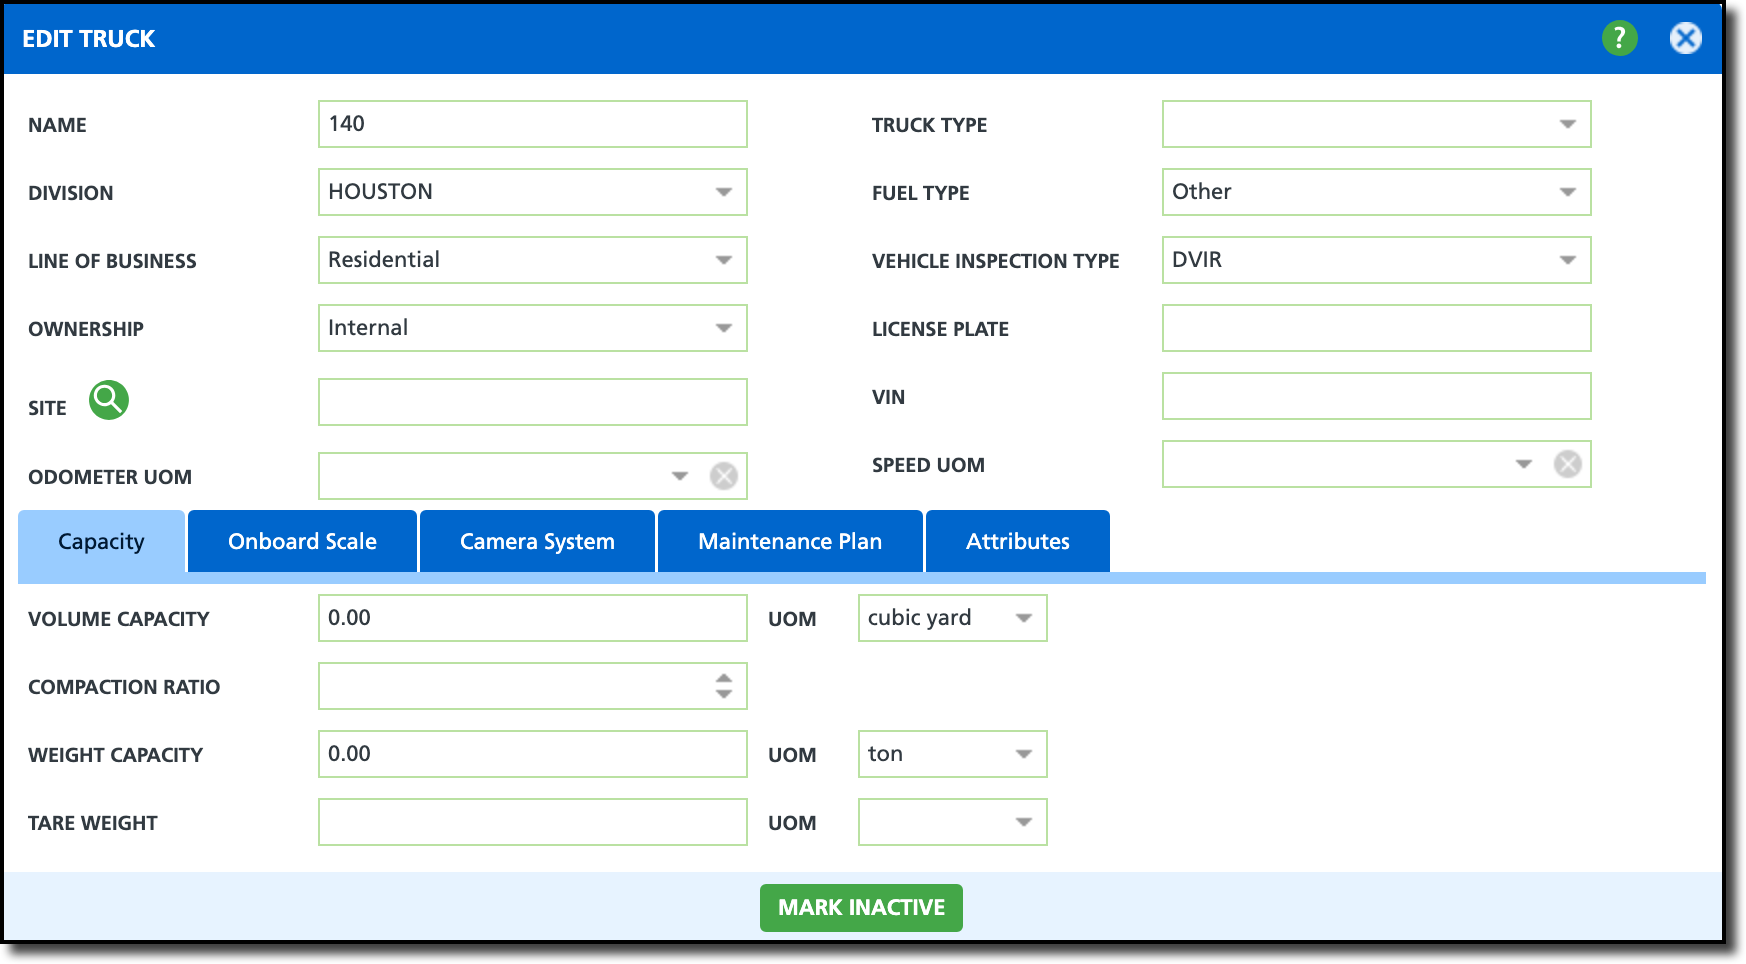
Add new trucks using the Add Truck tool. To edit an existing truck's record, double click on the row of the truck and the Edit Truck editor will display.

Add/Edit Truck Field Descriptions
| Fields | Descriptions |
Name
Required
| The name of the truck. |
Division
Required
| The division the truck is assigned to. |
Line Of Business
Required
| The primary line of business the truck is assigned to. Additional lines of business can be added to the truck upon save. Refer to the "Add Additional Lines of Business" section further down on this page to learn more. |
Ownership
| Indicates if the truck is owned by the company or a third party. |
Site
| The site assigned to this truck. |
| Odometer UOM | Indicates how distance is tracked for the truck and is an override for the default distance unit of measure setting in System > Operations > System [tab].
Odometer UOM is used in the Route Productivity view of the Dispatch screen to record the Start and End distance of the truck (miles, kilometers). See the Truck / Mileage column. |
| Truck Type | Identifies what type of truck the truck is categorized as. Truck type is used primarily for turn-by-turn navigation and scale. Review the Truck Setup documentation for further information. |
Fuel Type
| The type of fuel this truck is run on. |
Vehicle Inspection Type
| Determines which vehicle inspection list the driver will see. More information on vehicle inspections can be reviewed here: Vehicle Inspection Item and Vehicle Inspection Type. |
License Plate
| The license plate number for the truck. |
| VIN | The VIN number for this truck. |
| Capacity |
Volume Capacity
Required
| Indicates how much waste the truck can hold before needing to be emptied. This helps route optimization plan the placement of a disposal trip on the route.
If route optimization is set up in your system, the Volume Capacity entered here must match the equipment's Capacity Planning Volume in Equipment Type Setup; otherwise, optimization will fail. |
UOM
Required | The Unit of Measure used to measure the waste and calculate capacity. |
Compaction Ratio
| Numeric value that represents the ratio of how much one load of waste is reduced by because of a compactor.
Example: If the Compaction Ratio to Volume Capacity is 4, it would mean that for every 4 truckloads of loose waste taken to the landfill, the same quantity of compacted waste would only require 1 trip. |
Weight Capacity
Required
| Indicates how much weight the truck can carry. Also included in Route Optimization calculations.
UOM: The unit of measure used to calculate the weight. |
Tare Weight
| The weight of the truck without any waste (truck is empty). |
| Maintenance Plan - Only available to the Edit Truck screen |
| Plan | This feature identifies the maintenance plans applicable to a truck, such as oil changes, brake replacements, and more. |
| Add/Remove Toggle | Controls adding or removing maintenance plans from a truck. |
| Attributes |
| Date In Service | Date the truck started servicing routes. |
| Chassis Year | Identifies the year the chassis was built. |
| Chassis Make | Identifies the manufacturer or the chassis. |
| Engine Model | Designated field to enter the engine model for a truck. |
| Transmission Model | Designated field to enter the transmission model for a truck. |
| Registration Date | Field to record the truck's registration date. |
| Chassis Model | Designated field to enter the chassis model for the truck. |
| Engine Serial Number | Field to enter the serial number for the truck's engine. |
| Transmission Serial Number | Field to enter the serial number for the truck's transmission. |
Add Truck
- Select the green + to open the Add Truck tool.
- Complete the following required fields:
- Enter the Name for the Truck.
- Select the Division the Truck is assigned to.
- Set the Line Of Business for the Truck.
- Enter the value for the Volume Capacity and select the Unit Of Measurement the cargo will be measured in.
- Enter the value for the Weight Capacity and select the Unit Of Measurement the cargo will be measured in.
- Complete additional fields based on your company's setup requirements.
- Click Save when finished.
Mark Active/Inactive
After a truck has been added and saved, 'Mark Inactive' becomes available on the Edit Truck screen. By default, all trucks are set as active when initially added. The active status of a truck is clearly indicated in the Active column of the Truck Setup screen.
Mark Inactive
If a truck is marked inactive and is currently assigned to route records, a confirmation window displays prompting the user to confirm that marking the truck as inactive will result in its removal from all future routes.
Mark Active
If a truck is currently inactive, open the Edit Truck screen and select the 'Mark Active' button. 'Mark Active' only displays when the truck's status is inactive.

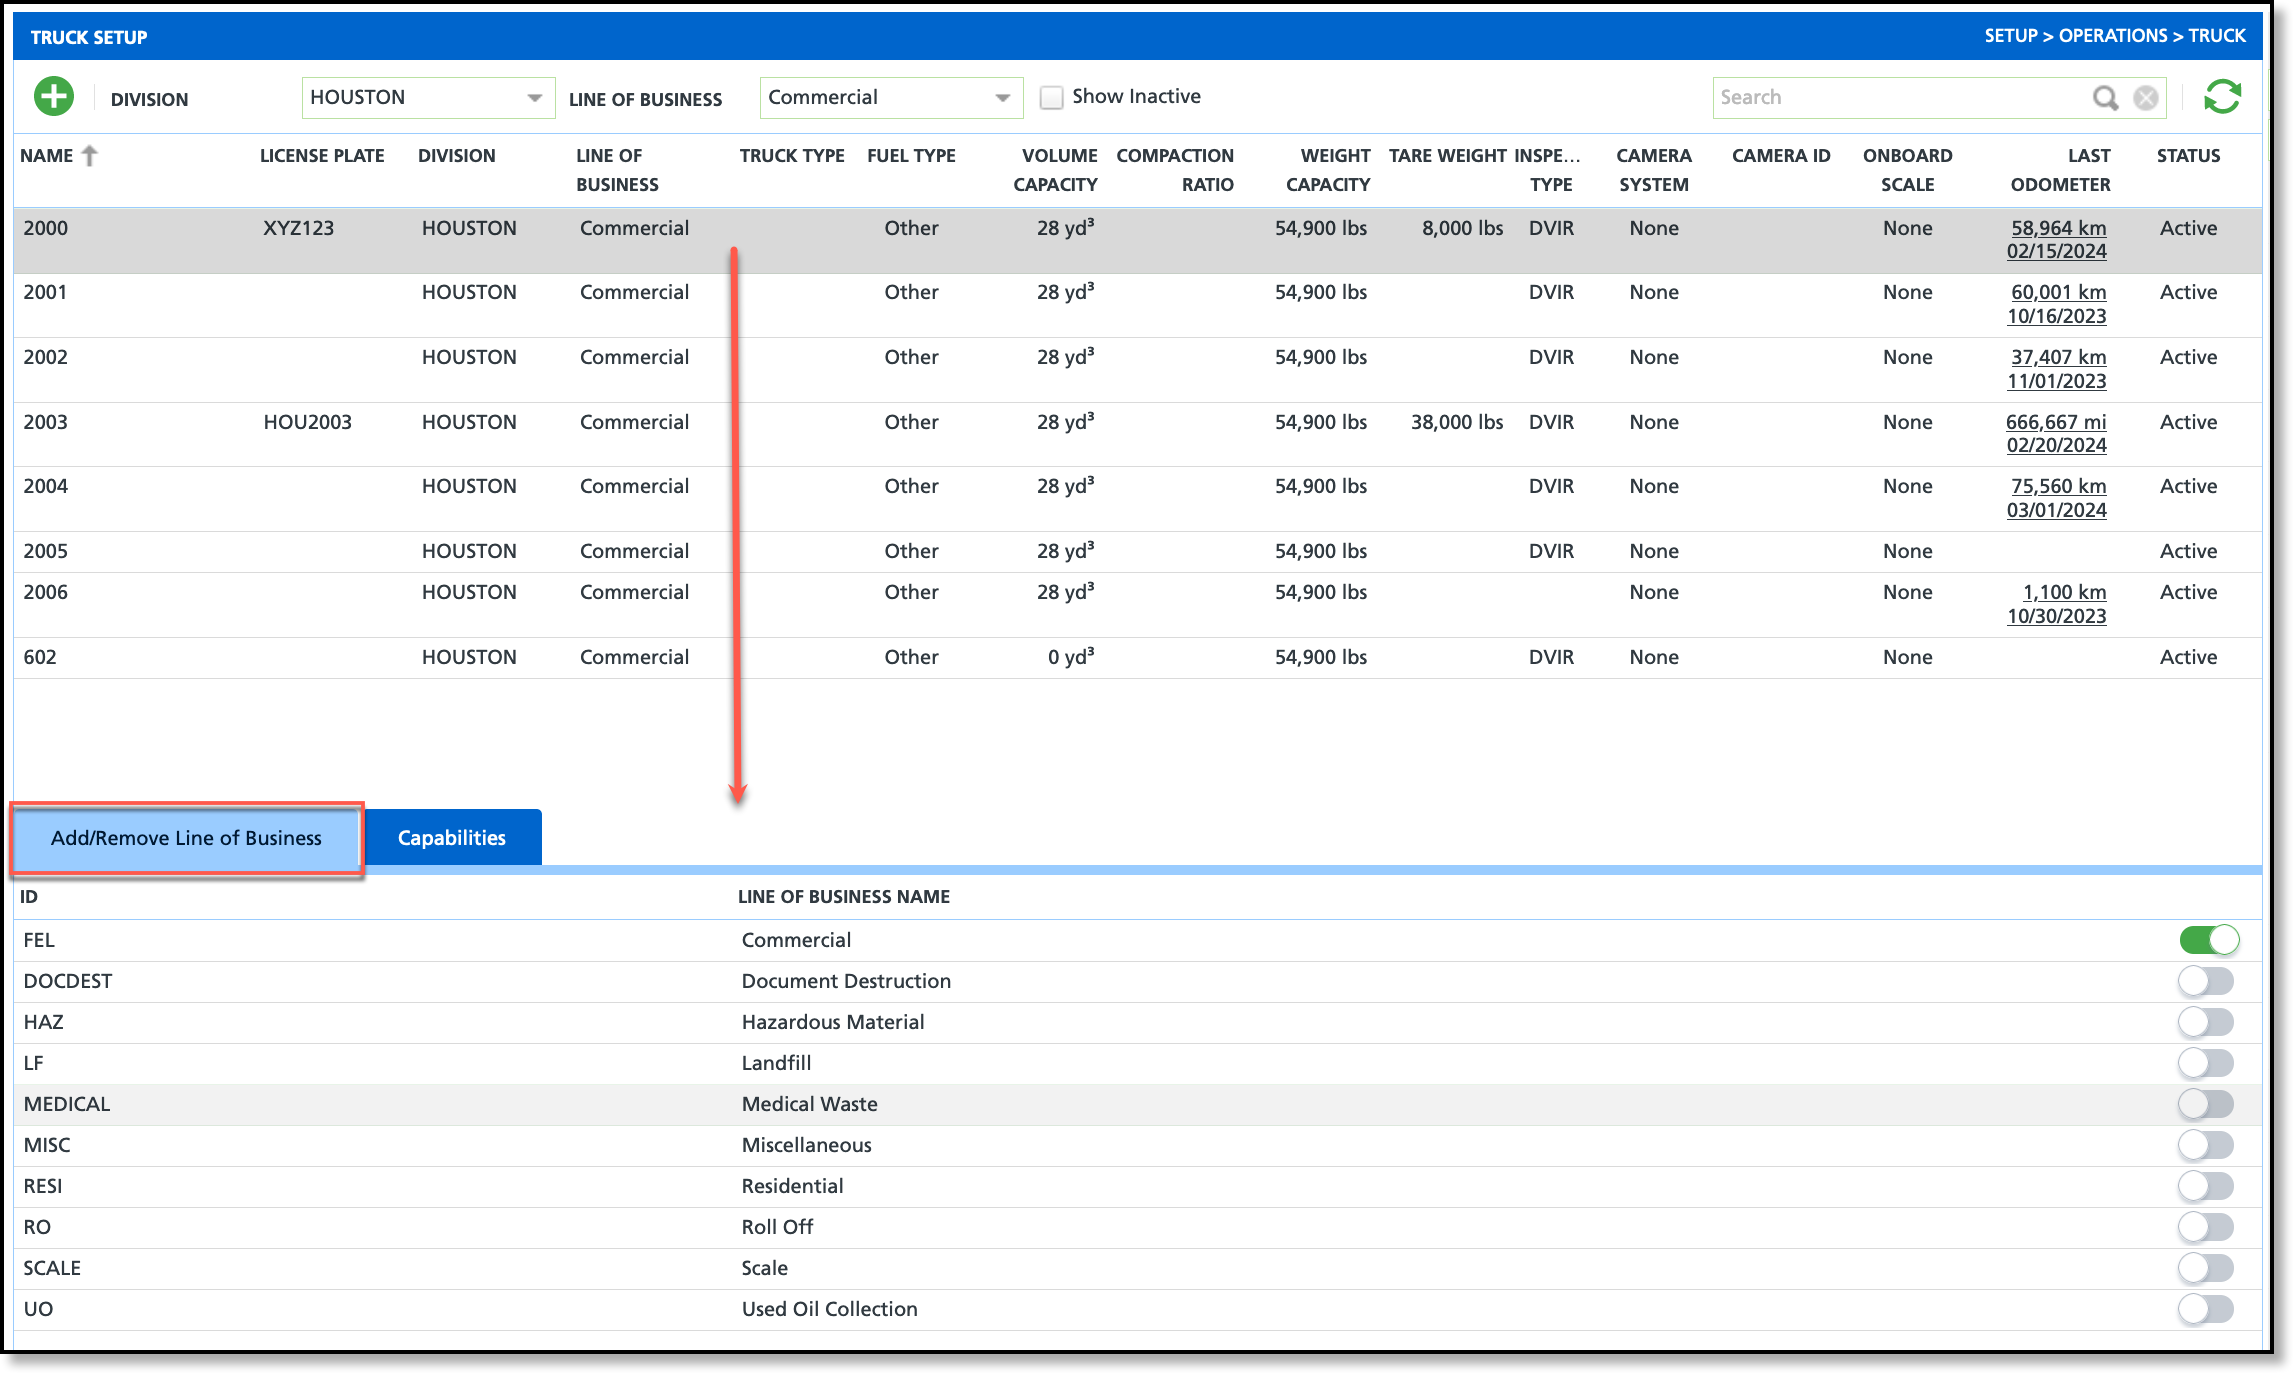
Add Additional Lines Of Business
In certain cases, trucks may be equipped to handle multiple lines of business on the same route (for example, a shredding truck servicing sharps). When this occurs, additional lines of business can be assigned from the Add/Remove Line of Business tab. To add one, select a route from the upper grid to display the tab in the lower grid, then use the toggle buttons to add or remove lines of business as needed.
Note: Specifying the lines of business a truck can service determines which trucks appear in the Route Record for the Truck assignment field. Trucks not equipped for a selected line of business will not be available as options.

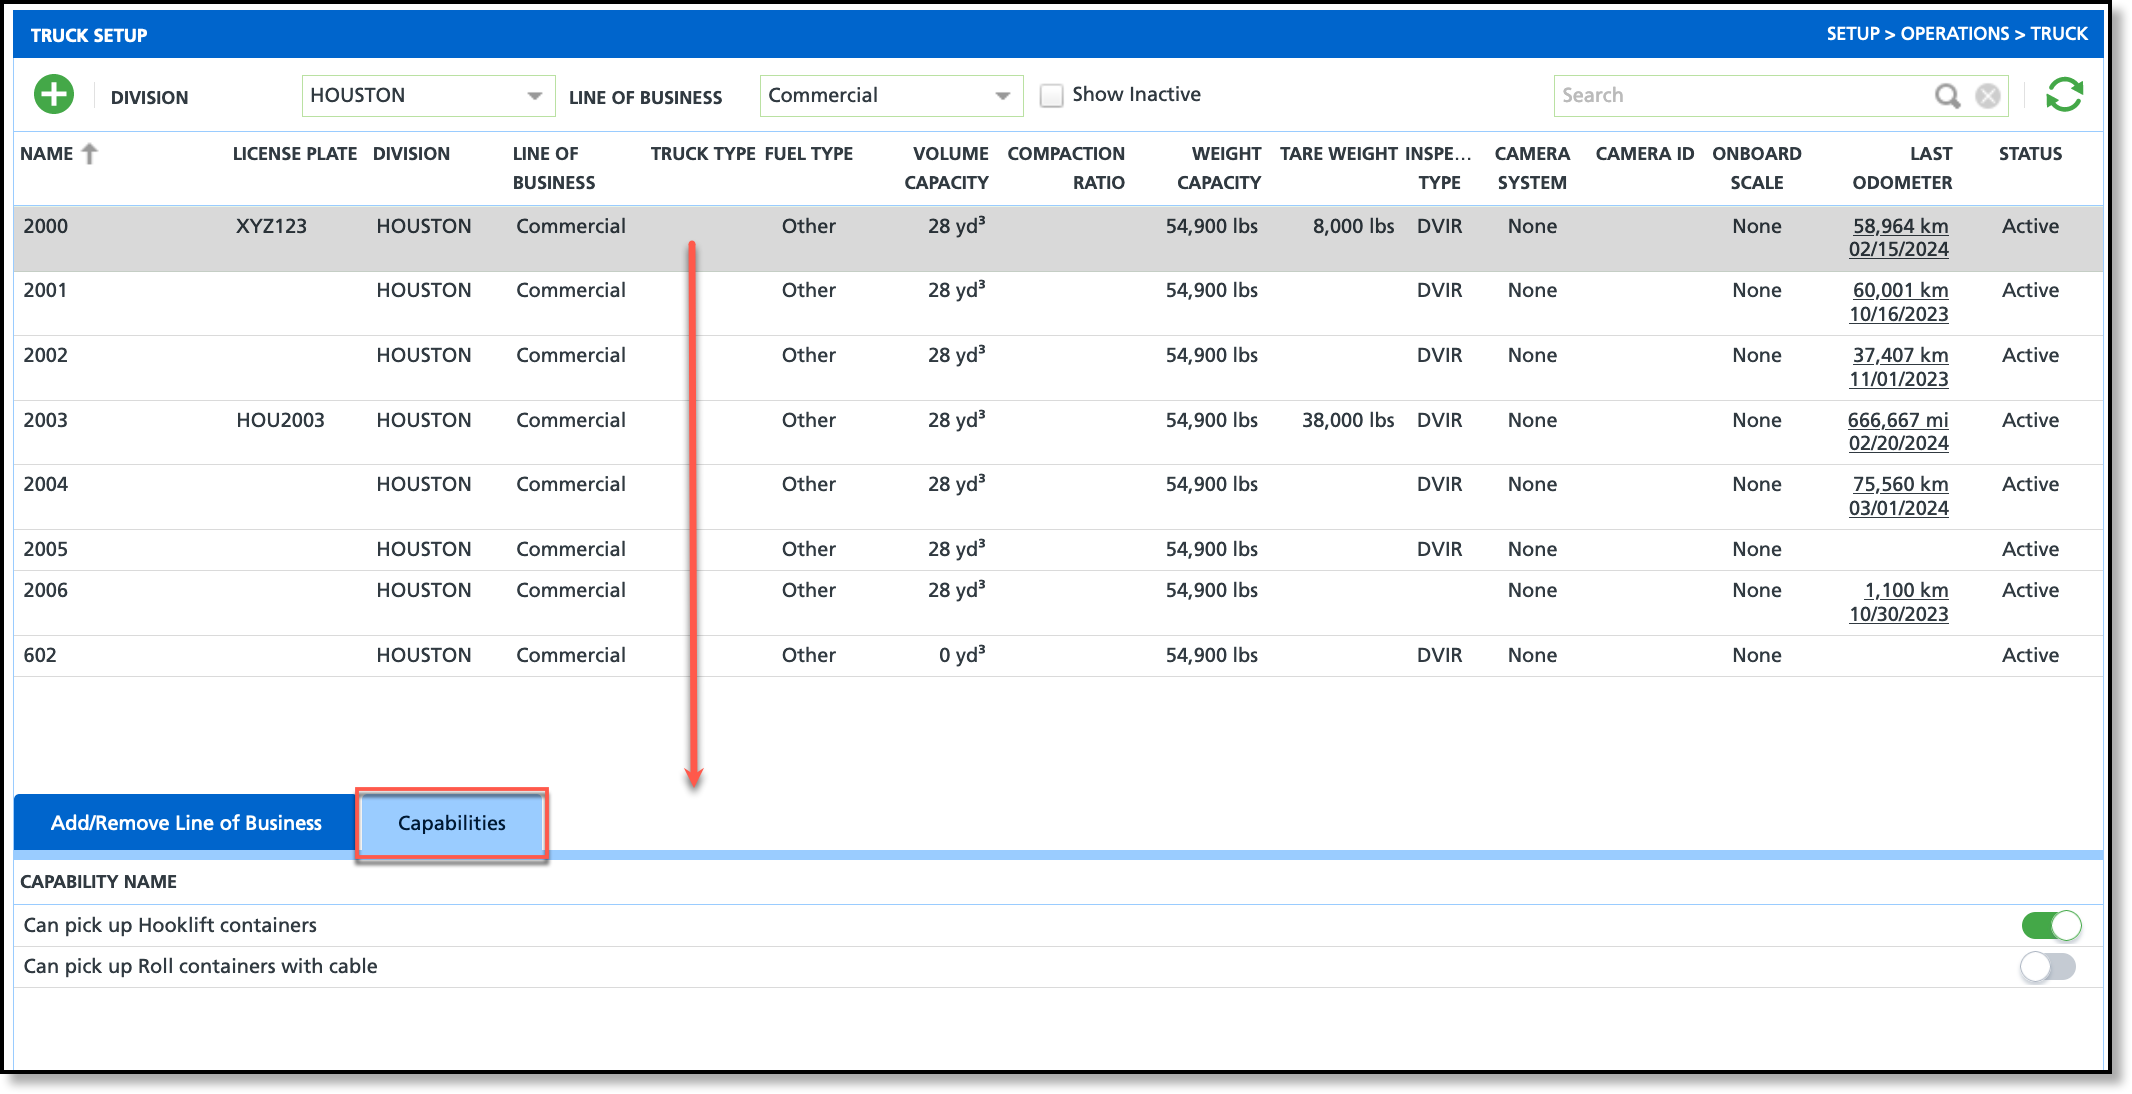
Add Capabilities
Select a truck record from the upper grid to add its capabilities in the lower grid. Use the toggle buttons to add or remove capabilities of a truck.
The Truck Capabilities tab provides essential information about the functions that a truck can perform. This includes detailing the specific job functions that the truck is capable of executing, aiding in the identification of its capabilities.

Related Articles
Truck Type


