The following article provides an overview of the NavuNav features, specific to the NavuNav Android Driver application.

Logging In
As soon as the driver logs in, they will be prompted to Clock In. Start Time here is recorded under the Log In column in Dispatch. The Vehicle Inspection screen lists items for the driver to review and mark as Passed or Failed. A notes field is available for entering additional details about any inspected item. Review the Vehicle Inspection Item setup article for additional information. Clock In

Field Logic
Vehicle Inspection

Driving Directions (Turn-By-Turn Navigation)
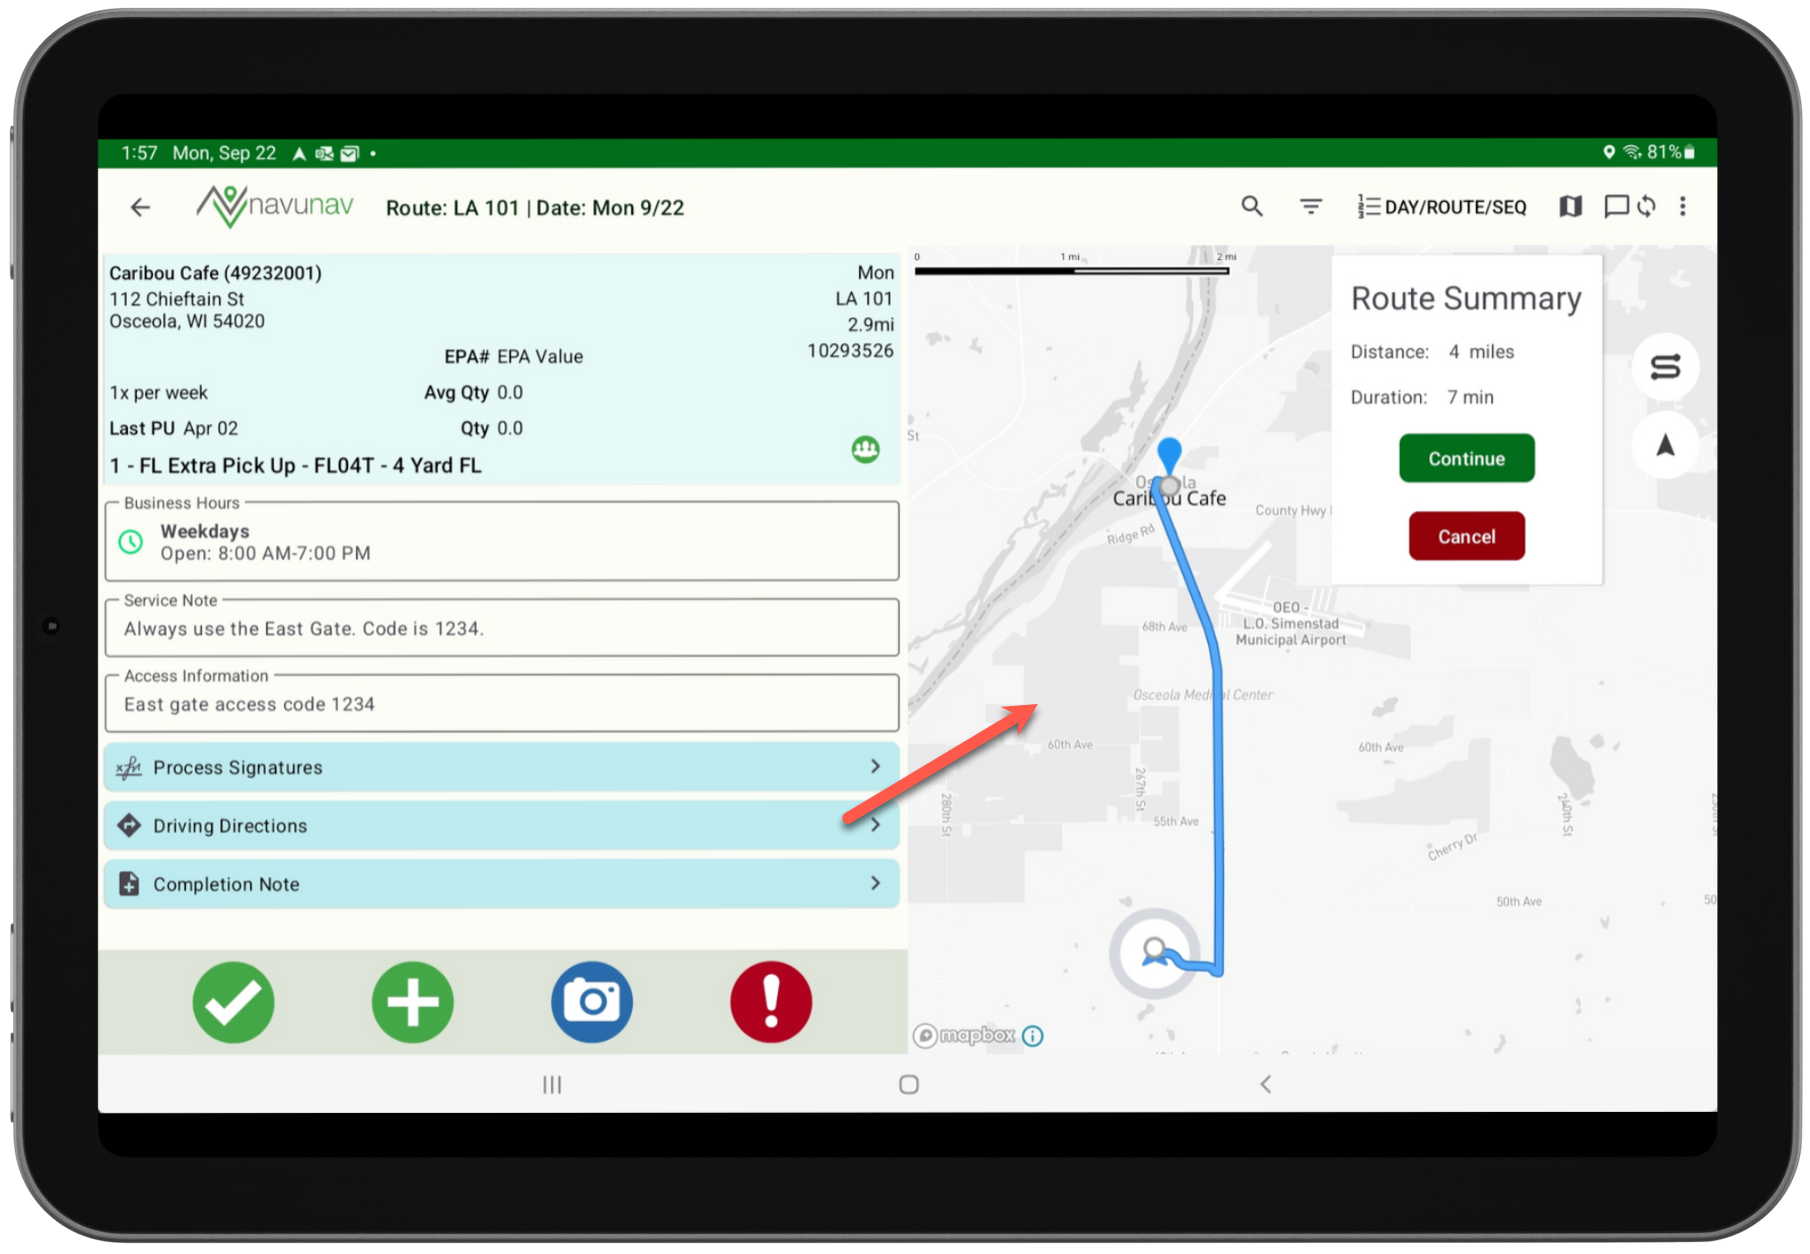
NavuNav's Driving Directions feature is designed to enhance navigation efficiency for drivers using the List View mode. When a driver selects a stop from their route list, the app provides a route summary, detailing the estimated distance and travel time to the destination. If the driver makes a wrong turn the, system will update to provide a redirect.
To exit turn-by-turn navigation, the driver can select the red 'X' located on the bottom right corner of their tablet. The Recenter and Overview functions on the map serve distinct purposes to enhance user navigation. Tap this icon to view detailed route information. To access this feature, the map must be using the "Overview" mode.
Exit Driving Directions Mode

Recenter and Overview

Navigation Details

Display Settings and Menu Options
Driver Filter Options
The Driver Filter option allows drivers to customize how stops are displayed on their screen. Settings can be configured to prevent the driver from viewing stops that are scheduled for past or future dates.
Drivers can choose to display only VIP sites by enabling the “VIP Only” filter. VIP-designated sites will appear with purple markings to highlight their status. This filter is disabled by default. For details on enabling the VIP indicator, refer to the Edit Account and Site Information documentation. At the bottom of the Filters screen is the Sequence Order setting with two options: Working Sequence and Dispatcher Sequence.Service Date and List Colors

VIP Status

Sequence Order

Stop Sequence
Stop sequencing preferences display at the top of the screen with the current selection displayed.

Screen Modes
The driver app offers three screen view modes to enable drivers to choose the most suitable interface for their route servicing needs.

List View
The list view in the NavuNav app displays all stops along with status buttons. When the tablet is held in landscape mode, a route map appears to the right of the list for enhanced navigation. The image displayed above is an example of List View in landscape.
Functions available in List View:
- Driving Directions (Turn-by-Turn)
Residential & Map Only Modes
Residential and Map Only modes share a similar display, presenting stops without a list while offering additional navigation features. In Residential mode, the system has the added ability to auto-complete stops. This mode uses the geofence radius settings defined in Account Class Setup and Site Class Setup to create a virtual boundary around the service location’s address, helping determine the truck’s proximity to the site.
No Additional Permissions No Additional Setup No Additional Permissions for Android (391 applies to IOS)
Map Only vs Residential
Mode Permission Setup Functionality Set Autocomplete Duration
Navigation Features
Auto Center This feature keeps the driver's location centered on the map as they move. When enabled, the map automatically updates and recenters on the driver's position. If the user manually moves the map, auto-centering may be disabled until reactivated. Auto North This setting ensures that the map is always oriented with north at the top of the screen. When disabled, the map may rotate based on the device's direction or user interaction. Auto Zoom This function adjusts the zoom level dynamically based on the driver's speed or movement. For example, the map may zoom in when stationary or moving slowly and zoom out when traveling at higher speeds to provide a broader view.
Driver Chat
The driver chat feature enables drivers to communicate directly with other users from their device. Access to this feature is managed through permission settings. When a new message is received, a notification appears on the chat icon and a message will display on the bottom of the screen.
The Chat option will only display on the driver app if the driver has at least one of the following permissions assigned to their user role:
Permissions
Sync Status
The Sync Status icon shows the total number of items pending synchronization when the device is offline. To review pending items, tap the icon or select "Sync Status" from the Menu Options list.

Application Menu
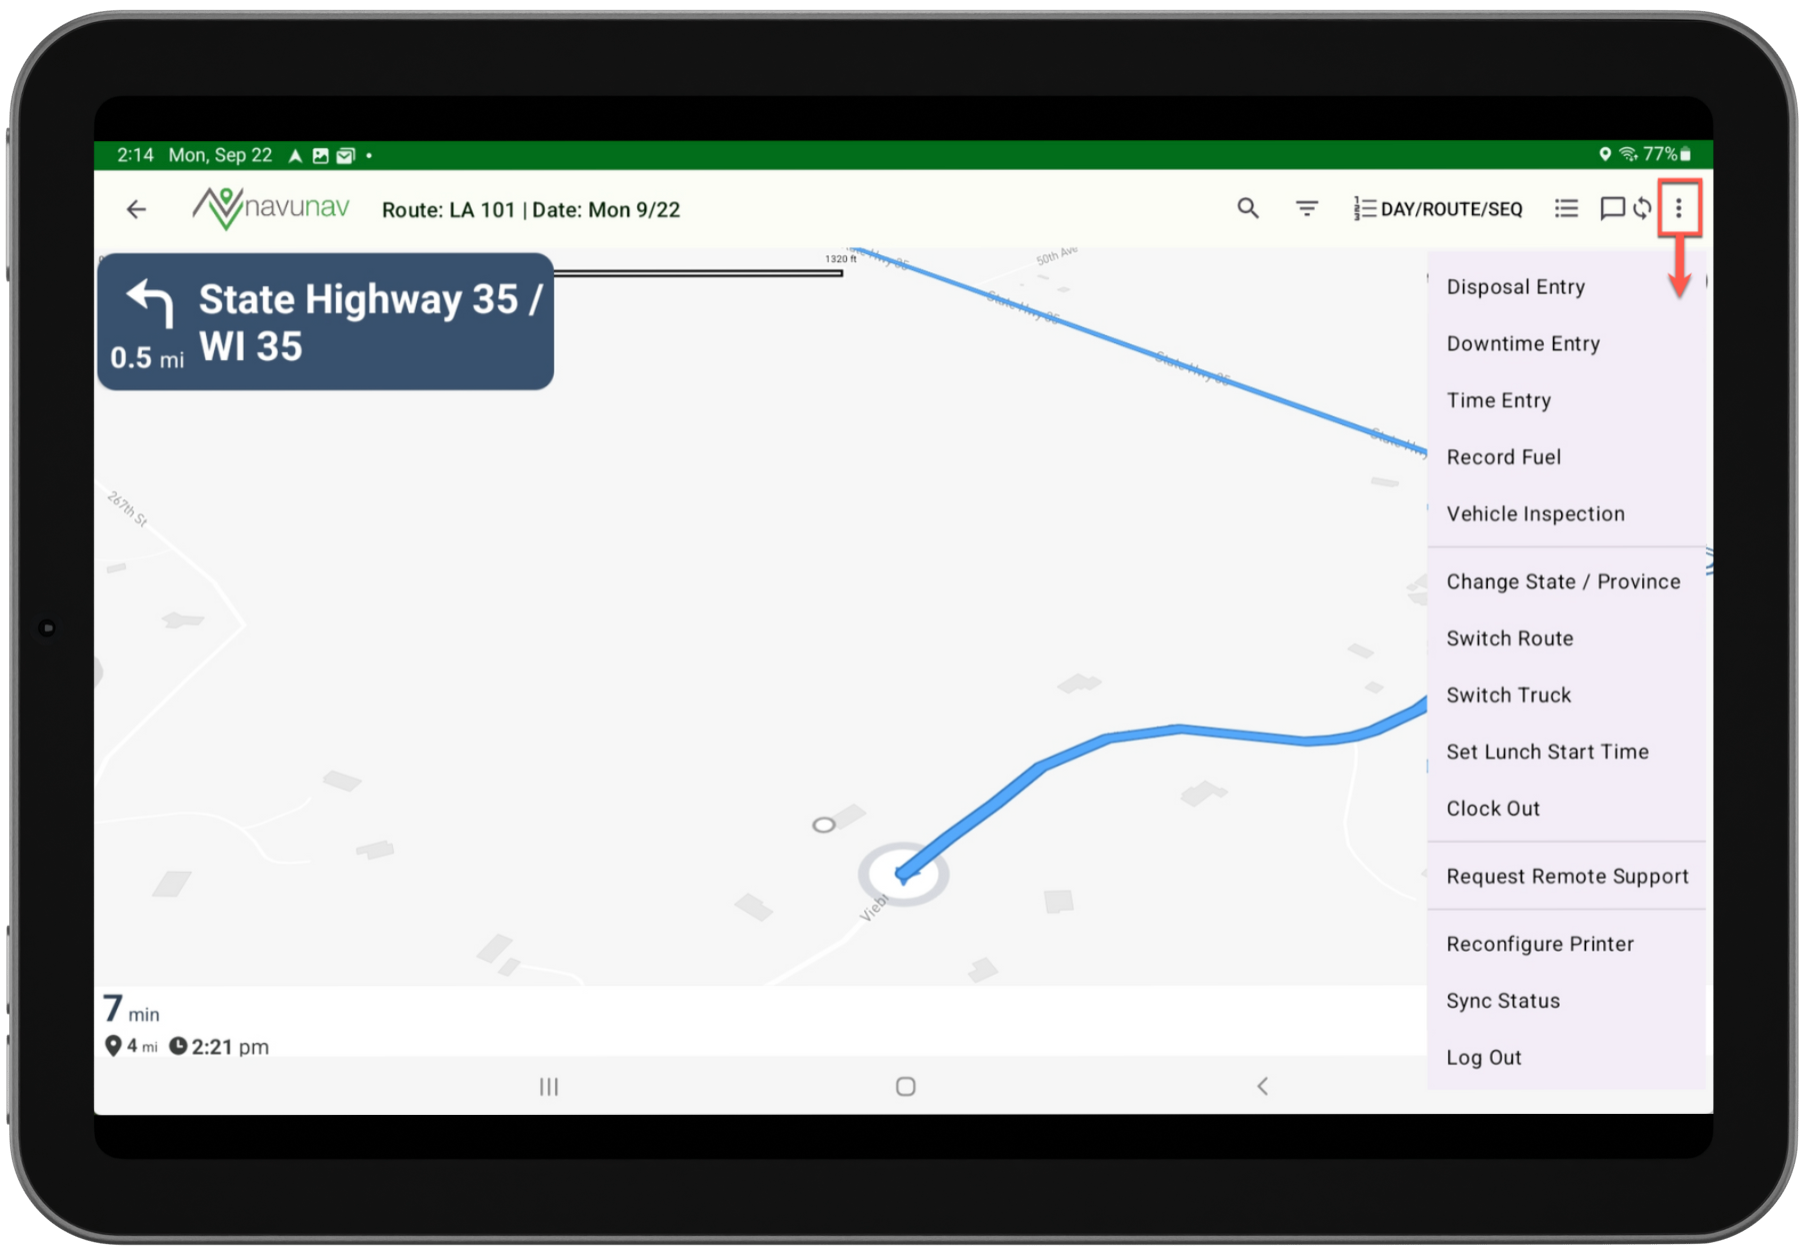
The Driver Menu offers a drop down with various options, allowing drivers to log time, record fuel usage, request remote support, and more.
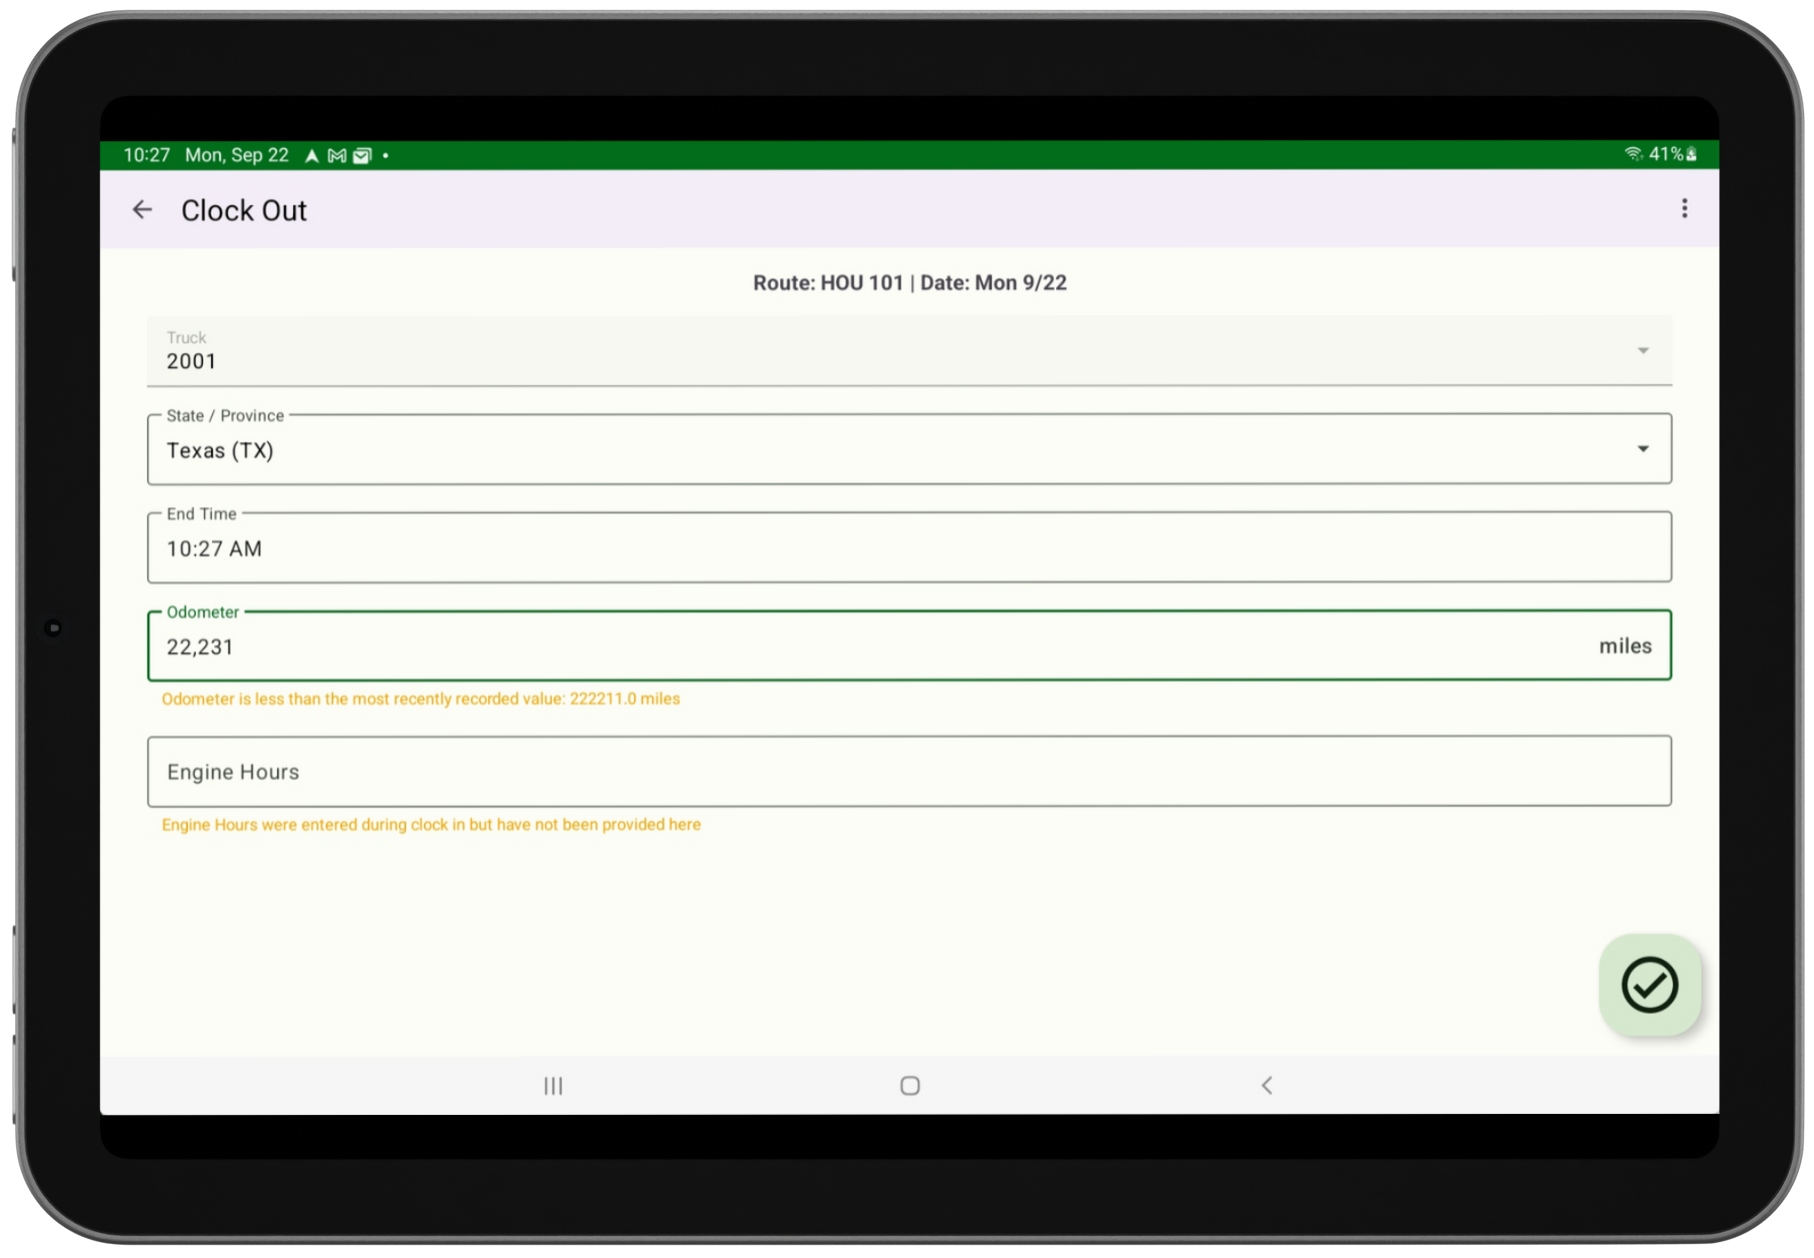
The Optimize Route feature allows drivers to optimize their current day’s route directly from their Android tablet. When route optimization is initiated, a pop-up message appears indicating that the optimization job is in progress. Once complete, the Stop List automatically updates to reflect the optimized route path. This feature is available in NavuNav version 6.6. The Disposal Entry feature allows drivers to input disposal tickets directly into the system. Additionally, drivers can attach images of the tickets by capturing screenshots, ensuring accurate record-keeping and facilitating efficient processing. Review the setup requirements below. Once a driver submits a disposal entry, it will be available for review in Dispatch under the Disposal column. Permission Requirement: 241 (NavuNav Driver \ Disposal Receipt Entry) Facilities Setup Requirement Pathway: Setup > Operations > Facility Proper Facility setup is essential for drivers to add disposal tickets in NavuNav. Divisions In the Add Disposal Entry feature of NavuNav, the Location drop down visible to the driver will only display active facilities linked to divisions that match the selected route. To enable the locations a driver can select, review the Divisions tab in Facility Setup. Materials In the Add Disposal Entry feature of NavuNav, the Material drop down visible to the driver will only display materials linked to the selected location. To enable the facilities a driver can select, review the Material Type tab in Facility Setup. Review Facility Setup documentation here: Facilities Setup The Downtime Entry feature is essential for drivers to accurately record productivity disruptions, such as a flat tire. When a driver logs a downtime entry, it will appear in the Downtime column within the 'Route Data Entry' view in Operations. Additional setup is required to enable this feature. Pathway: Setup > System > Reason Code In Reason Code Setup, assign the Downtime 'Type' to each reason a driver may record while on their route. Create an "Other" downtime reason code for instances not covered by predefined options. In the app, drivers can add notes to specify the reason for the downtime if "Other" was selected. When adding a downtime reason code, set 'Display in Mobile' to "Yes" to make it available in the app. Review Reason Code Setup documentation here: Reason Code Setup The Time Entry (Productivity) feature enables drivers to add and edit time entries for the start and end of their workday, as well as for lunch breaks. These entries are visible in the Productivity view of the Dispatch screen, allowing for accurate tracking of driver hours and activities. The Record Fuel feature allows drivers to log each refueling event directly within the app. To ensure comprehensive tracking, additional settings are available to specify details such as the fuel source and fuel type. Fuel type options are managed in Setup > Operations > Fuel Source in Navusoft. Vehicle inspections are captured when a driver first logs into the NavuNav application before starting their route. After their route is complete, the driver can complete a Post Trip inspection using the Vehicle Inspection menu option. After a driver completes and saves either inspection, it will be visible in Dispatch under the Pre-Trip and Post-Trip columns. Review the Vehicle Inspection Item setup article for additional information. In NavuNav version 6.6, users are provided the option to skip the Post-Trip inspection. When selected, the application will close automatically, and the user will be logged out. To complete a post-trip inspection, follow these steps: Access the Post-Trip Inspection: Inspect Each Item: Sign and Save the Inspection: The Change State / Province option allows a driver to update the state or province they are servicing. When the driver first logs into NavuNav, the selected state or province is initially identified on the Check In screen. The New State/Province drop-down list displays recently used selections at the top of the list under a Recent States/Provinces header. This allows drivers to quickly select a state or province they have used before without scrolling through the full list. If a driver is assigned multiple routes, they must select their first route at clock-in. After completing that route, they use the Switch Route feature in the application menu to begin servicing another assigned route. The option is not available while a lunchtime or downtime is in progress. Review the full documentation here: NavuNav (Android) Switch Route. To provide more precise productivity reporting, drivers switching to another truck must use the Switch Truck option in the application menu. The process highlights required fields in red to ensure completion. The option is not available while a lunchtime or downtime is in progress. Truck Current Odometer / Current Engine Hours New Truck Start Odometer / Start Engine Hours The Set Lunch Start Time setting allows for quick logging of a driver's lunch start and end times. Once logged, the lunch times will appear in Dispatch under the "Lunch Start" and "Lunch End" columns in the Labor Hours and Route Data Entry views. Start Lunch and End Lunch After a driver logs their start time, a "Lunch in Progress" message will appear at the bottom of their app, allowing the driver to navigate away from the Lunch Start Time screen. Once lunch is started, the app will update the menu drop down to display "Set Lunch End Time," allowing the driver to select it when ready to end their lunch. Edit Lunch Time Log Once a driver has logged their lunch time, the option will no longer appear in the app menu. If a correction is needed, it can be made through the "Time Entry" menu option. The Check Out feature records the end time of the driver's shift and captures the truck's odometer reading and engine hours at that time. This functionality ensures accurate tracking of driving hours and mileage. Field Logic The Request Remote Support feature provides drivers the ability to share their screen with support staff to assist in resolving an issue the driver may be experiencing on their device. Upon selection, a remote support code is generated for the driver to share with their support staff. Full details on the screen share process can be reviewed here: Create or Join a Screen Share Session Selecting the Reconfigure Printer option in NavuNav initiates a process to update your printer settings. To ensure that labels can be printed correctly, it is necessary to exit and restart the NavuNav application after reconfiguring the printer. The Sync Status feature ensures that all transaction statuses are retained on the device for one week. If the driver's tablet loses connection, transactions are queued locally and synchronized once the connection is restored. Successfully synced transactions will display a success icon, while failed syncs will be marked with a queued icon.
Optimize Route

Optimize Route Requirements
Optimize Route Driver Selection Options
Type Options include: Start Location Options include: End Location Options include: Supporting Documentation
Disposal Entry

Downtime Entry

Reason Code Setup Requirement

Time Entry

Record Fuel

Vehicle Inspection

Change State / Province

Field Logic
Switch Route

Switch Truck

Field Logic
Set Lunch Start Time / Set Lunch End Time


Clock Out

Request Remote Support

Reconfigure Printer

Sync Status
