Facility Setup
Last Modified on 07/21/2026 1:03 pm PDT
Pathway: Setup > Operations > Facility
The Facility Setup screen is used to create and manage facilities that are either owned by the hauler, or a third-party establishment. Setup here affects inbound/outbound work orders and manifest processing.
Permissions
The following permission is required to view and edit in the Facility Setup screen:
| Permission ID | Permission Name |
| 24 | Setup / Operations |
Add/Update Field Descriptions
| Field | Description |
| Facility Settings |
| ID | The unique system generated identifier for the facility.
|
| Name | The name of the facility that shows up in reports, disposal records and NavuNav.
|
| Abbreviation | The abbreviated name for the facility.
|
| Type | Identifies the type of facility and is important for Inbound/Outbound processes.
|
| Ownership | Determines whether disposal occurs at a company-owned facility (Internal) or an external landfill, which may impact costs, routing, and billing. |
| Division | The division assigned to the facility.
|
| External ID | User entered ID to identify the facility in external systems.
|
Address Line 1
City
State
Postal Code | The physical address for the facility. Select the “Set Facility Location” icon to place a geolocation pin for the facility or the truck entry point. This helps drivers identify where to go upon arrival. |
| Contact Name | Name of the facility manager or primary facility contact.
|
| EPA ID |
|
| State ID | State-issued identification number for the facility, used for state regulatory tracking and compliance purposes. |
| Active | Controls whether the facility is active for recording disposals and available for display in NavuNav.
|
| Default Scale UOM | The unit of measure (UOM) the facility uses for its scale.
|
| Weight UOM | The weight unit of measure used for mass-based disposals.
|
| Volume UOM | The volume unit of measure used for volume-based disposals.
|
| Default Transportation Method | |
| Signature and Signature Name | Uploaded signature that displays on tickets.
|
| Geofence Radius (Meters) | Defines the geofence radius around the facility in meters, used to support route optimization and location-based tracking. |
| Average Duration (MINS) | Average time, in minutes, a vehicle is expected to spend at the facility, used in route optimization calculations. |
| Intercompany Charge Code | Default charge code used to classify intercompany billing for services performed at the facility.
|
| Manifest Processing |
|
| Enable Scale | Enable or select the scale used for this facility; if set to “No,” scale integration is disabled.
|
| Serial Port Baud Rate | Communication speed used between the scale and the Navusoft system.
|
| Serial Port Parity | Parity setting used for communication between the scale and the system to help detect data transmission errors between the scale and Navusoft. |
| Serial Port Data |
|
| Serial Port Stop | Number of stop bits used to signal the end of each data packet in serial communication.
|
| Serial Port Flow Control | Flow control setting that manages how data is transmitted between the scale and the system to prevent data loss or overflow. |
| Scale Payload Start Offset | Starting position in the incoming scale data where the system begins reading the payload.
|
| Scale Payload Length | Number of characters in the incoming scale data that make up the payload being read.
|
Automatic Transfer Work Order | Select the green search icon to open Site Search. From there, enter the name of the site transfer work orders will be automatically assigned to for shipping.
Note: Once a transfer batch has been marked 'Ready to Ship' (Operations > Manifest Processing > Manifest Consolidation), the system will auto-generate a transfer work order to the location identified in the Automatic Transfer Work Order section. |
| Inbound / Outbound |
| Enable Inbound Order | If enabled, the facility will display in the Facility drop down on the Inbound / Outbound screen, where inbound tickets can be created. |
| Enable Outbound Order | |
| Require Manual Weight Reason | If enabled, when a scale operator overrides or manually enters the Gross (In) or Tare (Out) weight, they will be prompted to select a reason for the manual entry. |
| Default Scale Ticket Format | The default scale ticket format used when generating scale tickets.
|
| Search Default For Create New | Sets the default Search Type on the Create New Transaction(Operations > Inbound / Outbound > Create Inbound Order (F5)) screen when creating a new scale ticket. |
e
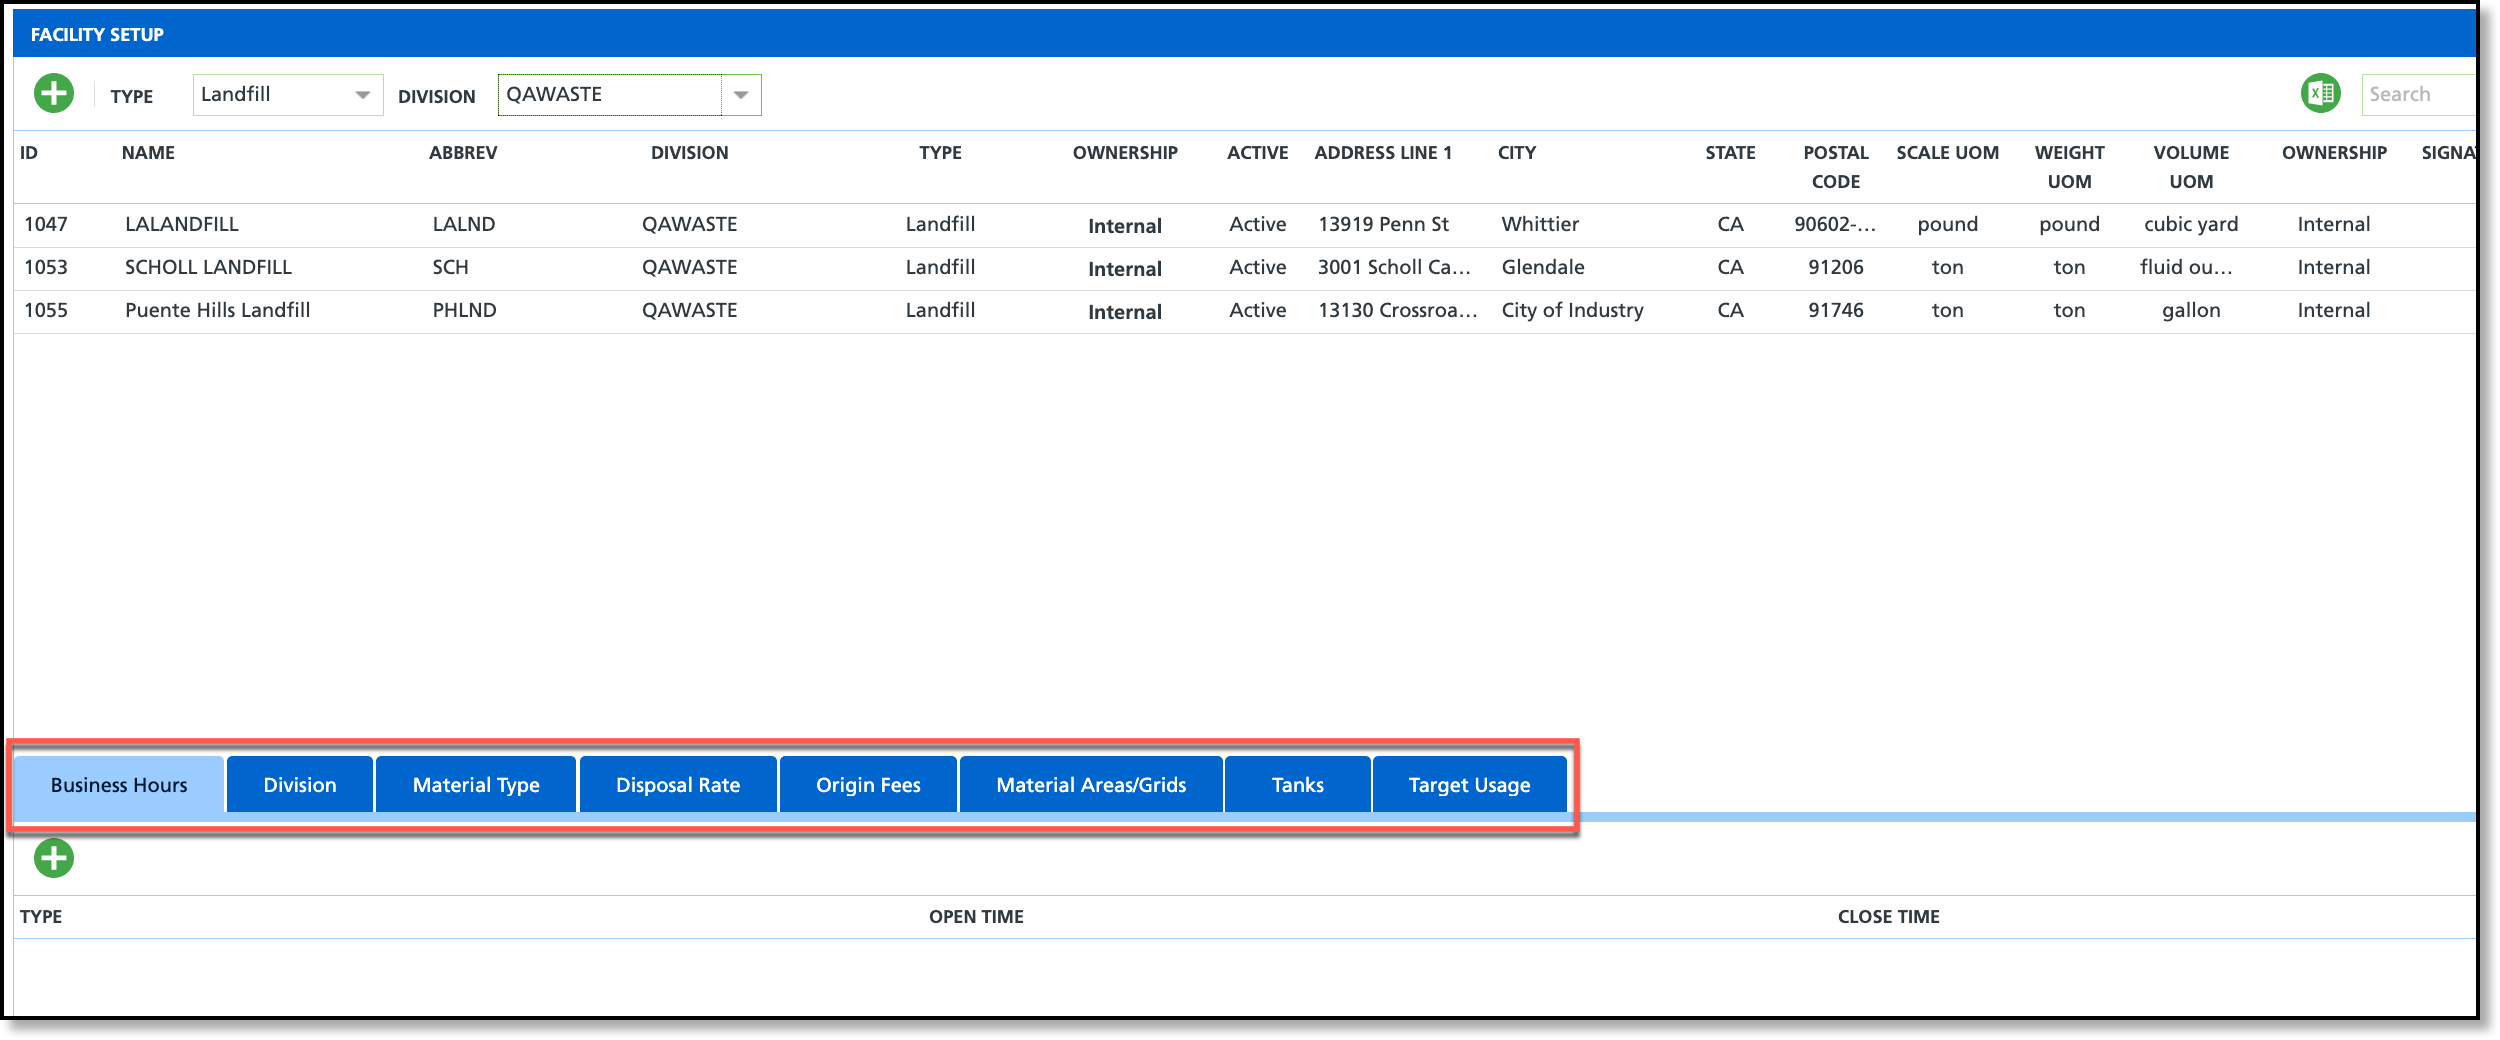
Facility Tab-set
The following section details the tab-set in the Facility Setup tool. Setup here is used for the creation of Disposal/Ship records and is also utilized by the Disposal Activity tool in Operations.
Business Hours
Enter a facility’s hours of operation in the Business Hours tab. Once set, these hours are displayed to drivers with color indicators showing whether the facility is open, closed, or closing soon.
If a facility is closed or a driver is unlikely to arrive before closing, the work order will automatically be moved to the next day.
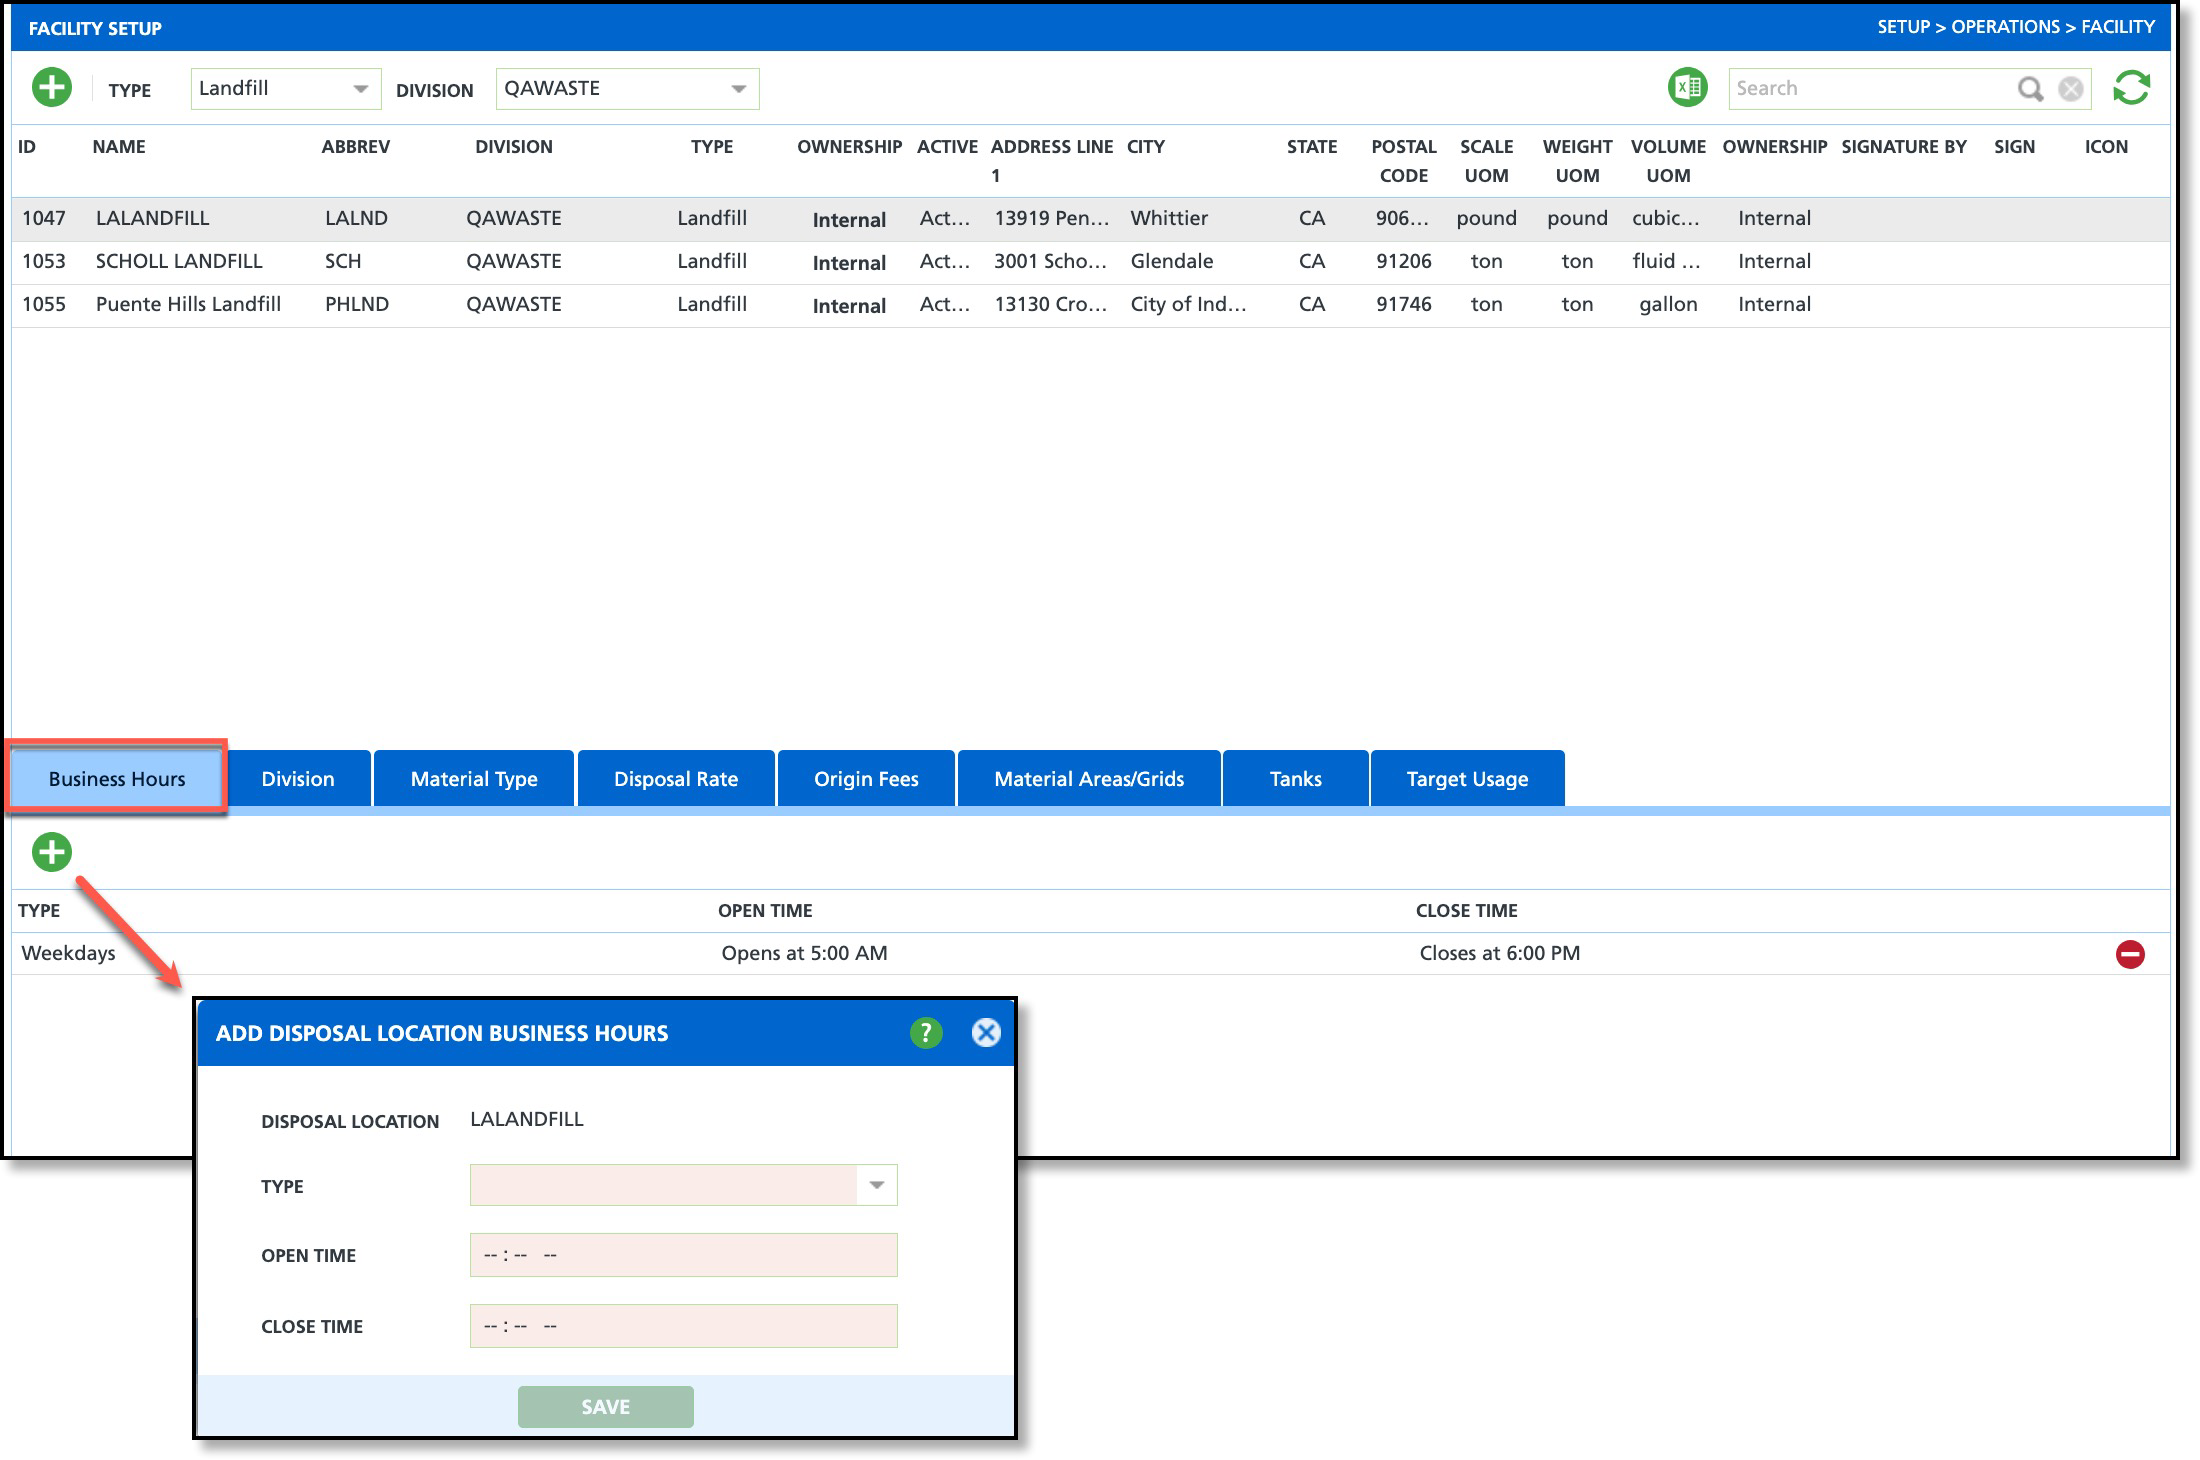
Add Business Hours
Complete the following setup for each Business Hours record for the location.
- Select a facility from the upper grid.
- Click on the Business Hours tab.
- Select the green '+' icon to display the 'Add Disposal Location Business Hours' editor.
- Select a Type from the drop down. Example: Select Weekdays to capture business hours for Monday - Friday, or a specific week day to observe special hours for that day.
- Select the Open Time from the list of options.
- Select the Close Time from the list of options.
- Select Save when finished.
Division
Use the Division tab to link applicable divisions to a facility. When creating an inbound ticket, only items with a division that matches one enabled here will be available for selection. In the NavuNav Driver Application, the Location drop-down for the Add Disposal Entry feature displays only active facilities whose division matches the division assigned to the route.
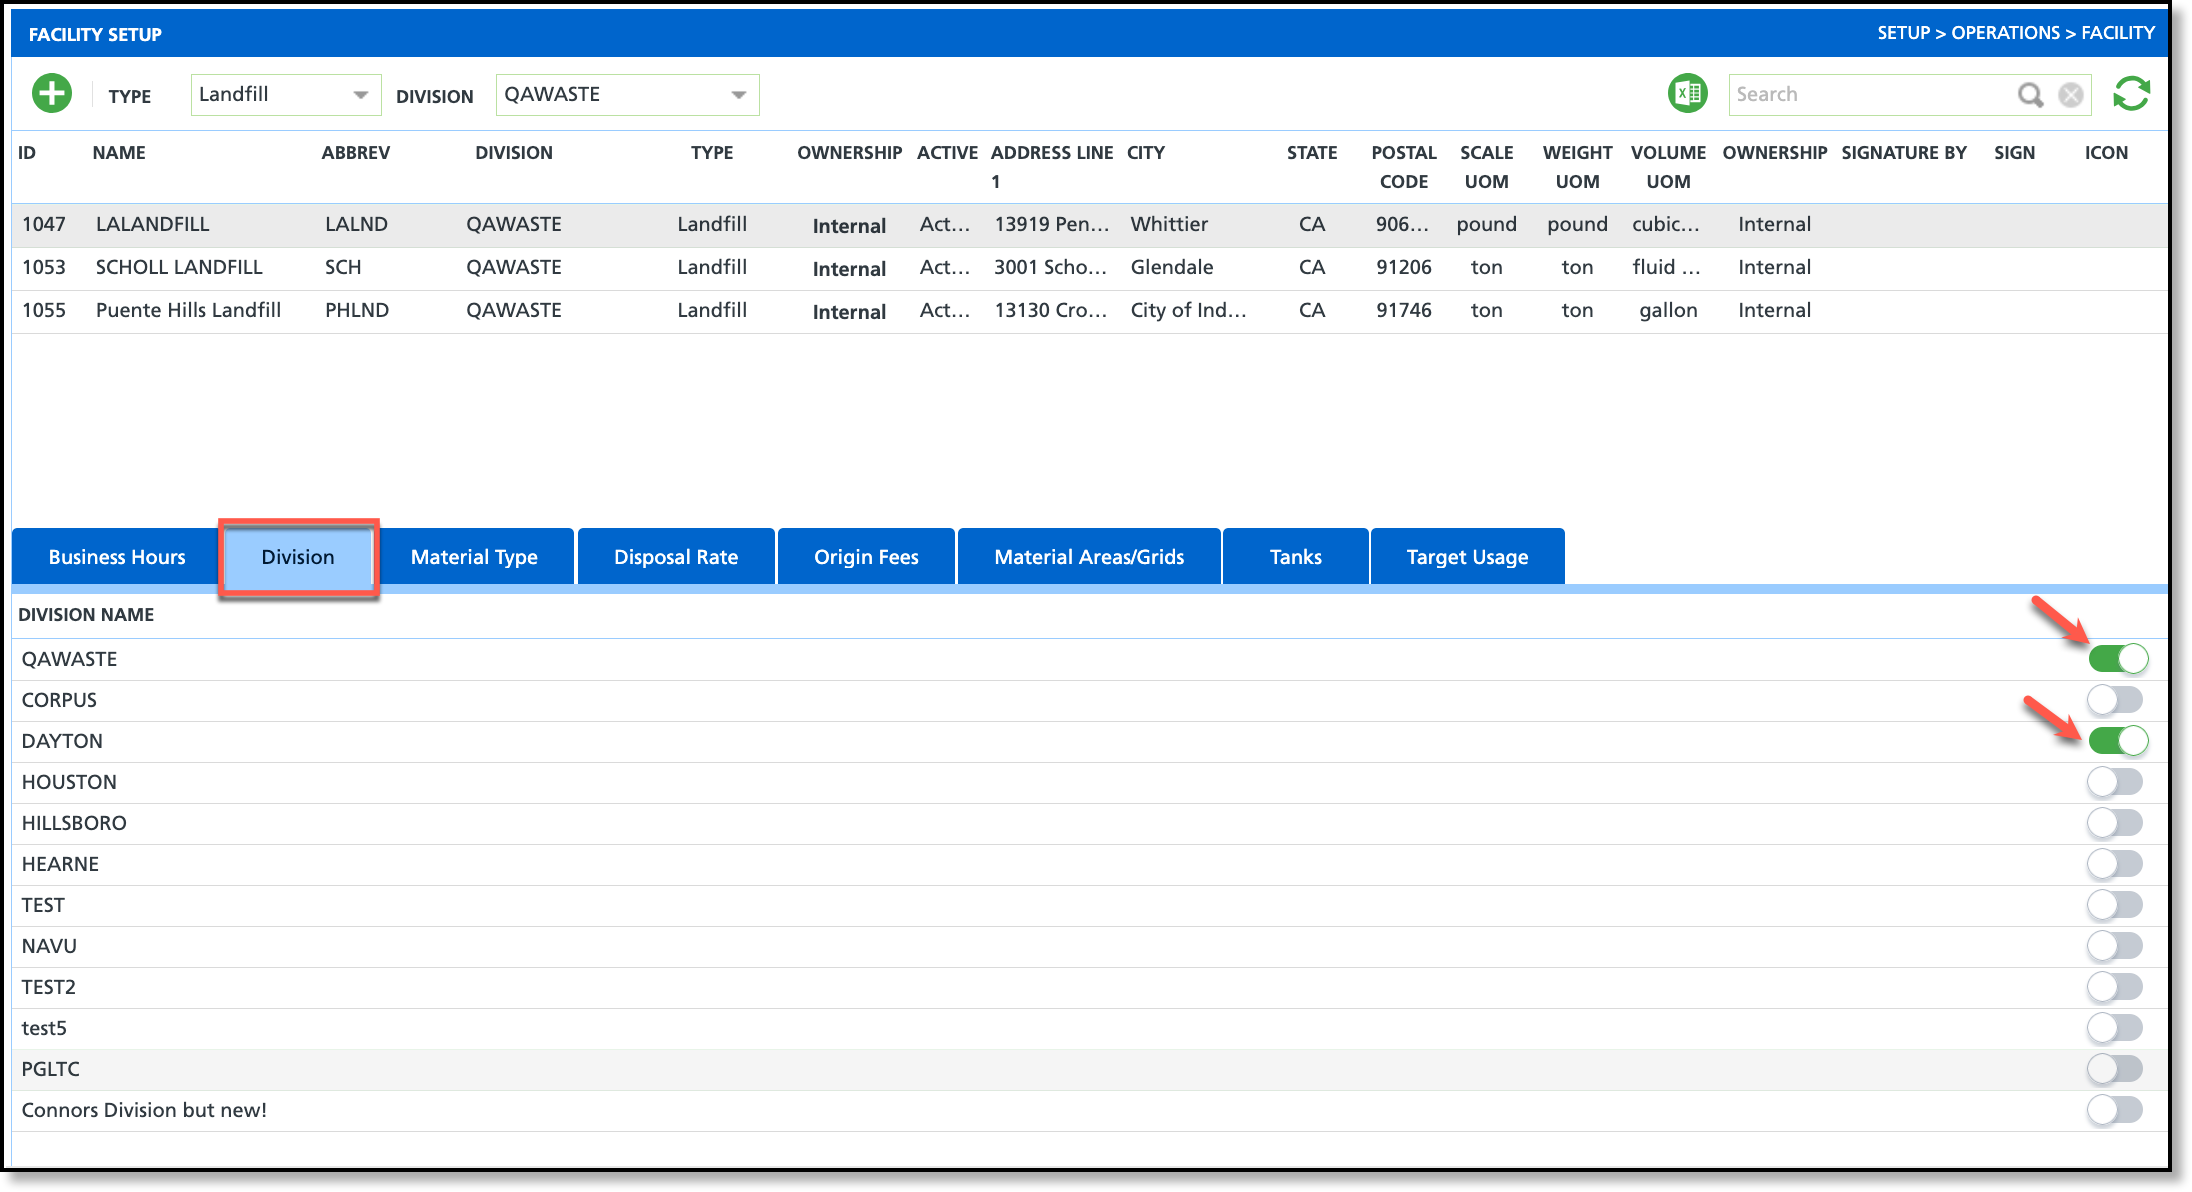
Add Division
- Select a facility from the upper grid.
- Click on the Division tab.
- Switch the toggle to green to add the division.
Material Type
The Material Type tab is used to identify and link each material type that is processed or disposed of at the facility. In Navusoft, the Materials tab on inbound and outbound tickets is limited to the material types enabled for that facility. In the NavuNav Driver Application, the Material drop-down for the Add Disposal Entry feature displays only materials linked to the location selected by the driver.
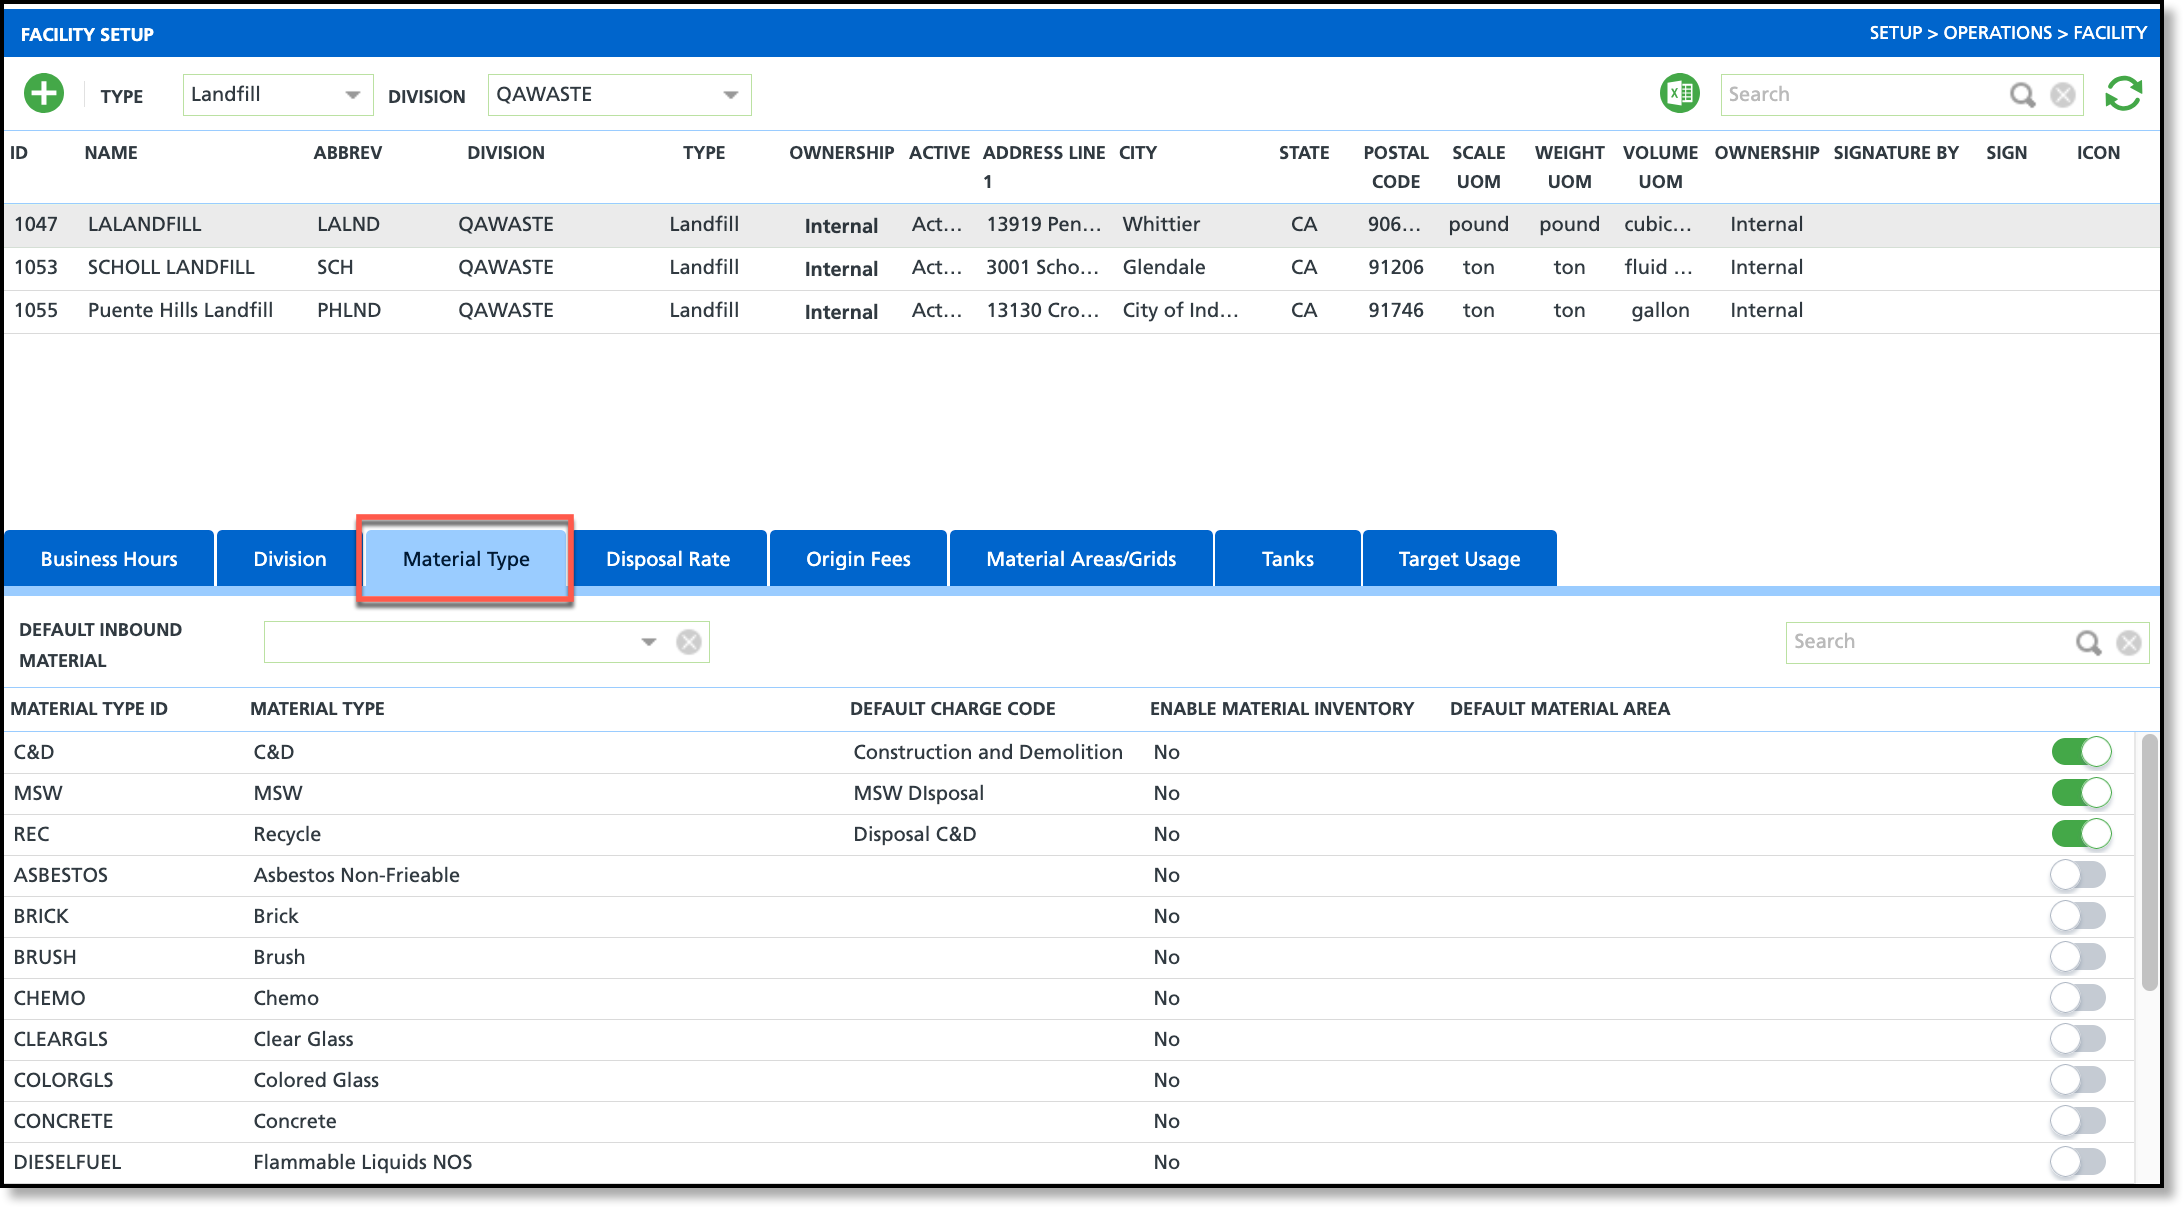
Add Material Type
- Select a facility from the upper grid.
- Click on the MaterialType tab.
- Switch the toggle to green to add the Material Type to the facility.
Setup of Material Types
Material Types are added in Setup > Operations > Material Type. For additional information, refer to the Material Type Setup documentation.
Consideration (Inbound Scale)
Select a default material type for inbound order tickets using the Default Inbound Material drop-down. When a material is chosen, it will automatically populate the Material field on new inbound orders.
Disposal Rate
The Disposal Rate tab is specific to a material type at a facility. The rates configured here are used when a Disposal or Ship record is recorded within a service record.
Important
Do not update an existing disposal rate when increasing rates. Doing so can cause billing issues due to the effective date. Instead, create a new rate with the appropriate effective date.

Add a Disposal Rate
- Select a facility from the upper grid.
- Click on the Disposal Rate tab.
- Select the green '+' icon from the left corner to display the 'Add Disposal Rate' editor.
- Verify the Disposal Location is correct in the Disposal Location field.
- Select the Material Type the rate applies.
- Enter a Rate for the selected origin and specify its Rate UOM (unit of measure).
- Complete any additional fields based on your company's policies and procedures.
- Select Save when finished.
Origin Fees
The Origin Fees tab is part of the inbound/receiving scale ticket setup and supports the origin-based fee calculation on inbound tickets. If a facility does not include origin-based fees this setup is unnecessary. Origins are created in Material Origin Setup (Setup > Operations). To appear on the Origin Fees tab, an origin must have the same division assigned as the facility.
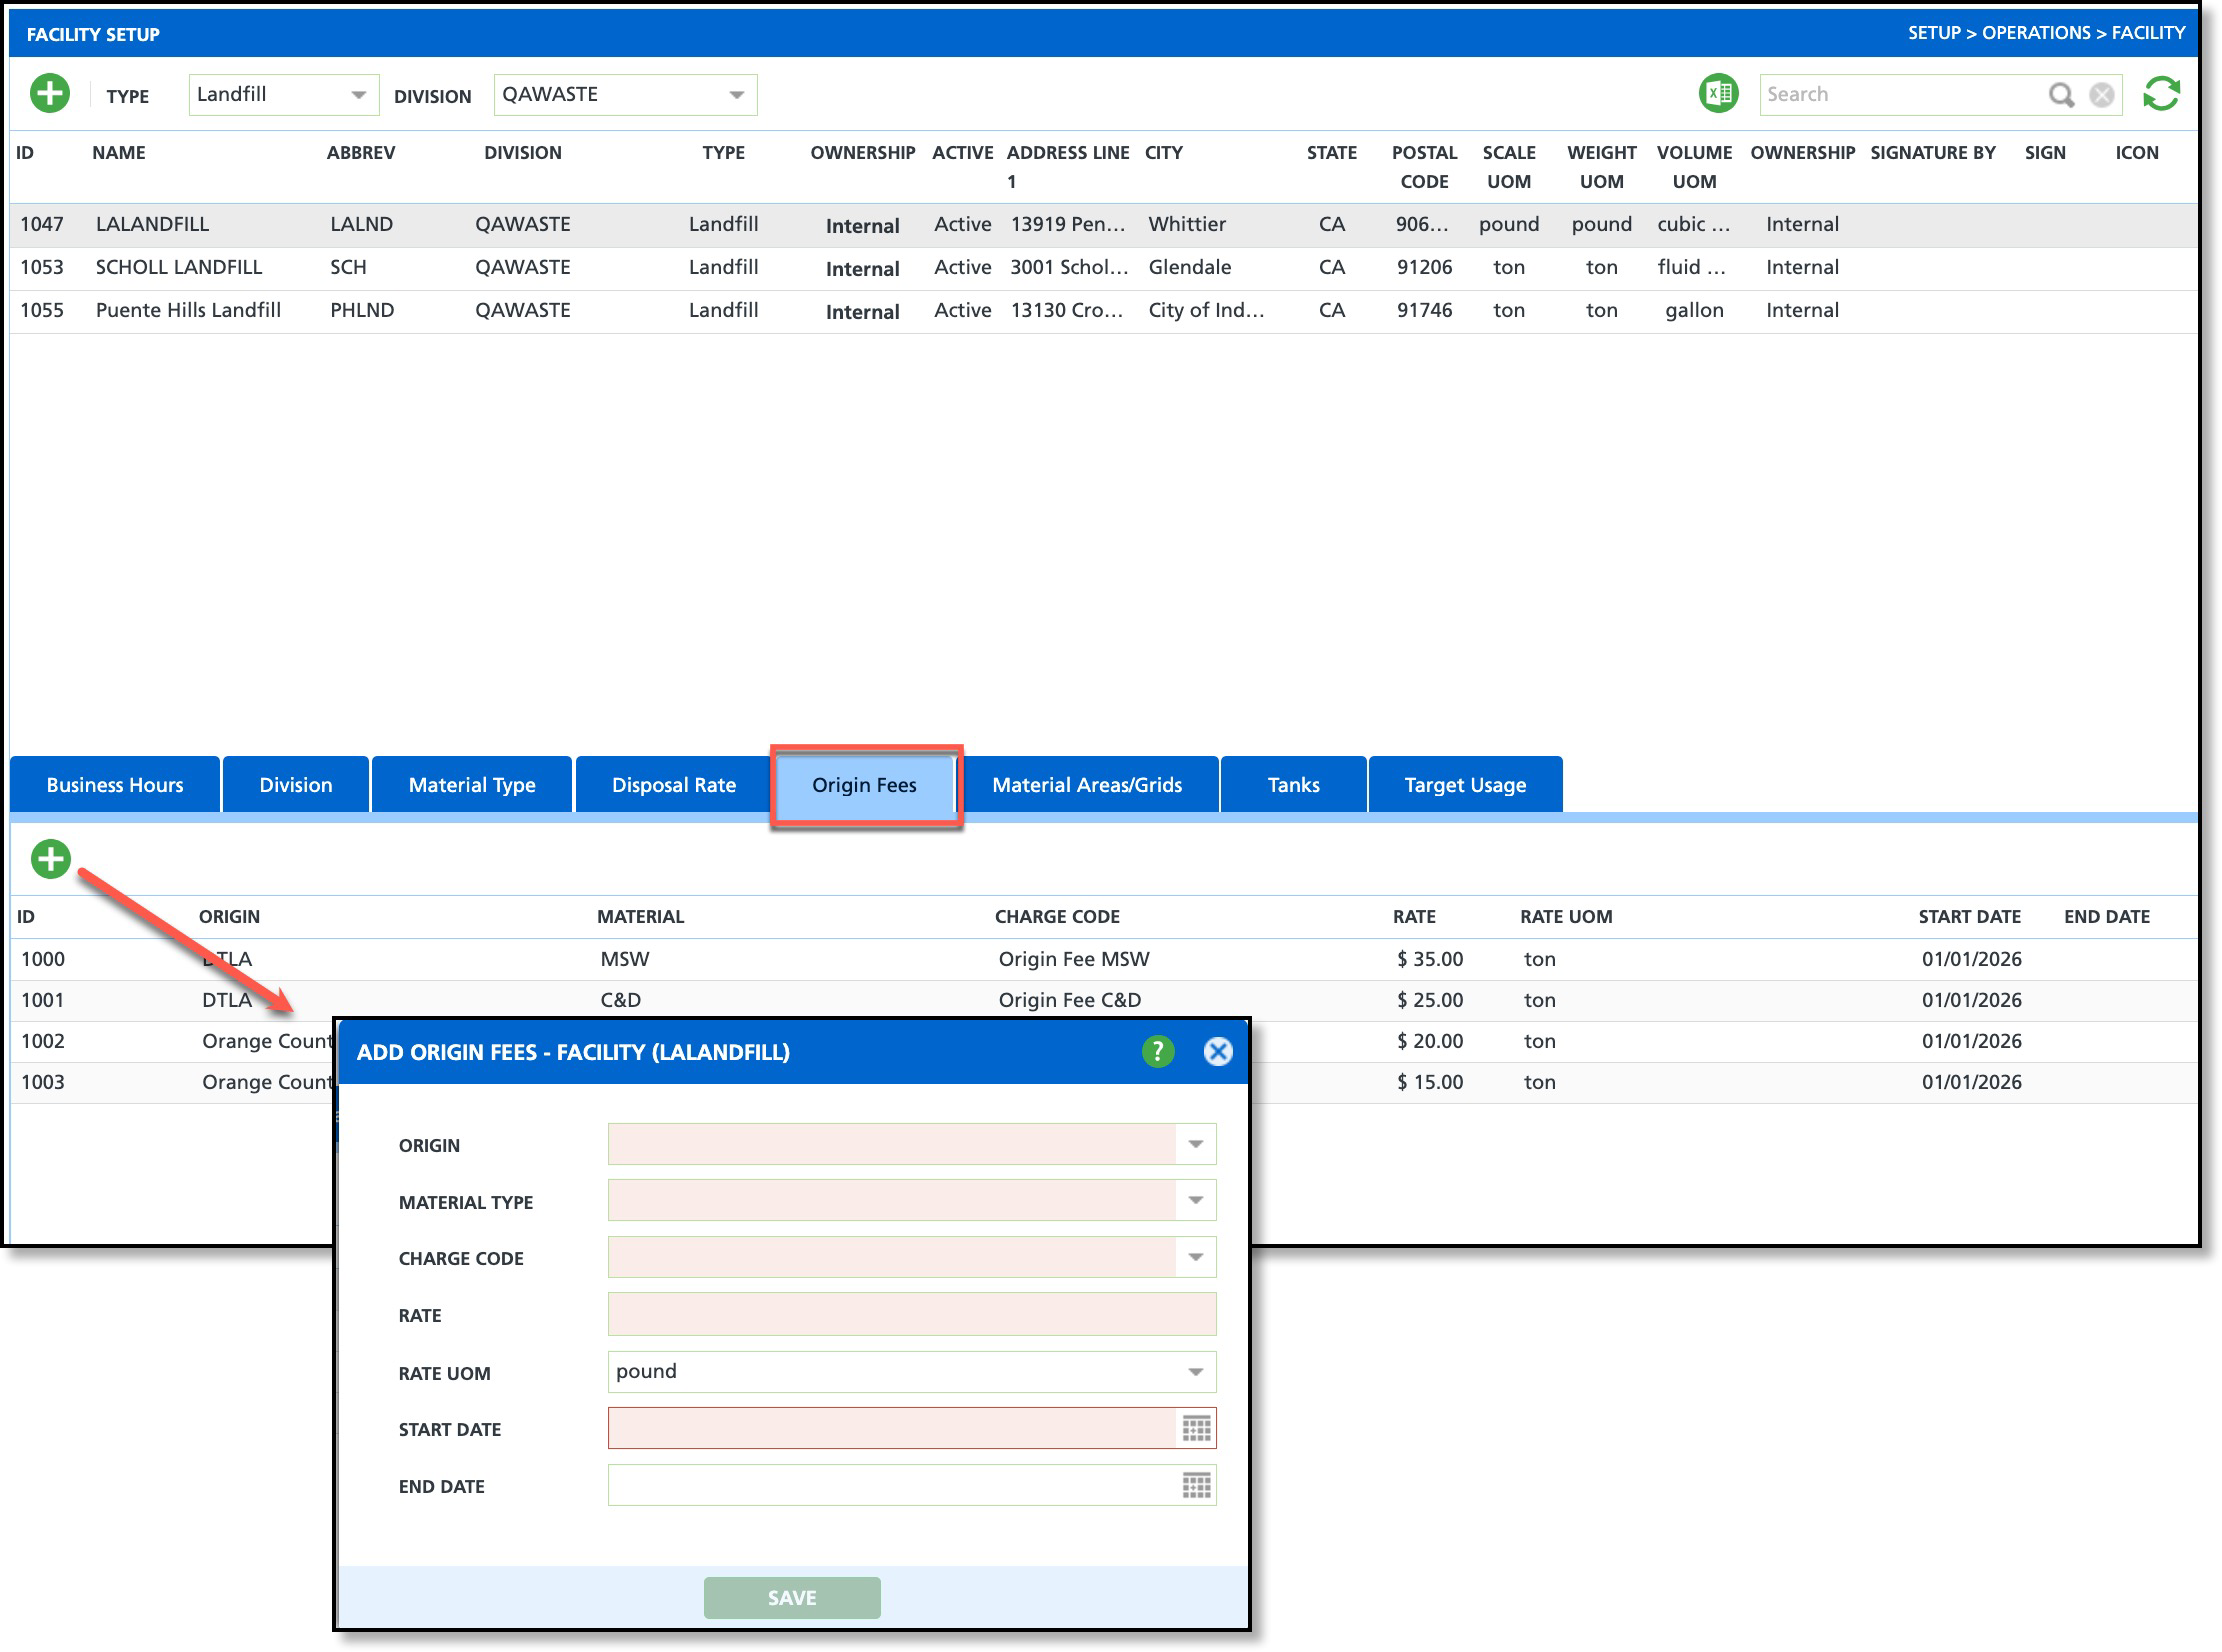
Add Origin
- Select the facility from the upper grid and then click the Origin Fees tab.
- Select the green Add icon from the left corner of the lower grid to display the 'Add Origin Fees' editor.
- Select the Origin.
- Only origins with a division that matches the facility’s division are available for selection.
- Select the Material Type. Create a separate origin fee for each Material Type associated to the origin.
- Only material types enabled on the Material Type tab (within the Facility Setup tab set) are available for selection.
- Select the Charge Code that will be used by the Service Record when the inbound ticket is created.
- Enter a Rate for the selected origin and specify its Rate UOM (unit of measure).
- Enter the Start Date for when the rate applies. If the rate is temporary, add an End Date.
- Click Save when finished.
Tanks
For facilities that use tanks, the Tanks tab is used to capture the capacity and volume of each tank at the location.
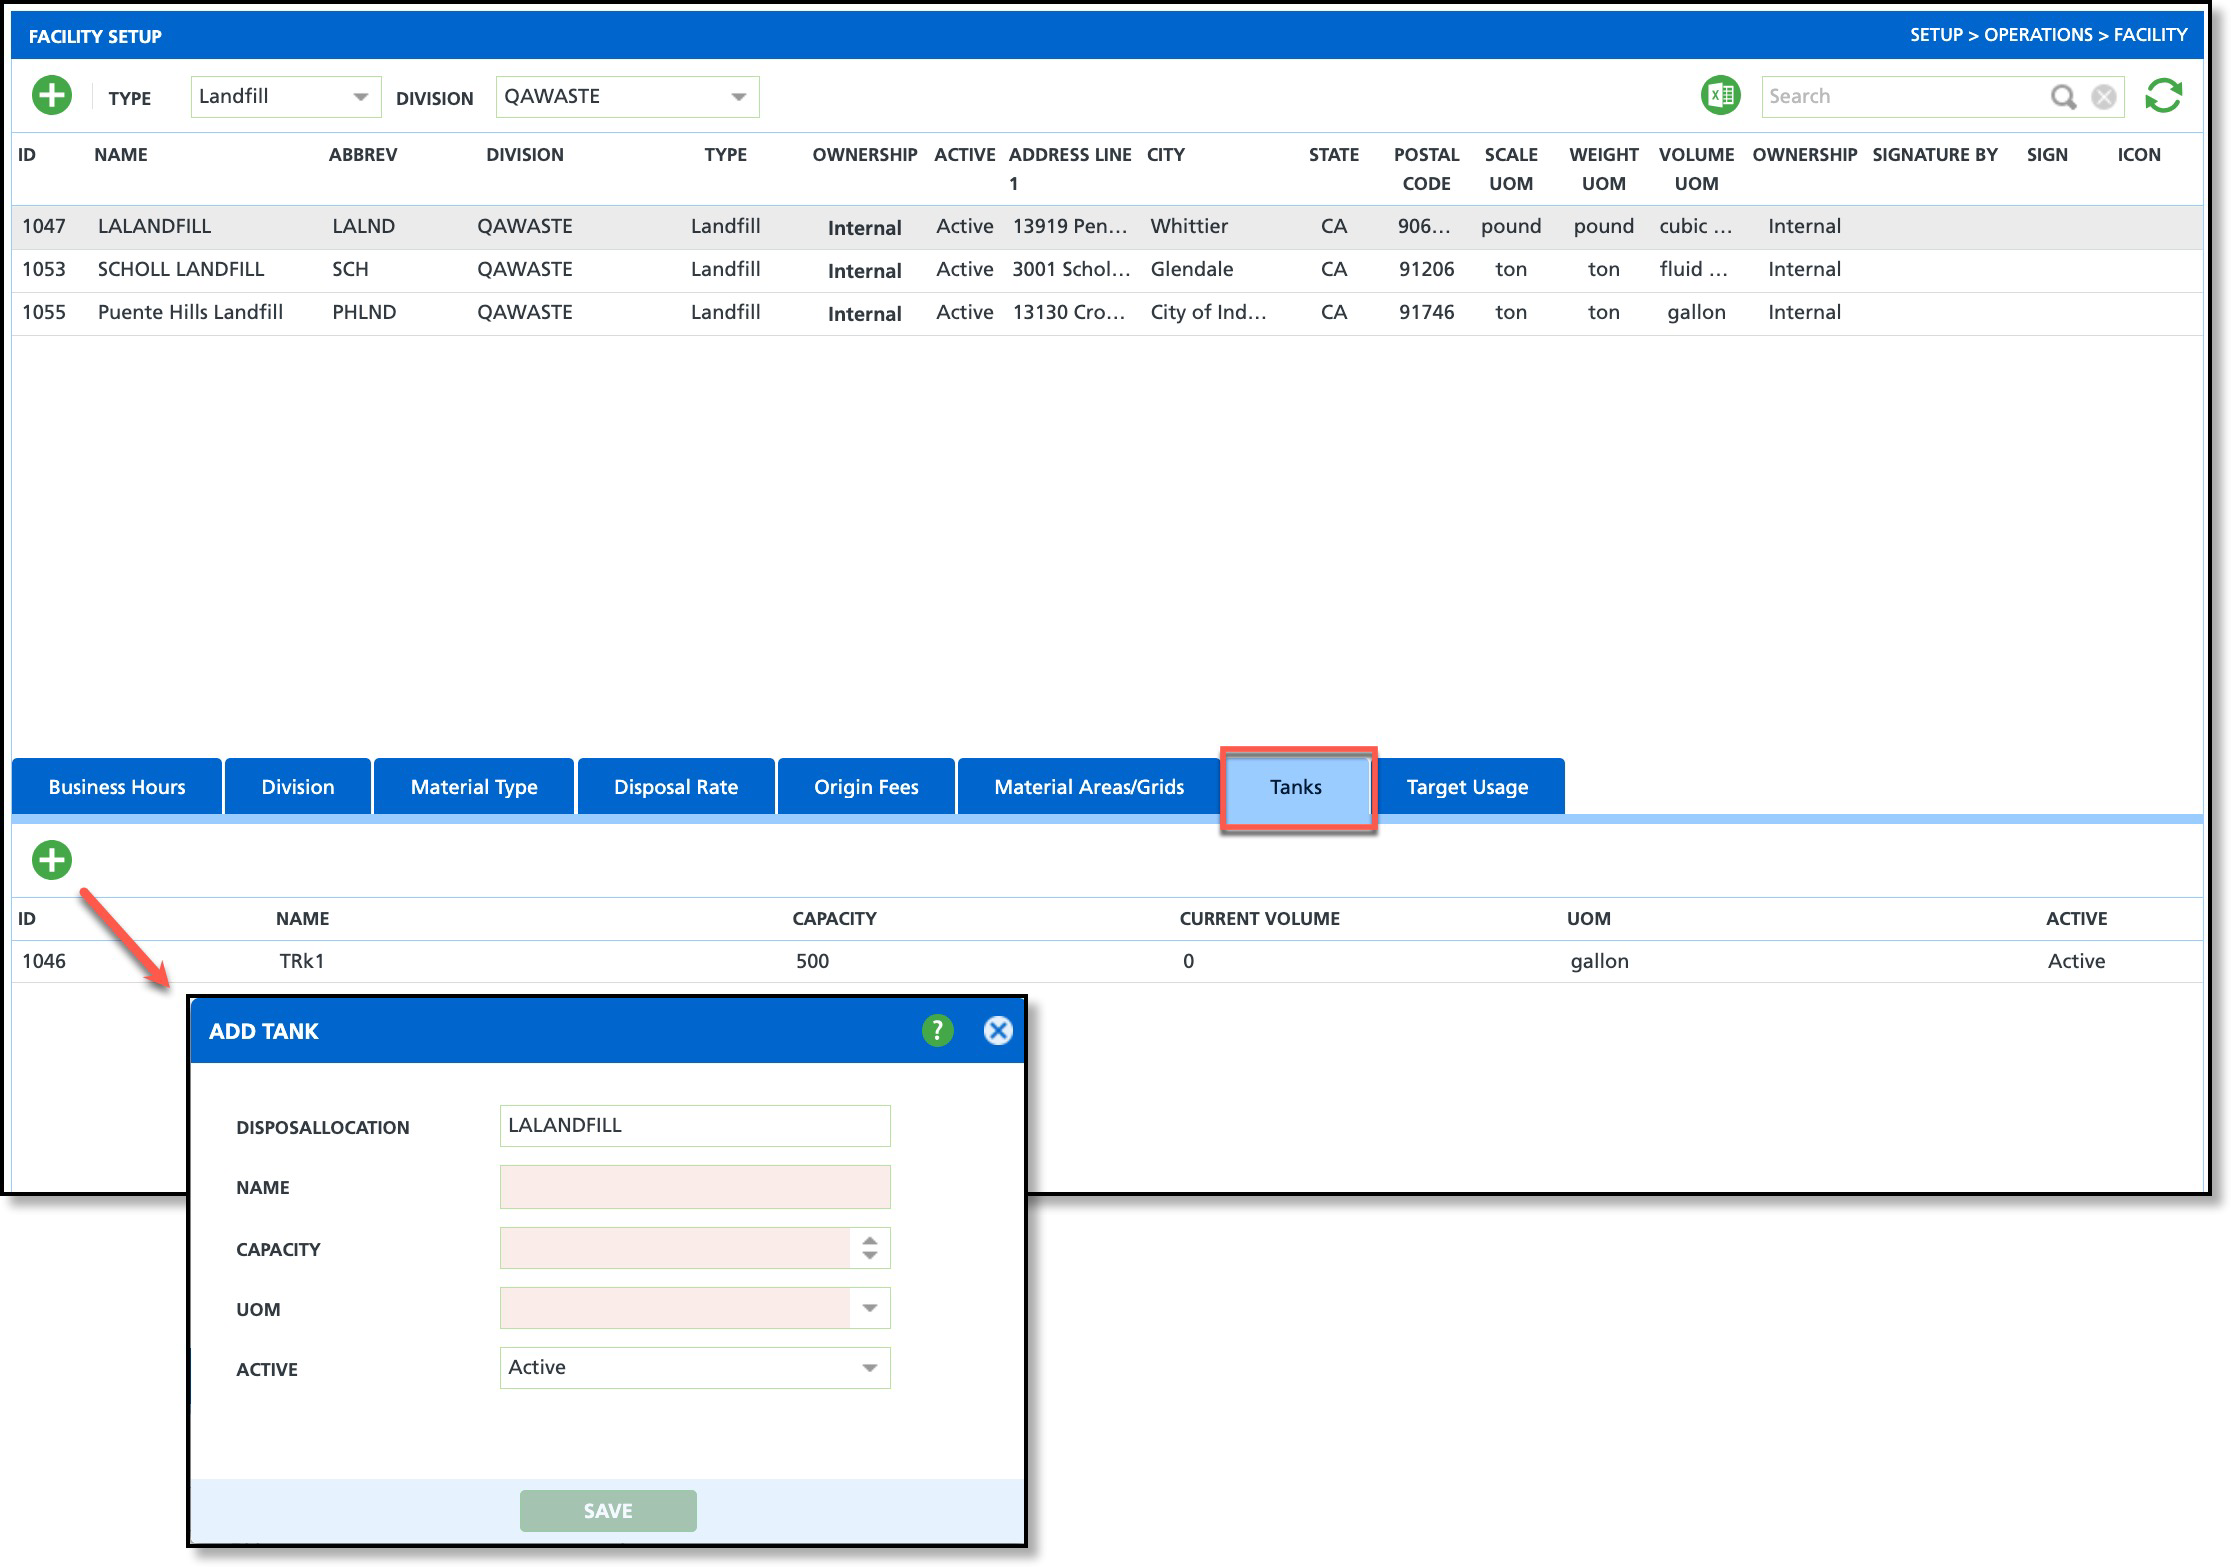
Add Tank
- Select a facility from the upper grid.
- Click the Tanks tab.
- Select the green '+' icon from the left corner of the lower grid to display the 'Add Tank' editor.
- Enter the Name of the tank.
- Enter the Capacity of the tank.
- Select the UOM (Unit of Measure) that capacity is measured by.
- Set the Active status of the tank.
Target Usage
Create one to multiple unique target usage goals for a disposal location in the Target Usage tab. Setup here is required to calculate and track target usage progress in the Disposal Activity screen (Operations).
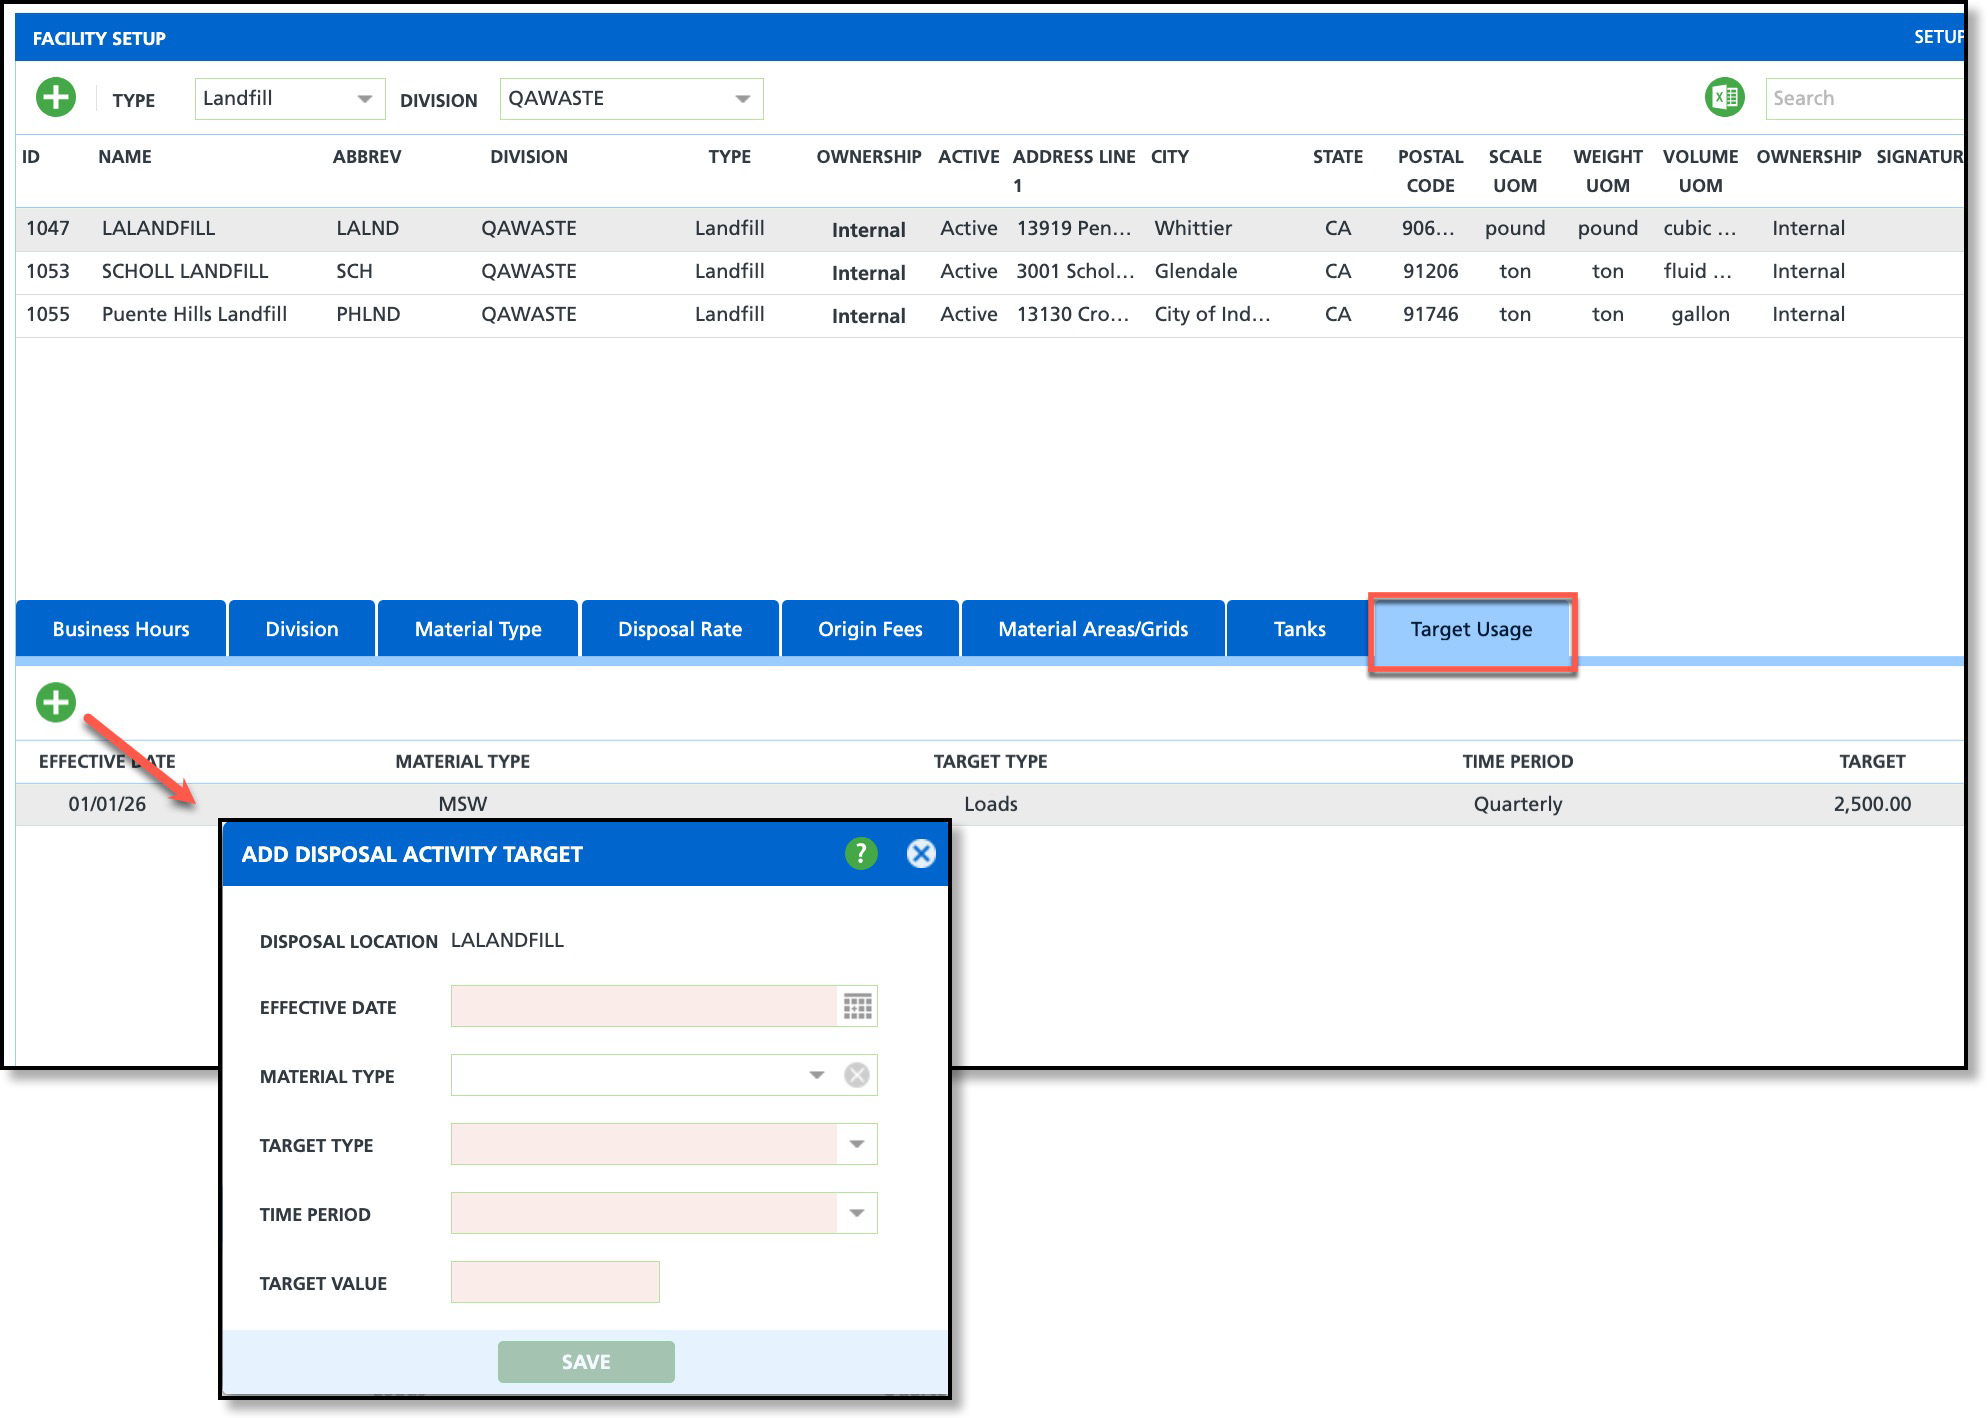
Add Target Usage
- Select a facility from the upper grid.
- Click on the Target Usage tab.
- Select the green '+' icon from the left corner of the lower grid to display the 'Add Disposal Activity Target' tool.
- Enter an Effective Date to indicate when target usage tracking will start.
- Optional. Select a Material Type from the drop down. Only Disposal/Ship records matching the selected Material Type will be included in target usage calculations. Leave blank if the Target Usage is not restricted to a specific material type.
- Select a Target Type from the drop down. Options include:
- Loads
- Weight or Volume
- Cost
- Select a Time Period to establish a measurable time frame. This will also calculate the 'Days Remaining' amount that displays under the Target column for a disposal location.
- Enter a Target Value to establish the measurable goal for the selected Target Type.
Related Articles
Material Origin Setup
Disposal Activity - Targets


