Closing a Sale and Lost Sales
Last Modified on 02/12/2025 2:08 pm PST
The last part of the sales CRM workflow involves capturing signatures from both the customer and service provider, verifying the contract was updated to a sold status and the account was updated from 'prospect' to 'active'.
Prerequisites:
Review the following articles to better understand the sales workflow leading up to closing a sale:
- Create Prospect Accounts and Leads
- Proposals and Service Contracts
- Manage Sales Pipelines and Followups
Step 1: Convert Proposal Document to a Signature (Contract) Document
When a customer has indicated they would like to sign, the proposal document should be converted to a contract. Proposals and contracts differ in that proposals do not include a signature page where as a contract does. Review the Related Articles section below to learn more about converting proposals to service contracts.
Related Articles:
Create a Service Contract
Step 2: Customer Signature
Once the proposal has been converted to a contract, it must be signed by the customer to create a legally binding agreement between both parties. Signatures can be captured electronically or manually (printed and signed); however, if the contract is printed and signed, it will need to be uploaded and attached to the electronic version.
Email a Contract for Signature
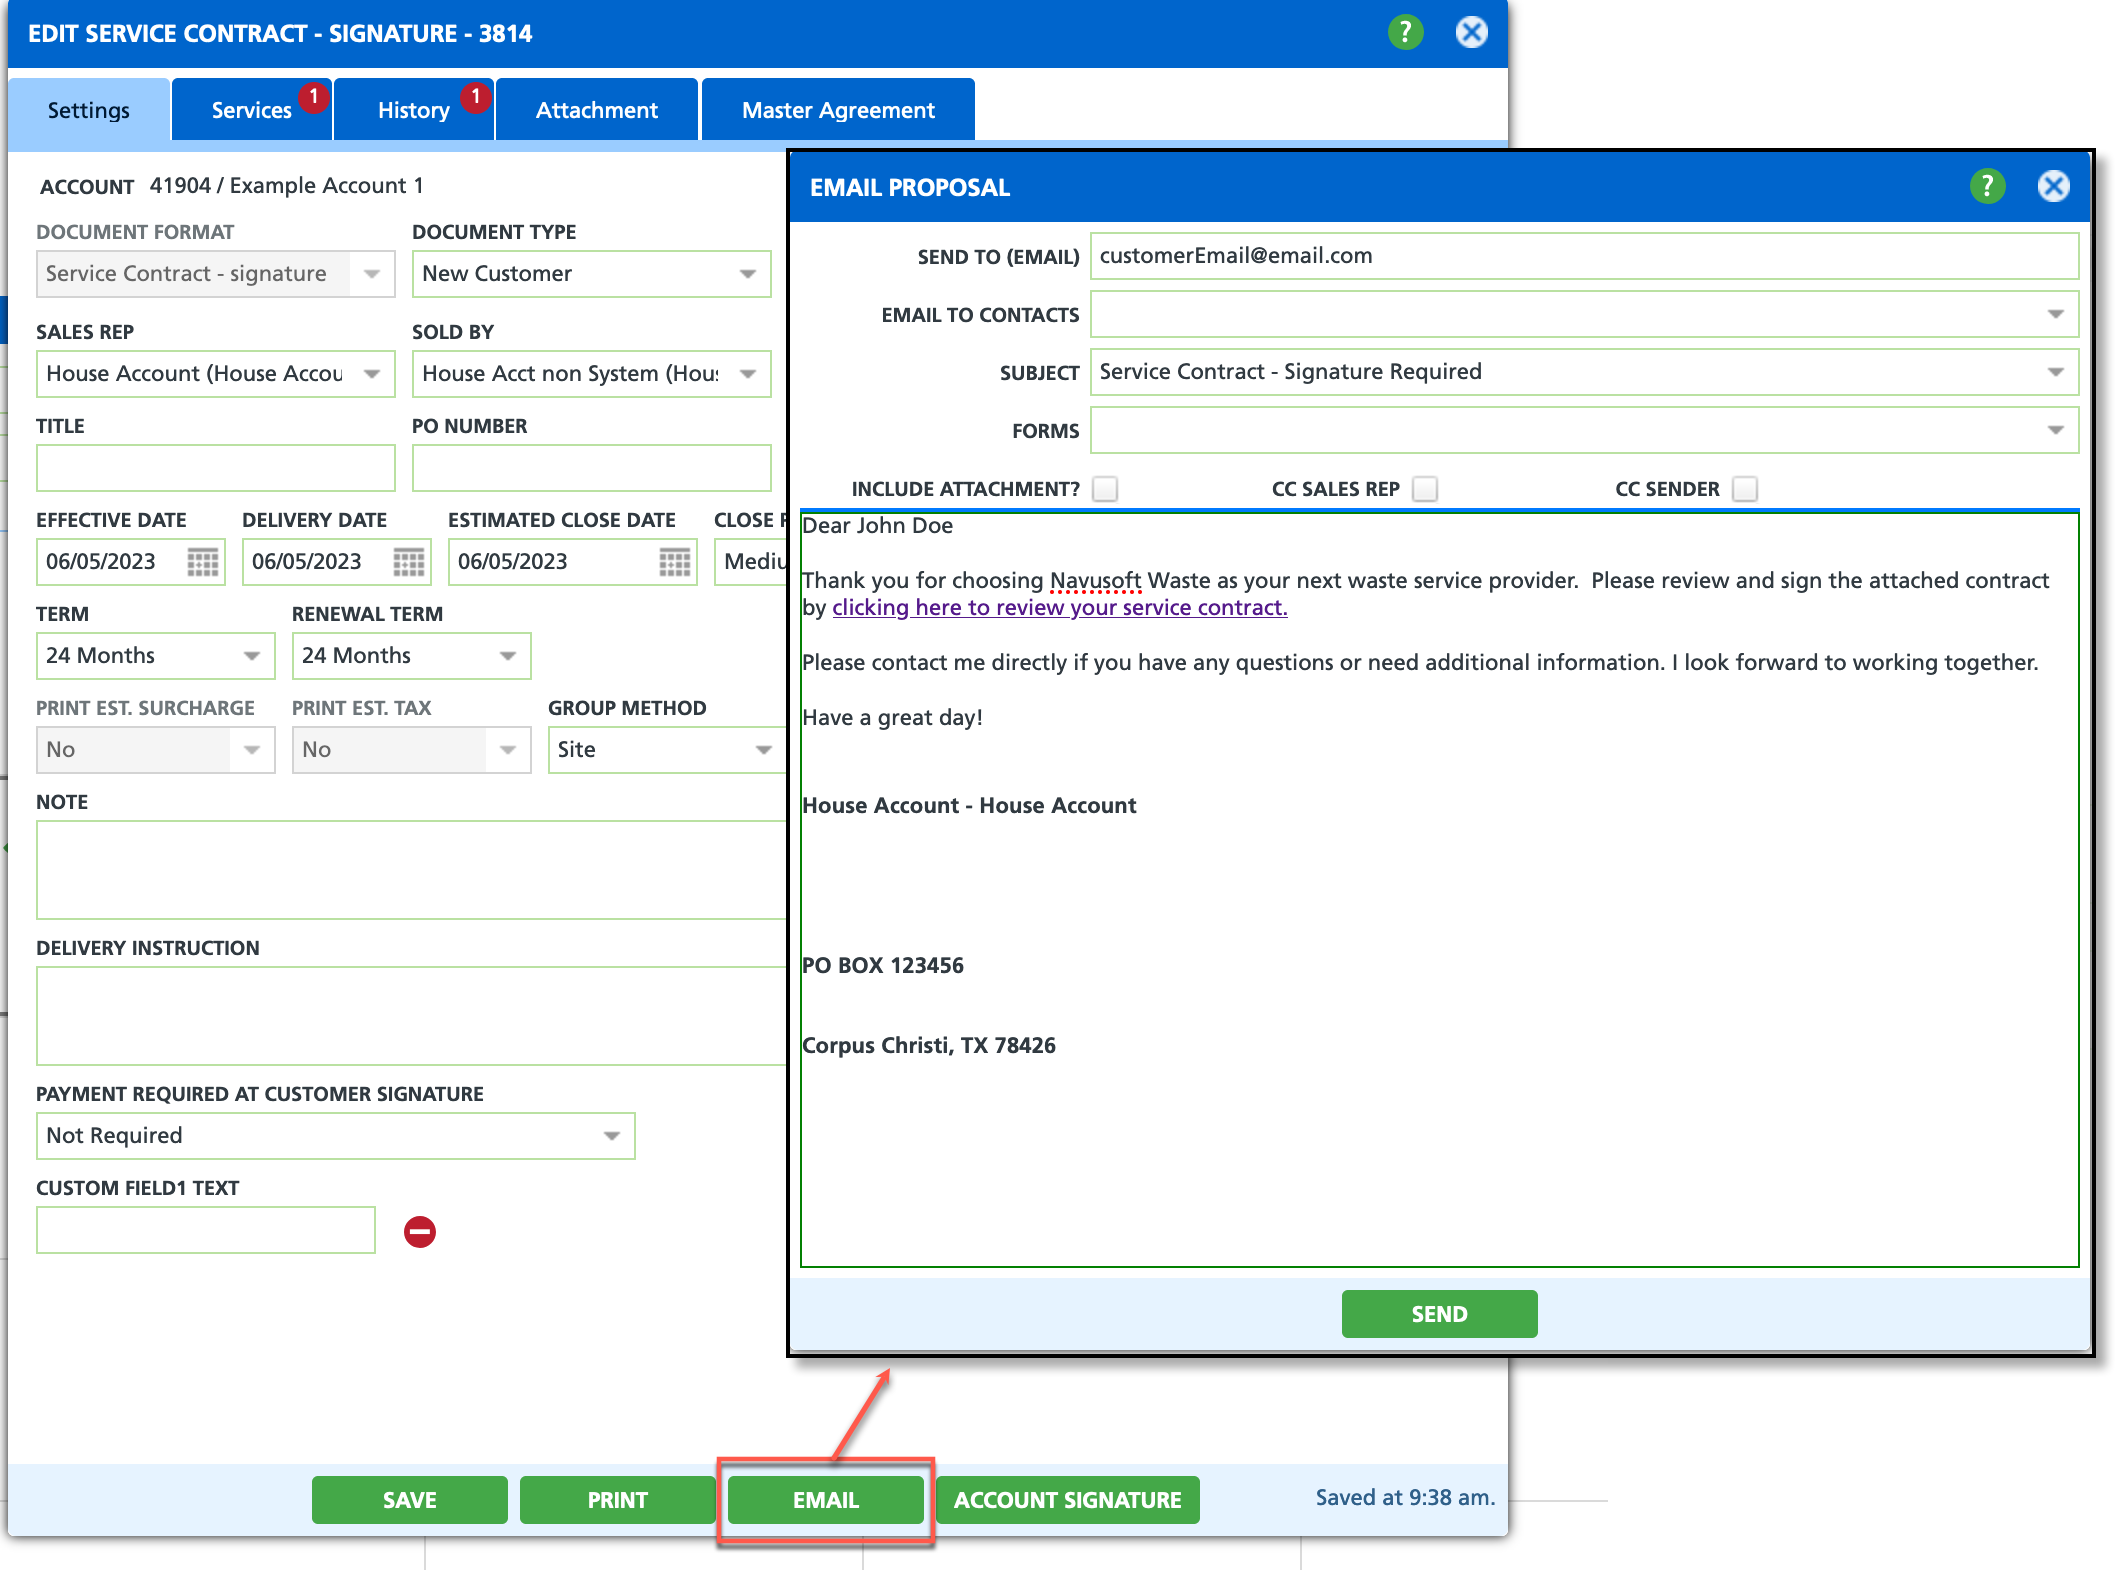
- Select the Email button at the bottom of the service contract's screen.
- Enter in the email address the contract should be sent to in the Send To (Email) field. This allows for sending the contract to someone other than the account/site contact.
- Optional - select the name of an account contact from the Email to Contacts field. Otherwise, leave blank and the email will be sent to the address entered in the Send To field.
- Select a Subject template from the drop down list of options. Once selected, the template name will populate in the Subject field and the message will populate in the body field. Edit the subject and the body to fit what is needed for the account.
- If an attachment such as a Credit Card Authorization form should be included in the email, select it from the Forms drop down. Otherwise, leave blank. If a form is selected, check the 'Include Attachment' check box.
- Optional - select the check boxes to cc the sender and sales rep when the email is sent.
- Click Send when finished.
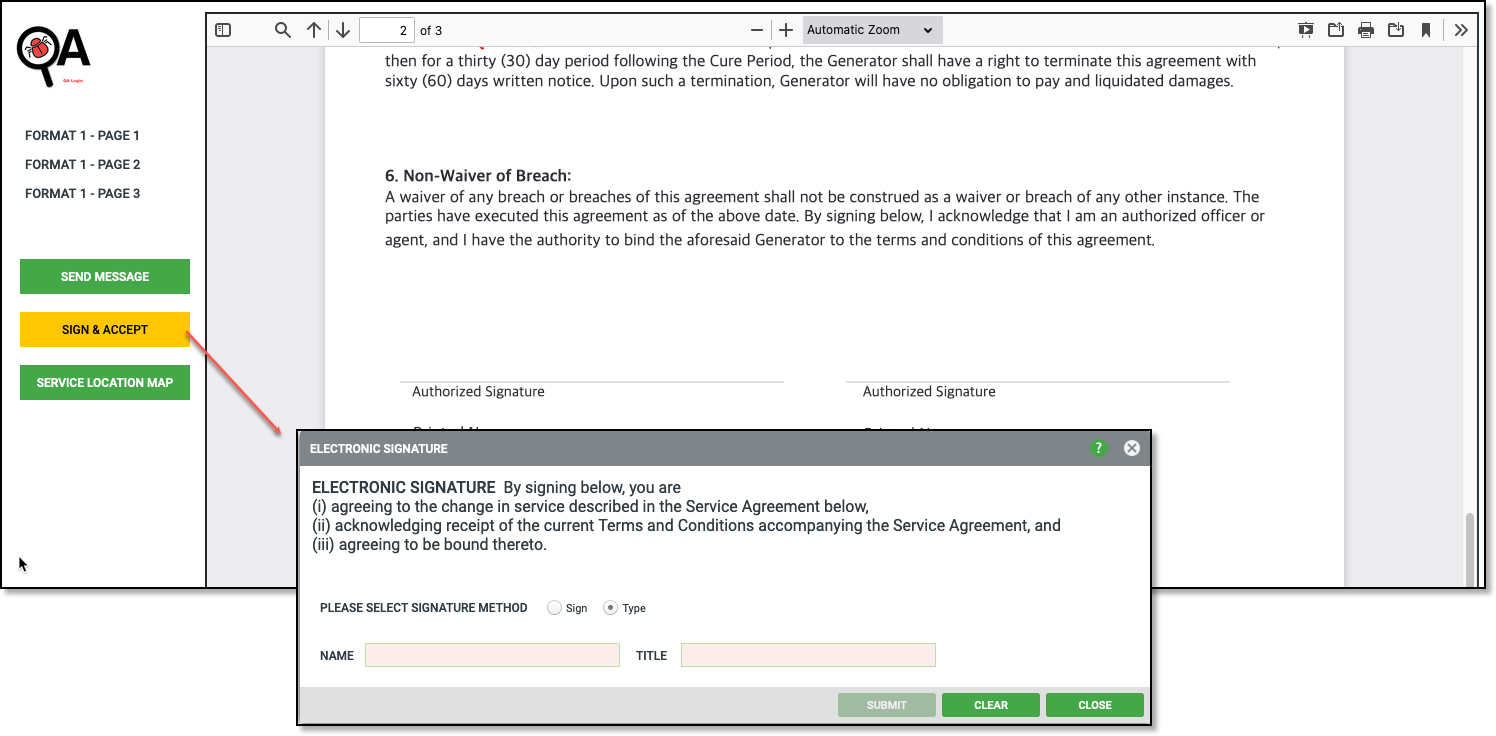
When the customer receives the contract, they will need to select the Sign & Accept button displayed on the right side of the form. Upon selection, the Electronic Signature popup will display with two signature method options: Sign or Type.
Sign: Customer must use their mouse to sign their name.
Type: Customer must type there name and title into the Name and Title fields.
Print Contract for Signature
Select the Print button to print a hard copy of the contract. After it has been signed, the sales rep must then update the contract's status to 'Sold' and attach the signed agreement.

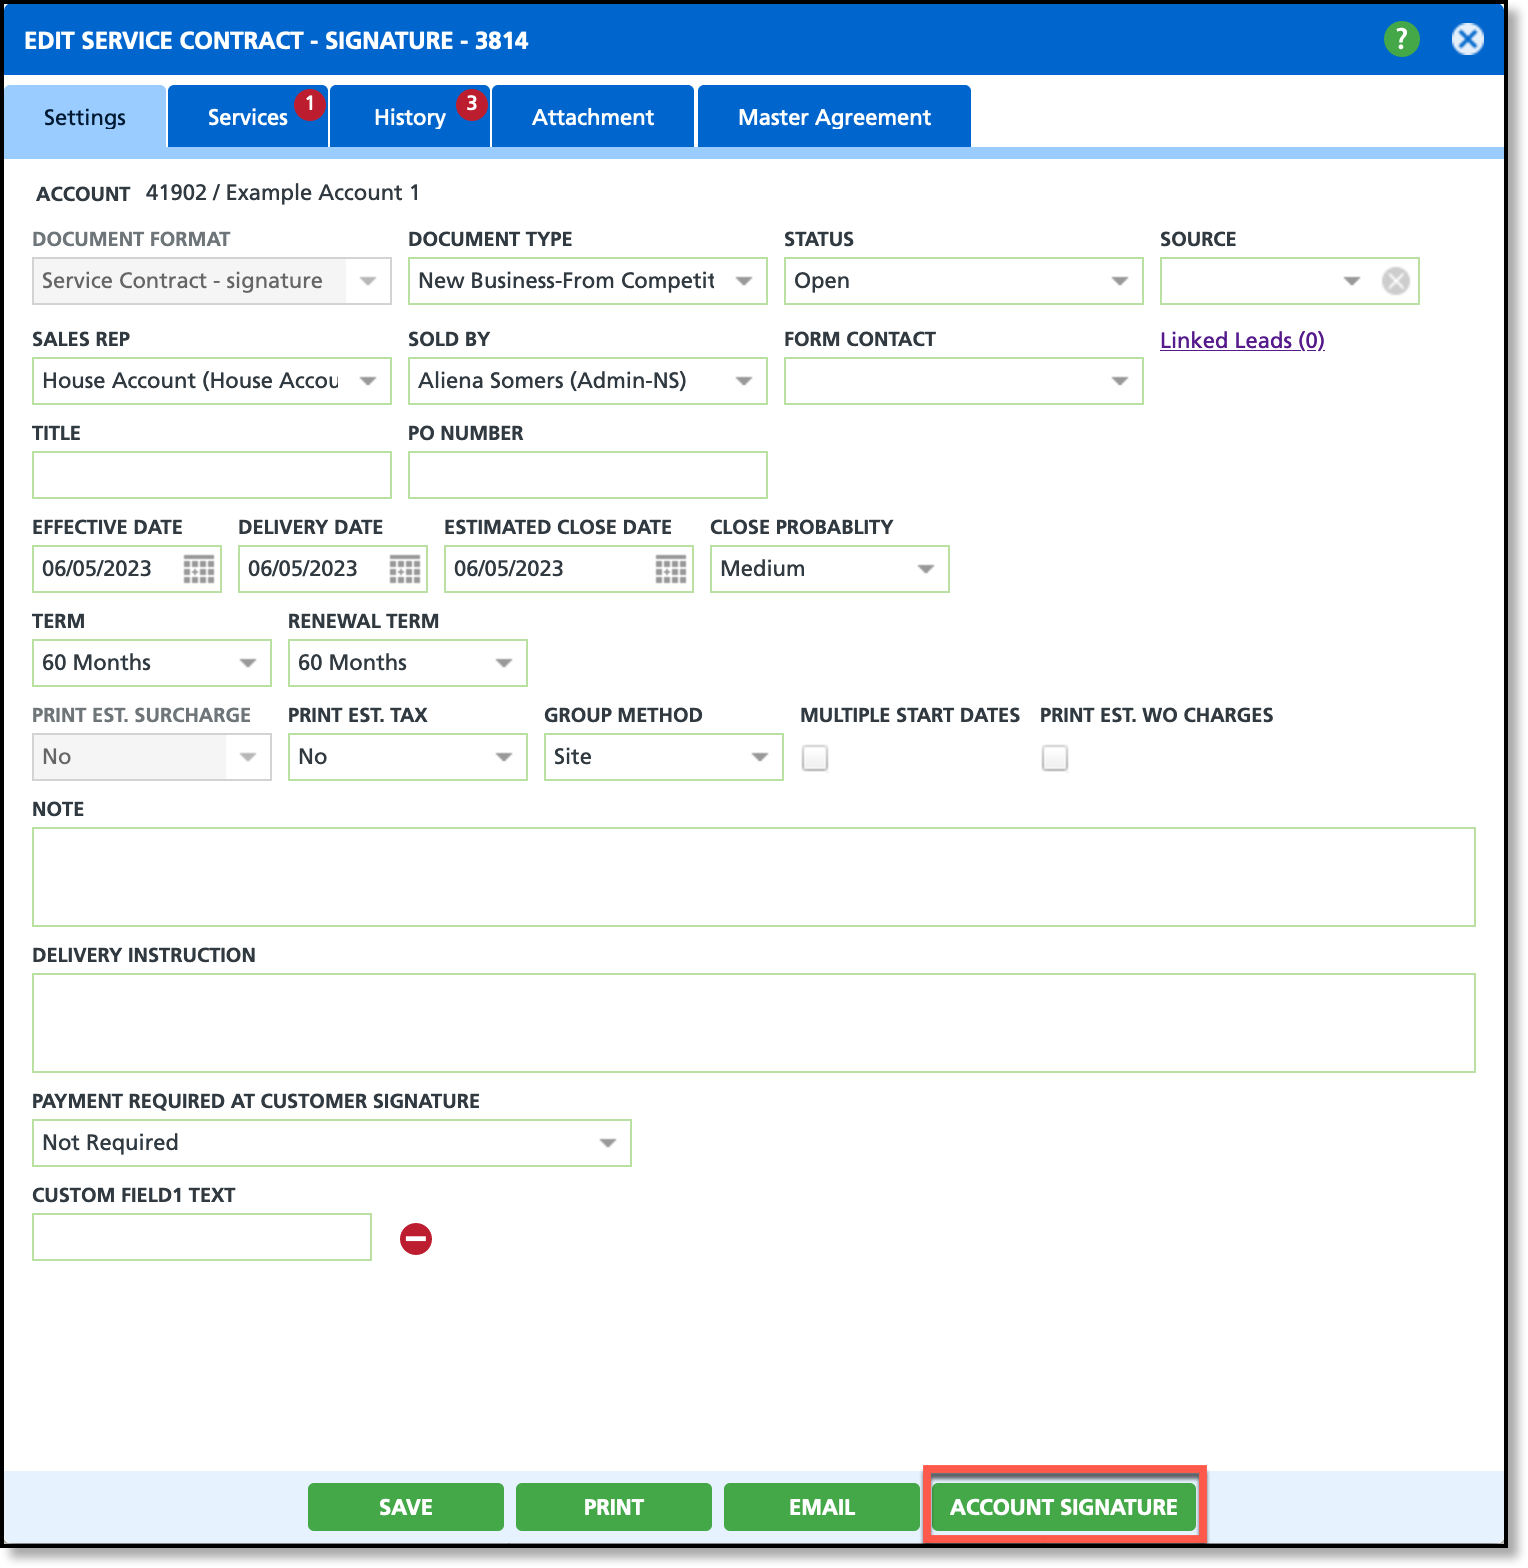
Account Signature - In-Person Signature Option
An alternative option is also available to gather a signature in person. This option triggers the Electronic Signature popup window, allowing the sales representative to capture the customer's signature during their face-to-face interaction.
Step 3: Countersignature
A countersignature from the sales representative recorded on the contract is required to complete the sale. This process will be different depending on whether or not the sales representative has automatic countersign enabled on their user profile.
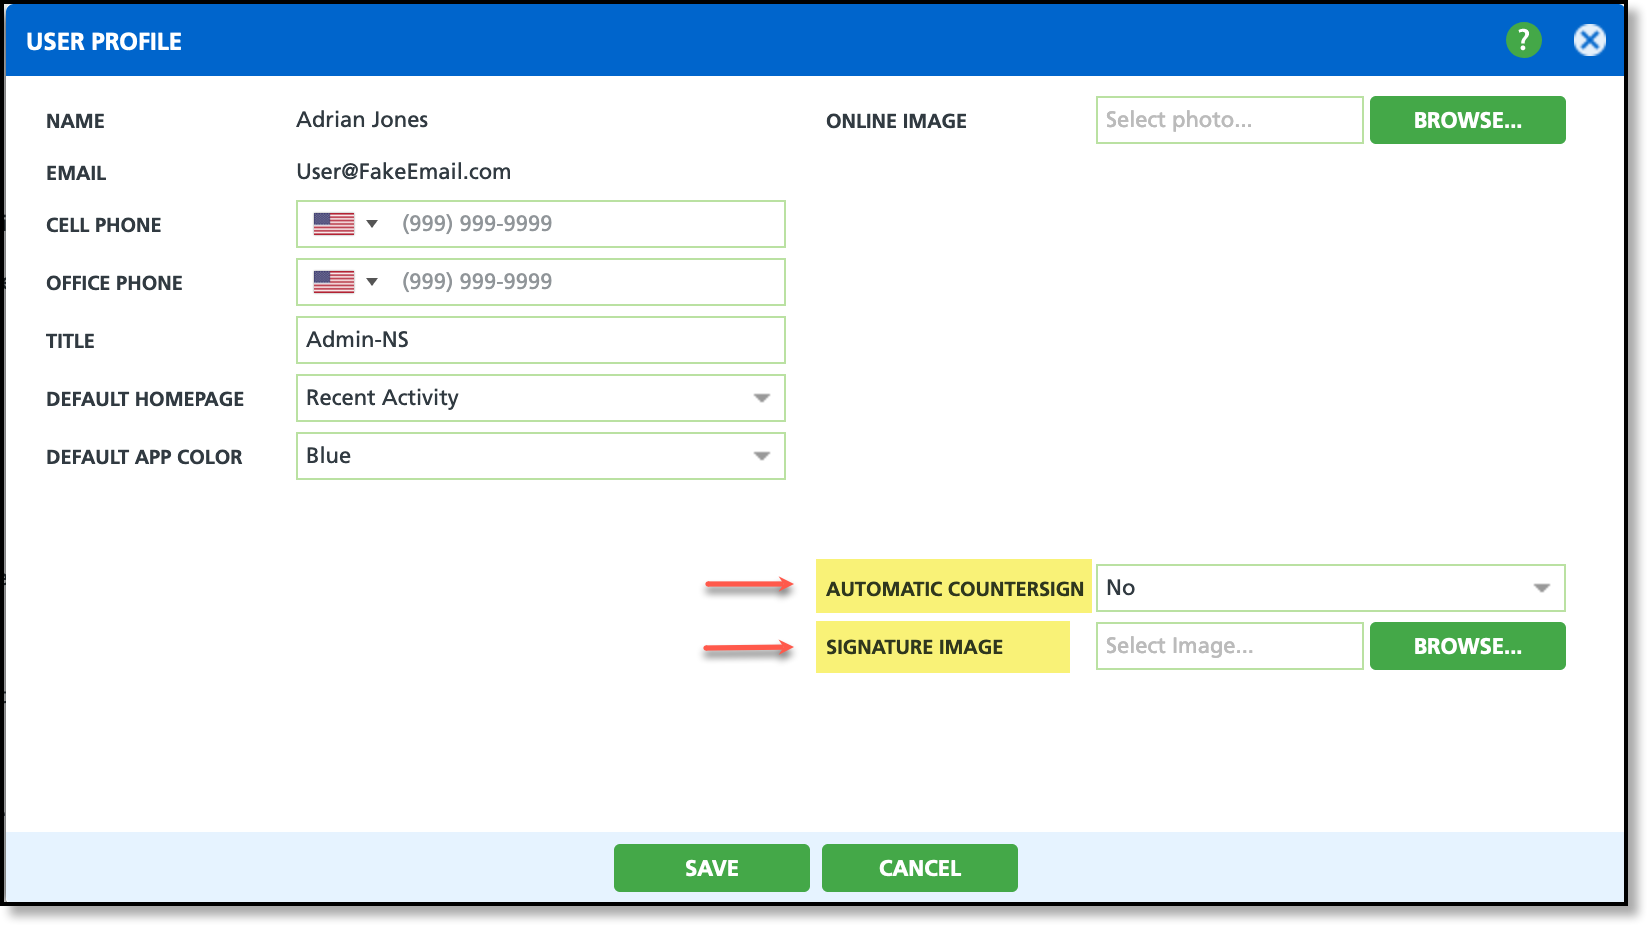
Automatic Countersign
Pathway: User Profile > (select) Automatic Countersign
To activate automatic countersigning, access your user profile by clicking on your username in the upper right corner of the application and select "User Profile". Set the Automatic Countersign to 'Yes' and upload a pre-existing Signature Image saved on your local drive. Once done, click Save to finalize.
Add Sales Rep Signature - Applies if Automatic Countersign IS NOT Enabled
Pathway: Contract Document
If the sale representative's user profile does not have countersigning enabled, they will need to open the contract and select the 'Add Sales Rep Signature' link displayed below the Sales Rep drop down field. This link only displays after the customer has signed the contract.

Related Articles:
Sales Management
Step 4: Update Contract Status
Sold Status
During step 4, confirm that the account has been changed to a 'Sold' status after the contract has been signed. If the contract was signed electronically (via Email or Account Signature), the status will be updated automatically. However, if the contract was manually signed and uploaded, the status will require manual modification to 'Sold'.
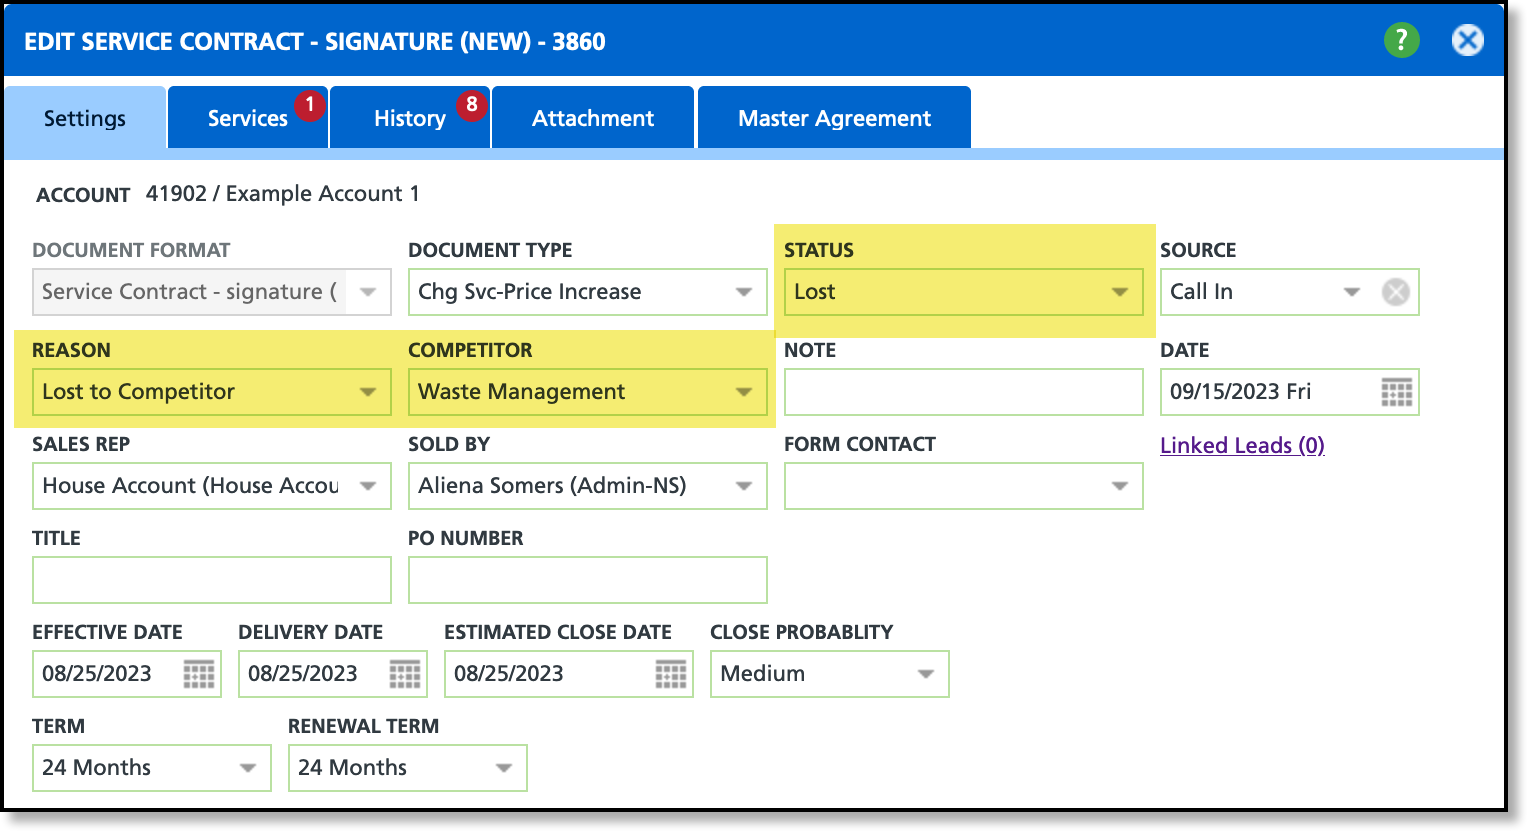
Lost Status
Lost accounts are account contracts that were lost to a competitor. In that case, the contract will need to be manually changed to Lost. Although the contract was a loss, it will continue to populate in the following CRM Pipeline dashboards for future opportunities:
If a contract is lost, an optional setup allows for capturing details about the lost sale and identifying the competitor. The following logic and setup are used to gather additional information on lost contracts:
- The Reason (code) field will be hidden until "Lost" is selected from the Status drop down.
- The Competitor field will be hidden unless:
- The selected Reason has "Capture Competitor" set to 'Yes' in Setup > System > Reason Code.