NavuNav (Android) Switch Route
Last Modified on 10/06/2025 10:30 am PDT
To improve productivity and profitability reporting, drivers assigned to multiple routes must use the Switch Route feature in the application menu to move between them. Although a driver may be assigned multiple routes in a single day, stops can only be serviced on one route at a time. To begin servicing another route, the driver must select the Switch Route option in the menu.
Switch Route Screen
Previous to the NavuNav 6.5 version, drivers could view and service stops for all assigned routes at once. In versions 6.5 and beyond, drivers may still be assigned multiple routes in a day, but they can only view and service stops for one route at a time.
The Switch Route feature will not display in the application menu when lunch or downtime is in progress.
Field Descriptions
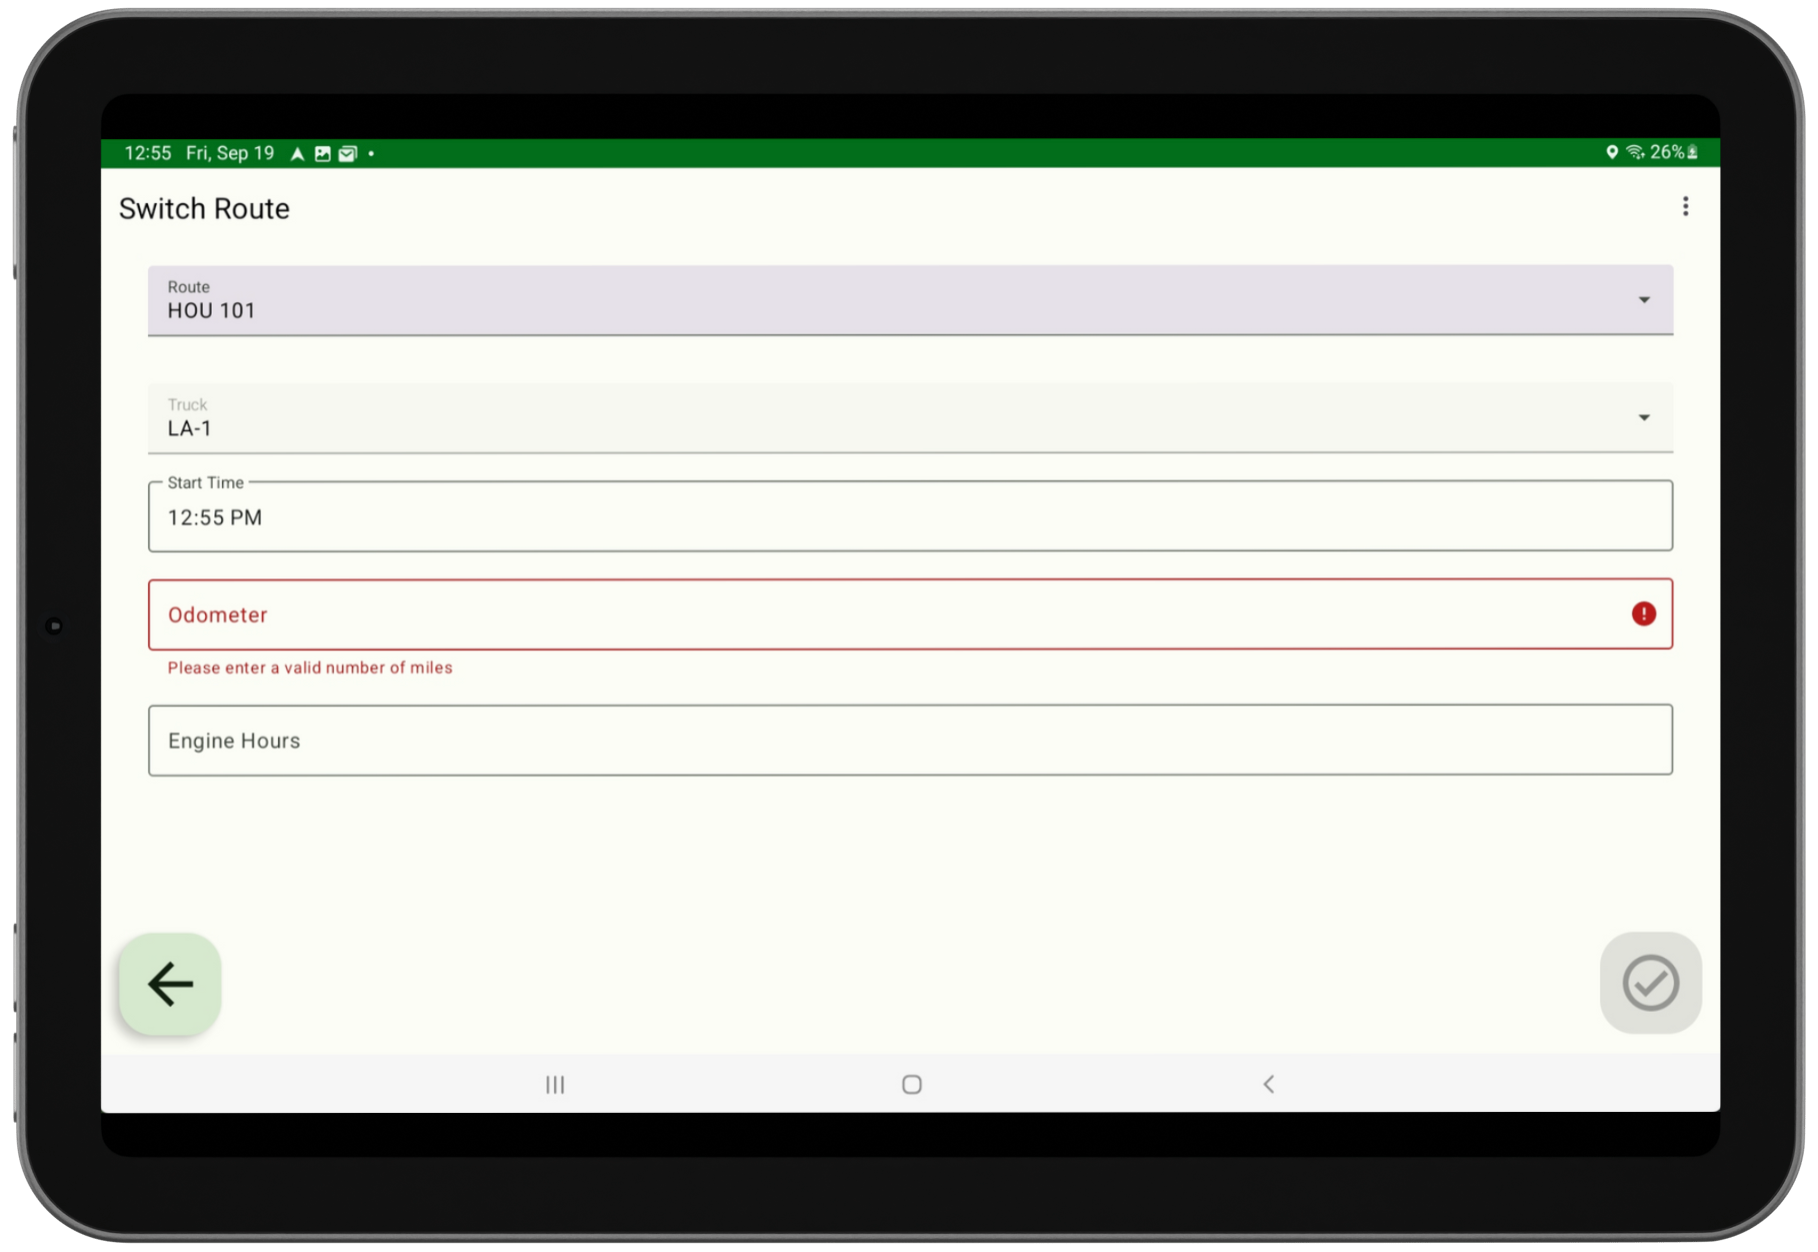
Route
Only the routes assigned to the driver are available for selection. If a driver has two routes assigned to them, the Route field will automatically populate with the new/other route.
Truck
This read-only field displays the truck assigned to the selected route.
Start Time
When switching routes, the Start Time of the new route is automatically applied as the End Time of the previous route.
Odometer / Engine Hours
Entries in these fields are recorded in Dispatch [Truck Productivity] under the End Odometer and End Engine Hours columns. When a driver runs more than one route, the End Engine Hours and End Odometer from the previous route are carried over and recorded as the Start Engine Hours and Start Odometer for the next route.
* To help prevent data entry errors, the driver app applies the following screen logic:
Switch Route Step-by-Step Process
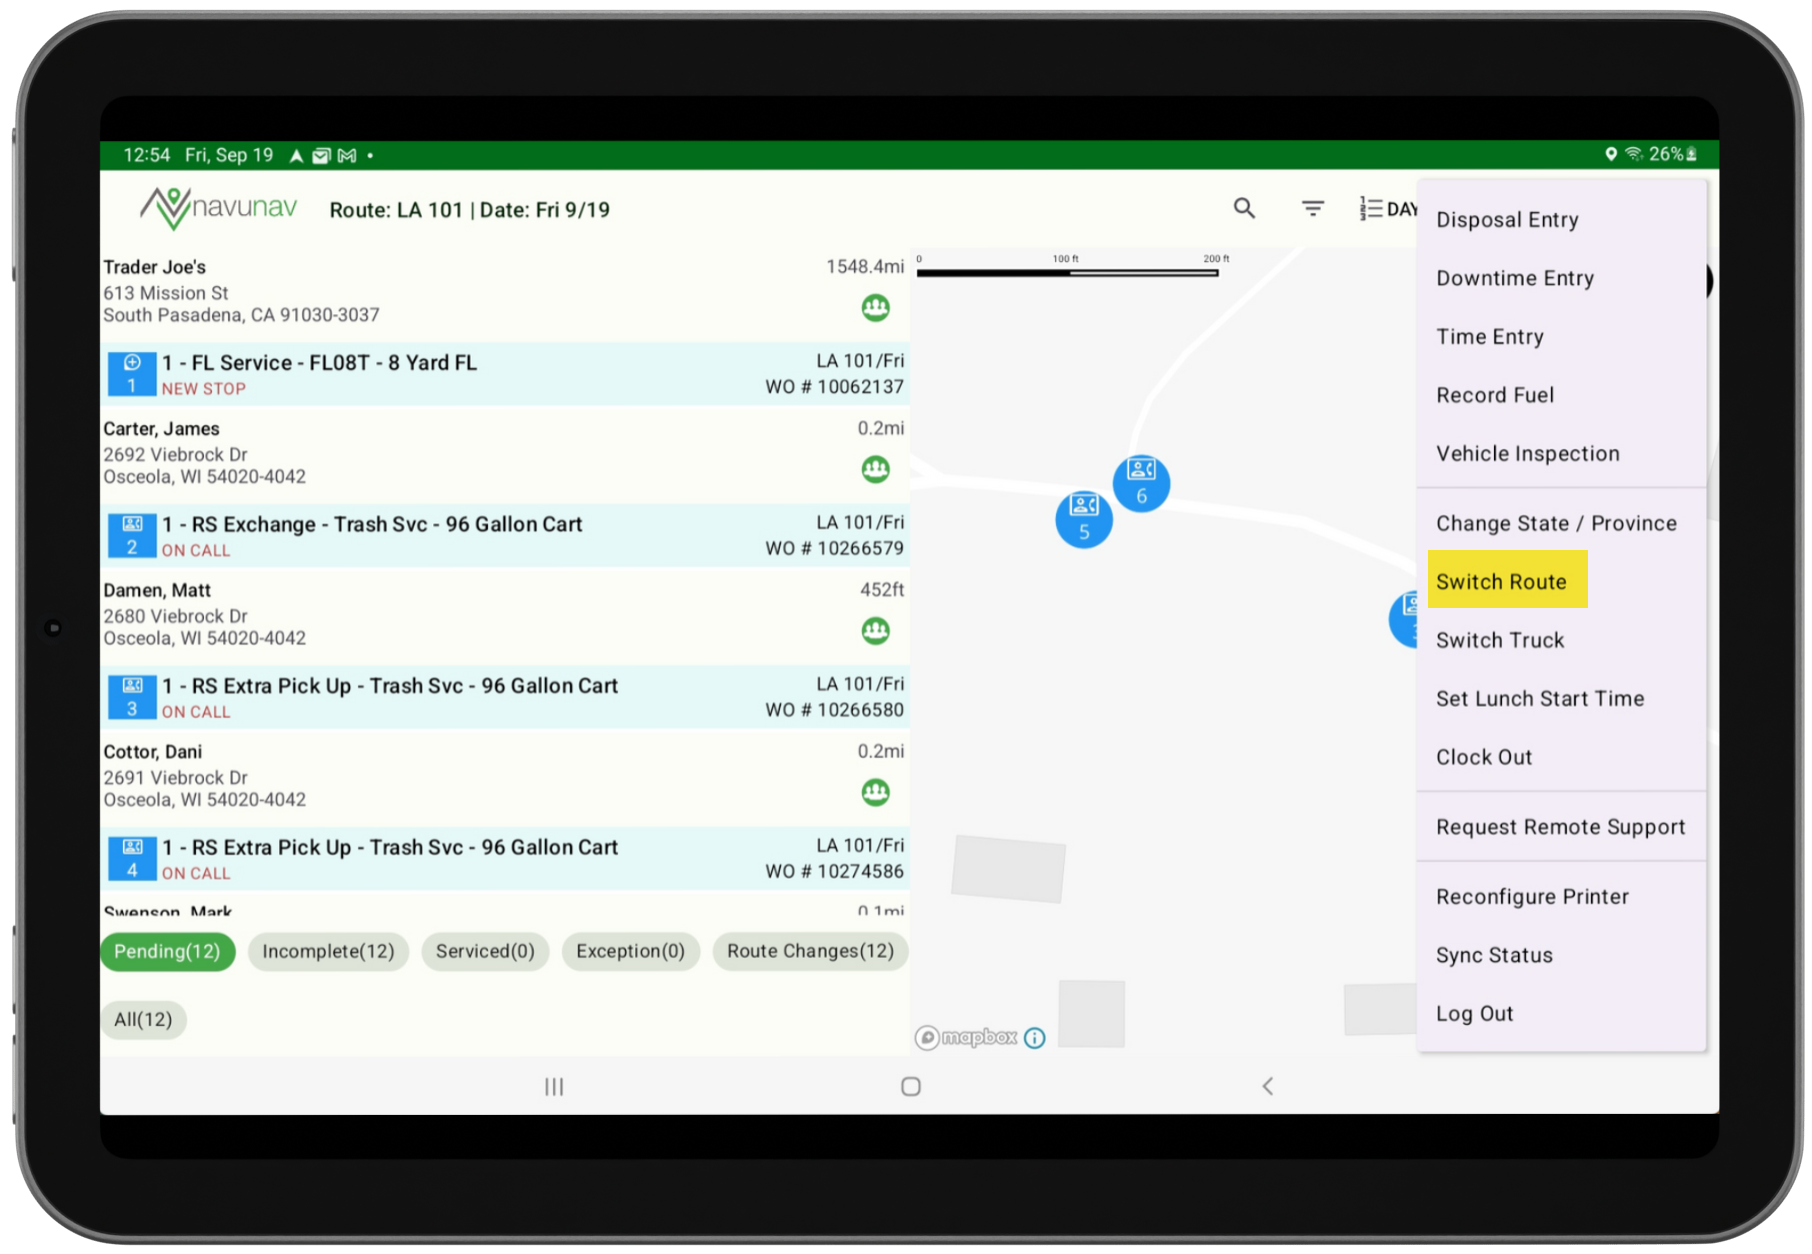
- On the NavuNav screen, open the Application Menu and choose Switch Route.
- From the Route drop down, select the new route. (If only one route is available, the field auto-populates).
- Enter the Odometer (required) and Engine Hours (optional).
- Tap the green check mark at the bottom-right to continue. The button remains inactive until all required fields are filled and no warning messages are displayed.
Switch Route Scenario Examples
Review the following scenarios regarding the Switch Route feature, as it may require adjustments to your current routing setup configurations.
Scenario 1 – Driver services a single route for the entire day
No changes are needed. NavuNav will automatically default to the single route assigned to the driver.
Scenario 2 – Driver services a trash route in the morning and a recycling route in the afternoon
This will require a slight adjustment for the driver. At the start of the day, the driver must select the trash route and service the trash stops. When ready to begin the recycling route, the driver will select Switch Route in the menu, choose the recycling route, and enter the current Odometer and Engine Hours. The recycling stops will then be available for servicing.
Scenario 3 – Driver alternates between Medical Waste and Document Destruction routes throughout the day
This setup will require configuration changes to combine the Medical Waste and Document Destruction stops into a single route that covers both lines of business.
Truck Productivity (Dispatch)
In Truck Productivity, after a driver has switched routes, start and end entries display based on the route the truck was servicing.
Ended (Current) Route
After the driver has successfully switched their routes, entries for End Time, End Odometer, and End Engine Hours are recorded for the truck on the ended route.
New (Switched) Route
The End Time, End Odometer, and End Engine Hours from the previous route are recorded as the Start Time, Start Odometer, and Start Engine Hours for the truck on the new route.


