GL Batch Export - Quickbooks Integration
Last Modified on 12/16/2024 1:00 pm PST
Pathway: Accounting > GL Transaction Processing
Export GL batches from Navusoft into an Excel file for uploading into QuickBooks using the process outlined here. This documentation outlines the steps within Navusoft, provides recommendations and tips, and includes limited guidance on the recommended QuickBooks application, Axis.

Setup Requirements
The following system settings must be configured to successfully export a GL Batch into a compatible file format for QuickBooks.
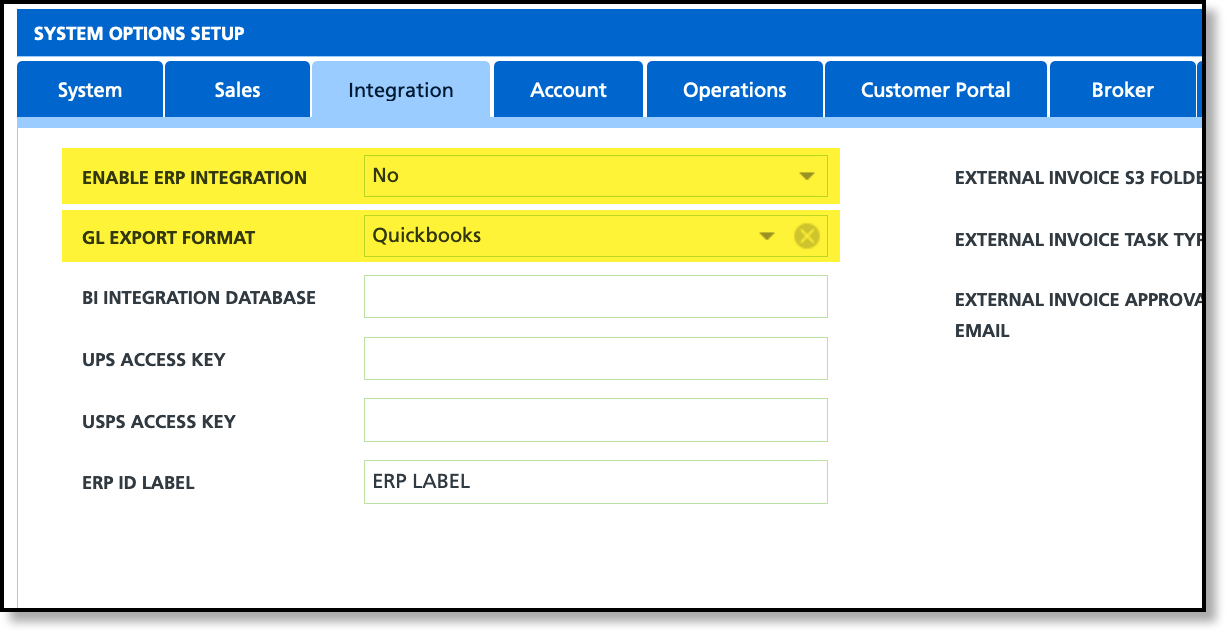
- System Options(Setup > System > System Options)
- Integration tab
- The Enable ERP Integration field should not be set to 'External Systems'.
- GL Export Format must be set to 'QuickBooks'.

Export Process
The export process is accessed via the GL Transaction Processing screen from the In Progress tab, after a GL Batch has been created. It is important to use the specific export process outlined here, as other export options in GL Transaction Processing do not meet the formatting requirements for uploading to QuickBooks.

- Create a GL batch. For detailed instructions, refer to the GL Transaction Processing documentation. Note that batch types do not need to match when creating a GL batch for purposes of exporting to QuickBooks.
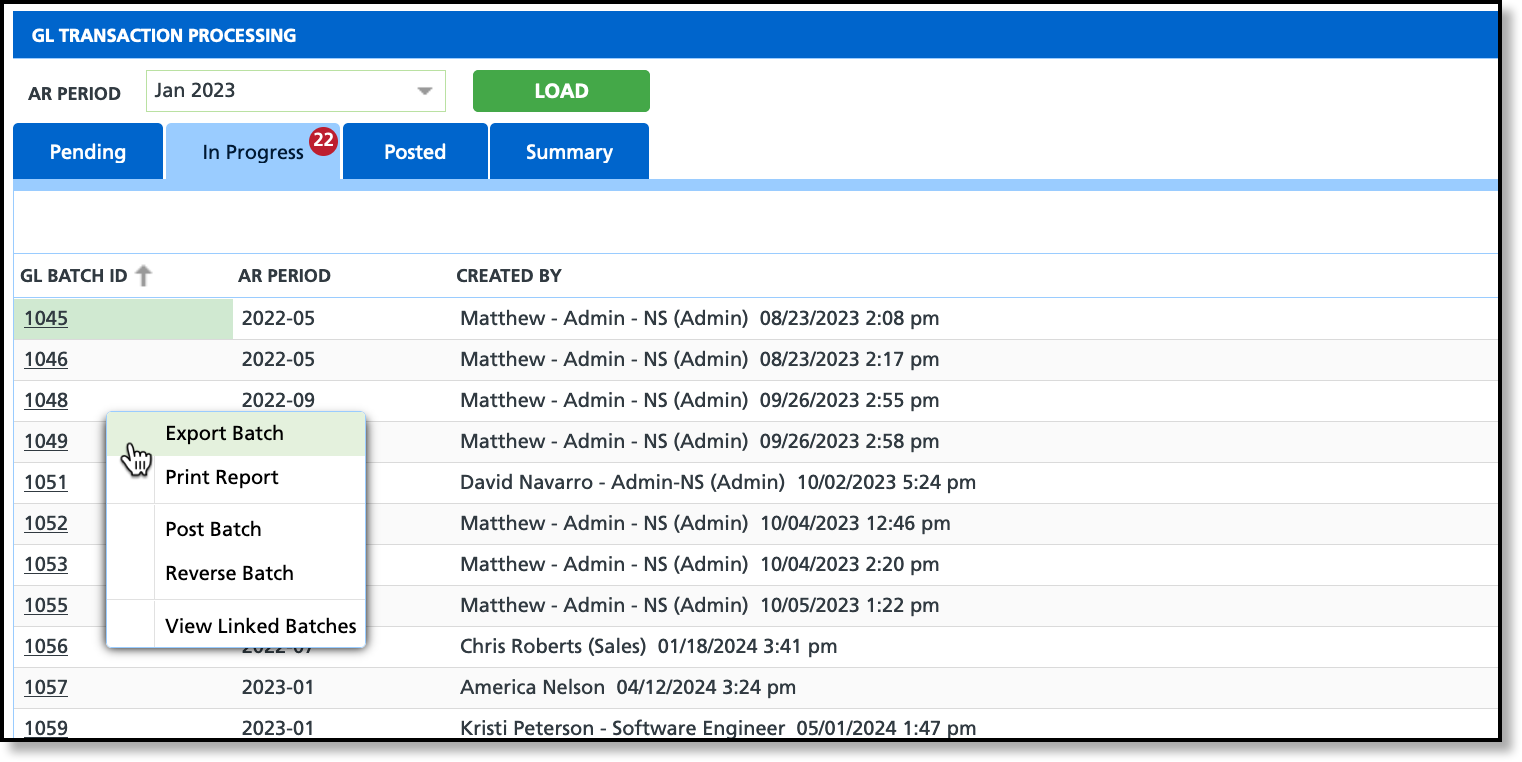
- From the In Progress tab, right-click on a batch and select Export Batch. This will generate an Excel export file.
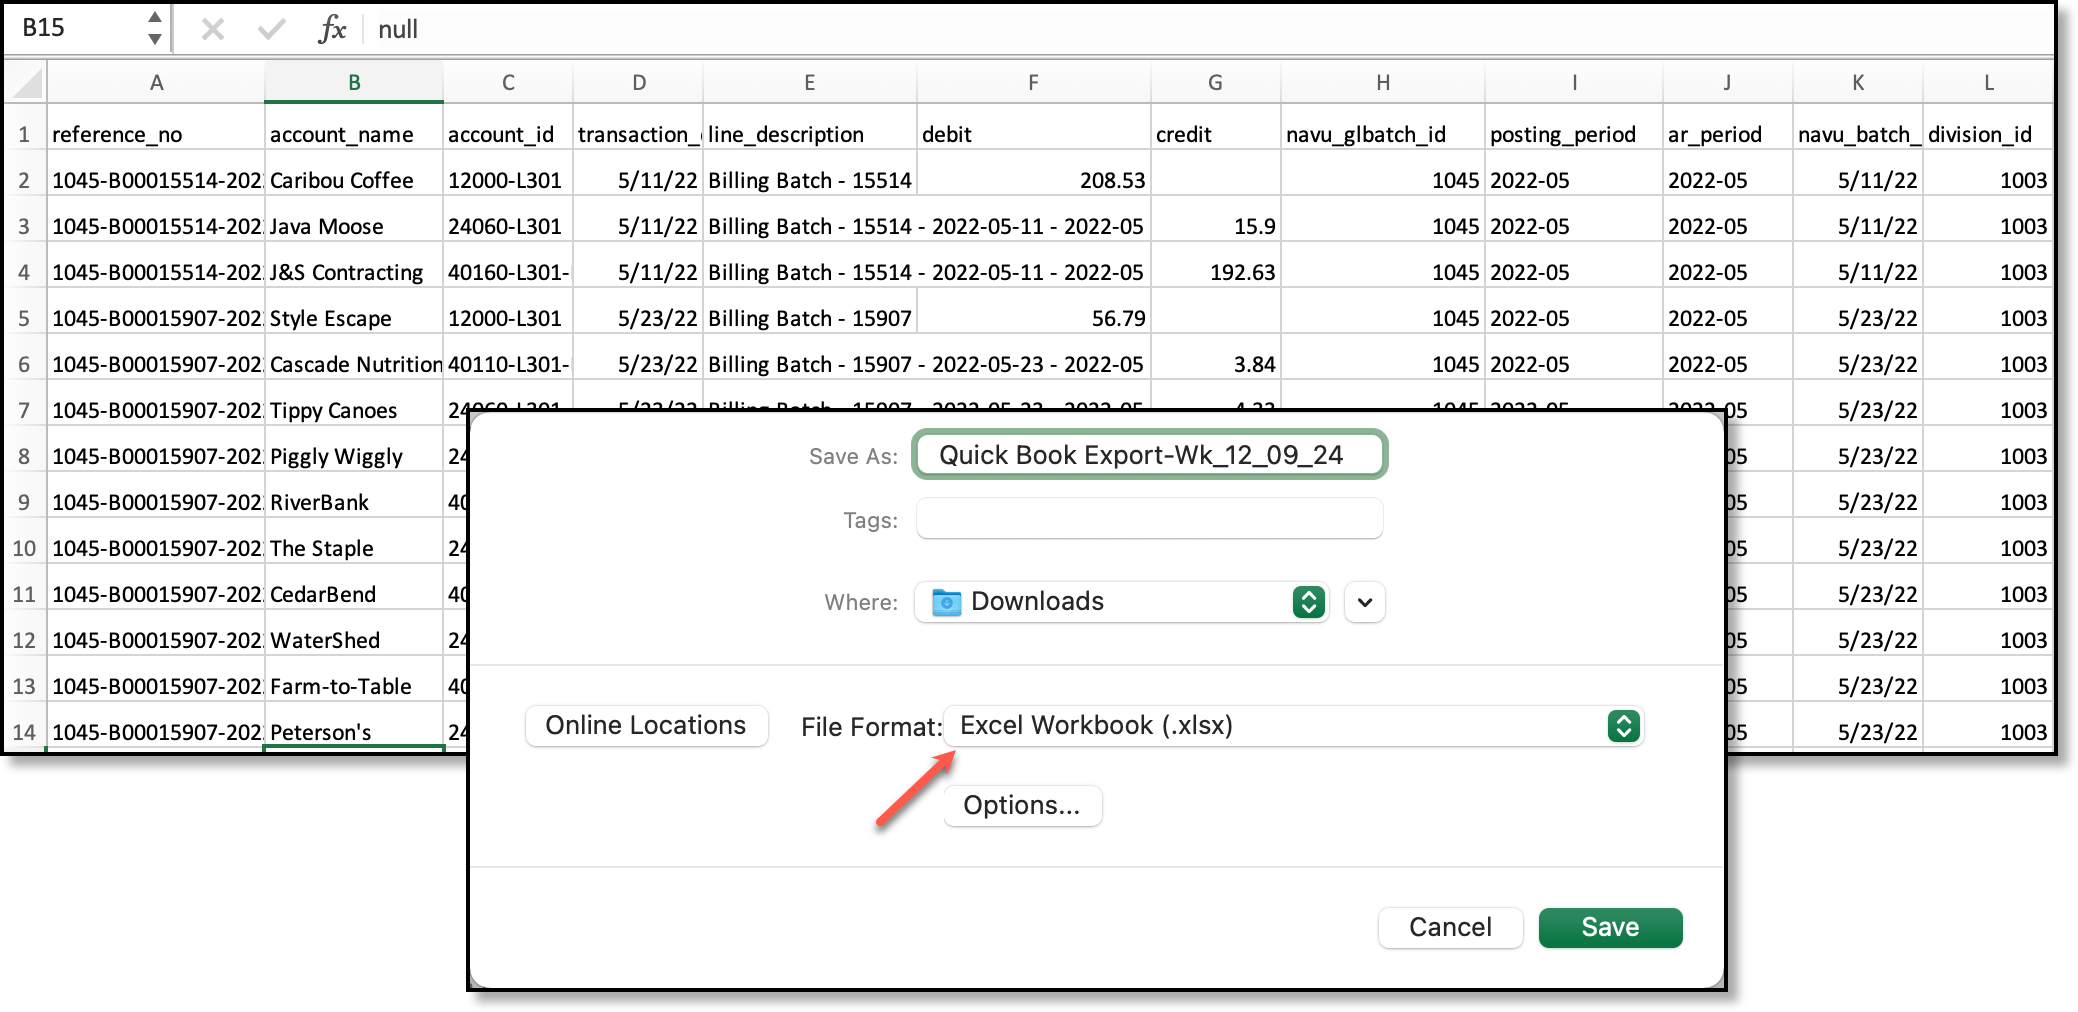
- Important: When the file is ready, verify that there are no '0' values in the credit/debit columns. QuickBooks will reject the file upload if any cells contain a '0' value. Instead of '0', these cells should be left empty/blank.
- Save the file in Excel as a Workbook (.xlsx) format to prepare it for QuickBooks upload.
- Note: When the file is first generated, it will generate in file format .CSV, which is not a supported format.
QuickBooks Recommended Import Process
This content is based on using the recommended Axis Import App for QuickBooks. While other apps may also work, we have found the Axis app to be the most user-friendly and compatible option.
The documentation provided is based on an external system and may not reflect the latest version of the Axis app in QuickBooks. Image unavailable.
- Find and launch the Axis application in QuickBooks:
- This can be searched and launched from Find Apps, or Apps in QuickBooks. Once you have launched the Axis app, the following steps apply:
- Select Axes from the index. This will open the Axes screen.
- Select GL Import from the Axes screen. This will open the GL Import screen.
- Select Make a New Connection from the GL Import screen and then select File Upload to search the GL batch file you would like to import.
- Set up your data mapping. Once the mapping is complete, it will only need to be updated if there are changes to your upload file. Mapping is saved for future uploads.
- If this is a new process to you, please submit a ticket to Navusoft Support for assistance with mapping.
- Once mapping is complete or the existing mapping has been reviewed and confirmed no changes are necessary, click next until you see your uploaded file on the screen.
- From the file, drag and drop the DocNumber column header to the upper left corner where it says "Drag a column header and drop it here to group by that column". This sorts the GL batch into the respective AR batch types - payment, billing, etc. that the GL batch included.
- Select Import to QuickBooks.
Post GL Batches in GL Transaction Processing
Upon verifying the upload into QuickBooks was successful, you can then proceed to post the GL batch in GL Transaction Processing. The process to post a batch can be found in the following documentation: Create and Process a Batch - GL Transaction Processing.


