Add and Edit Contacts
Last Modified on 06/26/2026 1:49 pm PDT
Pathway: Accounts > Search > Accounts
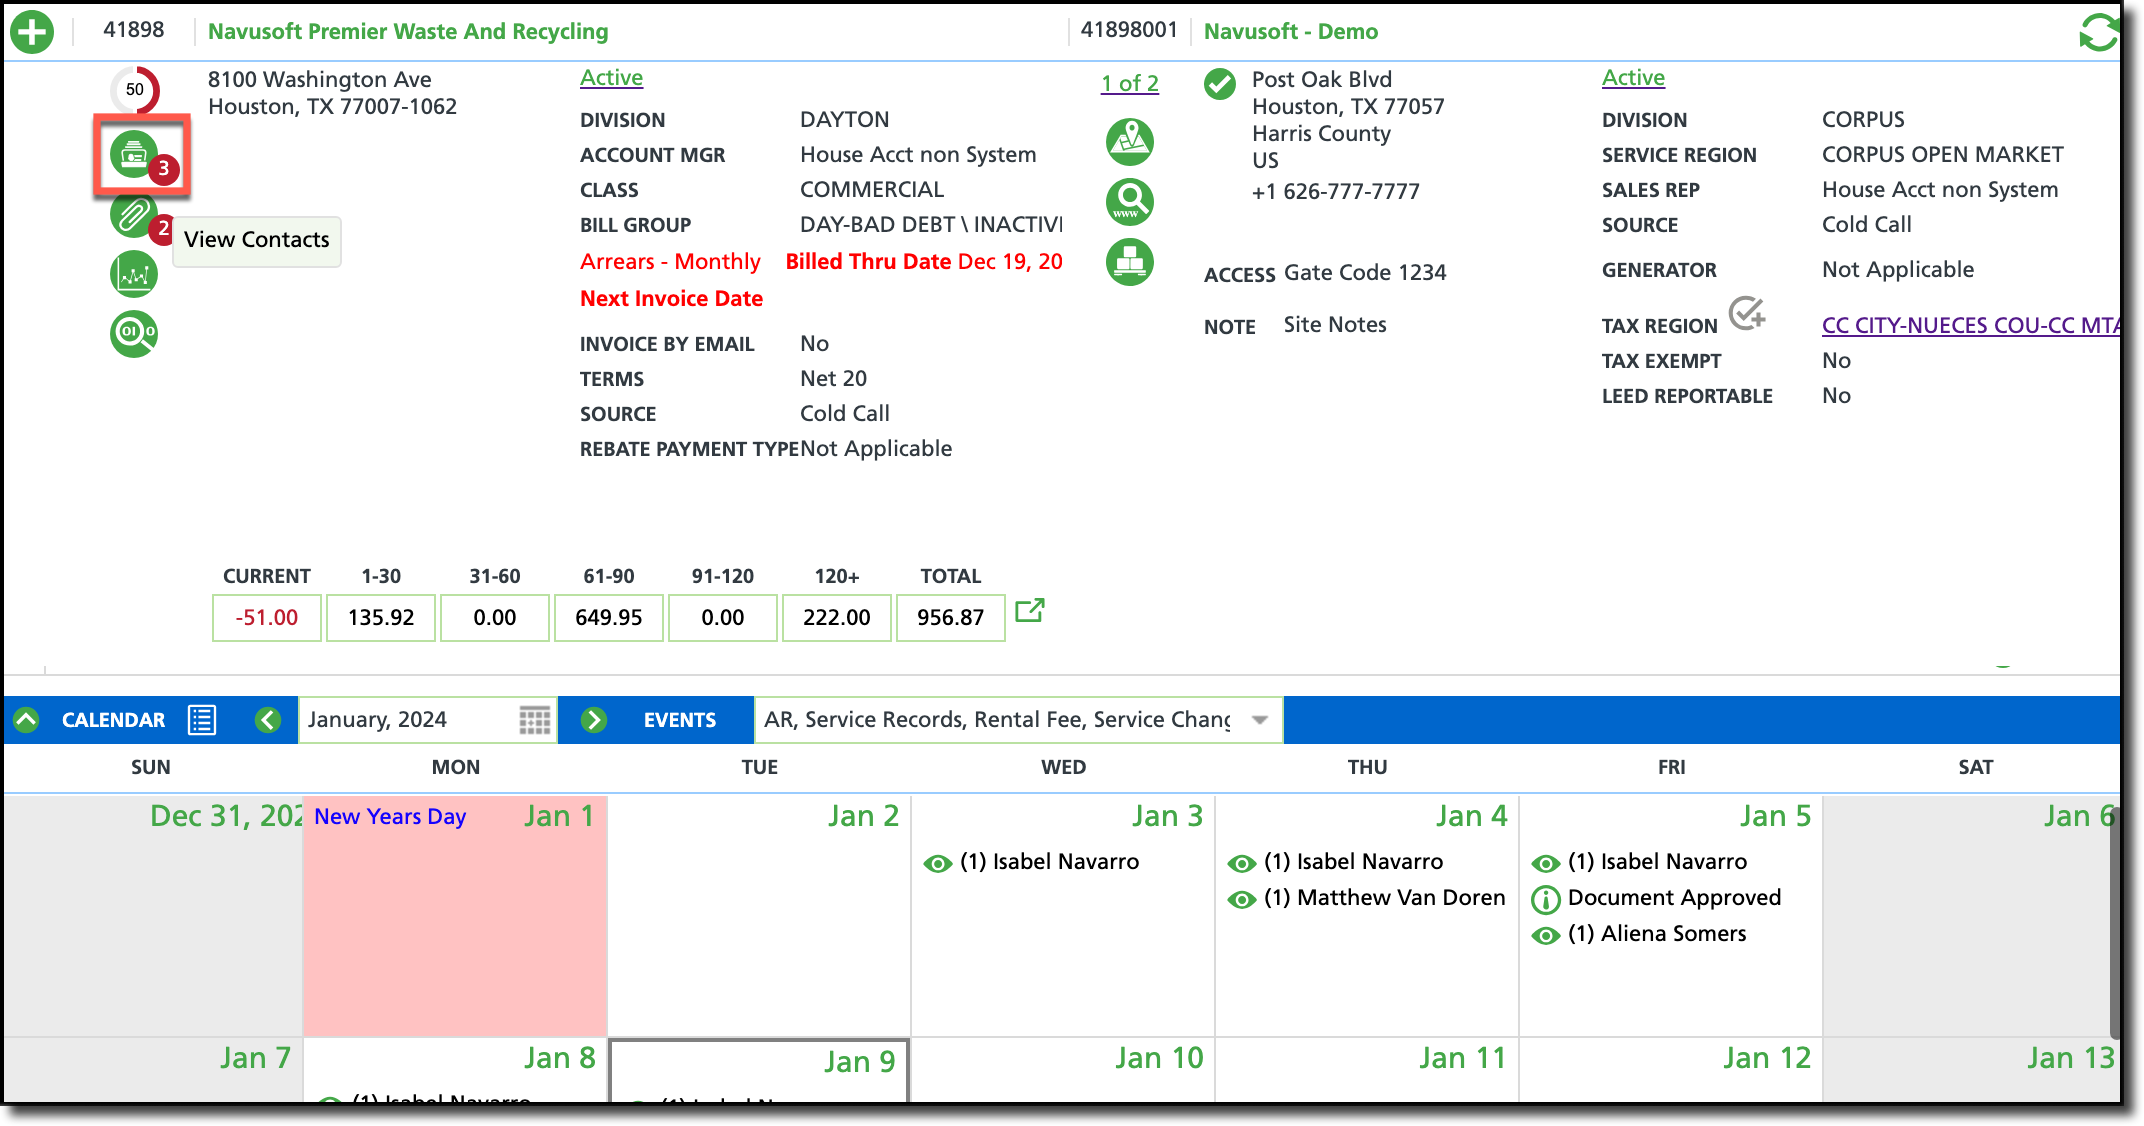
The View Contacts tool, accessible in the Account Details section of the customer service screen, provides users the ability to add and edit contacts associated with accounts and sites. Adding an account contact is essential to ensure efficient communication and accurate record-keeping.
Permissions
The following permissions are required to view, add and edit Contacts:
| Permission ID |
Permission Name |
5
|
View Accounts |
6
|
View Sites |
| 138 |
Edit Non-Prospect Account / Site Contact Information |
Add Contact Tab and Field Descriptions
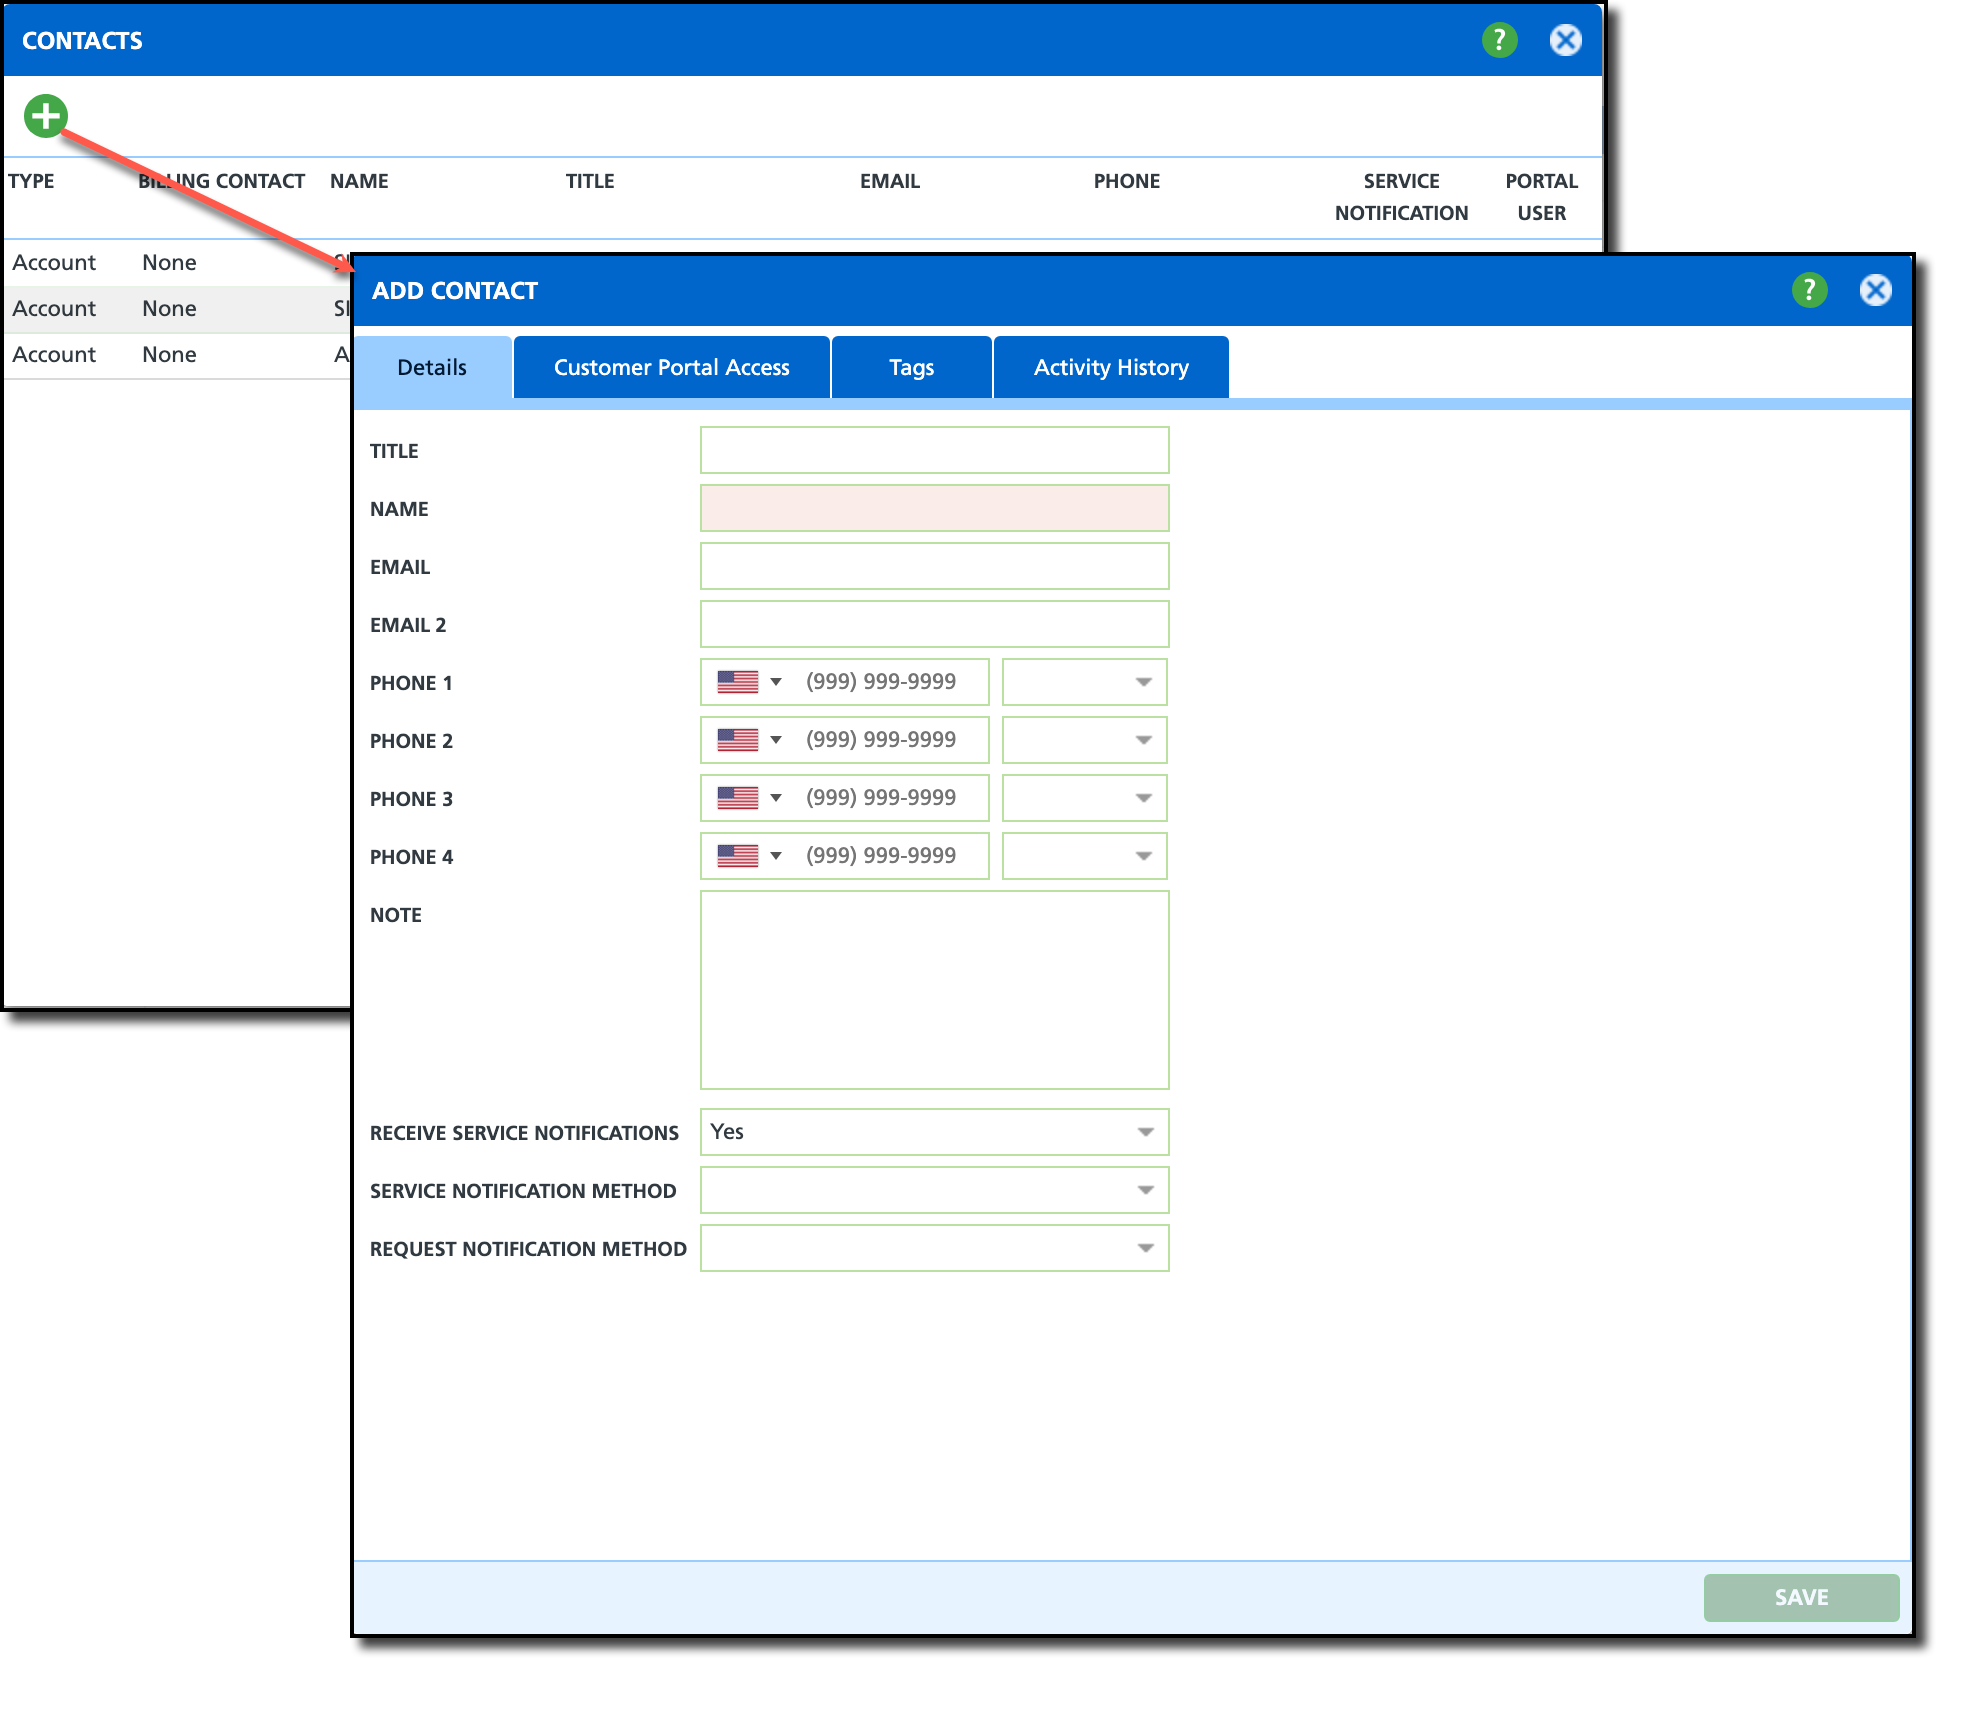
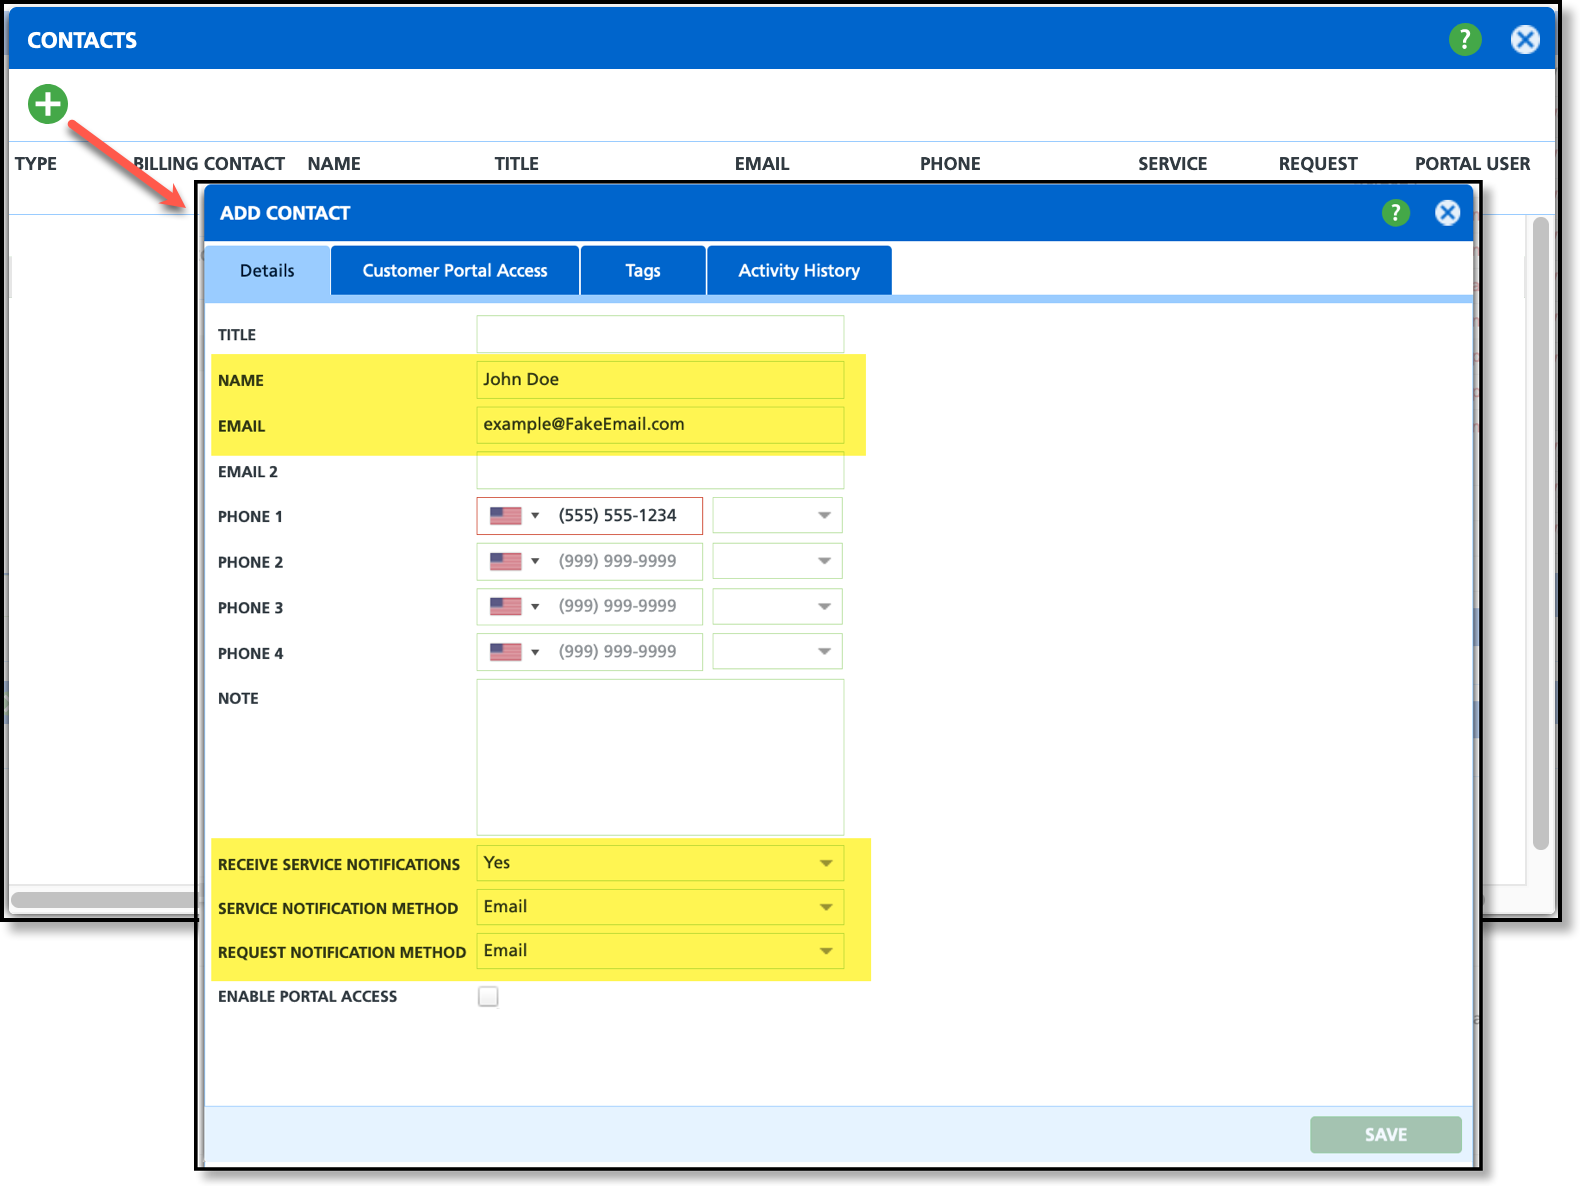
From the Account section of the Customer Service screen, select the 'View Contacts' icon to open the Contacts screen. Selecting the green '+' Add icon, the Add Contact popup editor will display. This section covers each of the tabs used to create, edit, or monitor activity with a contact.
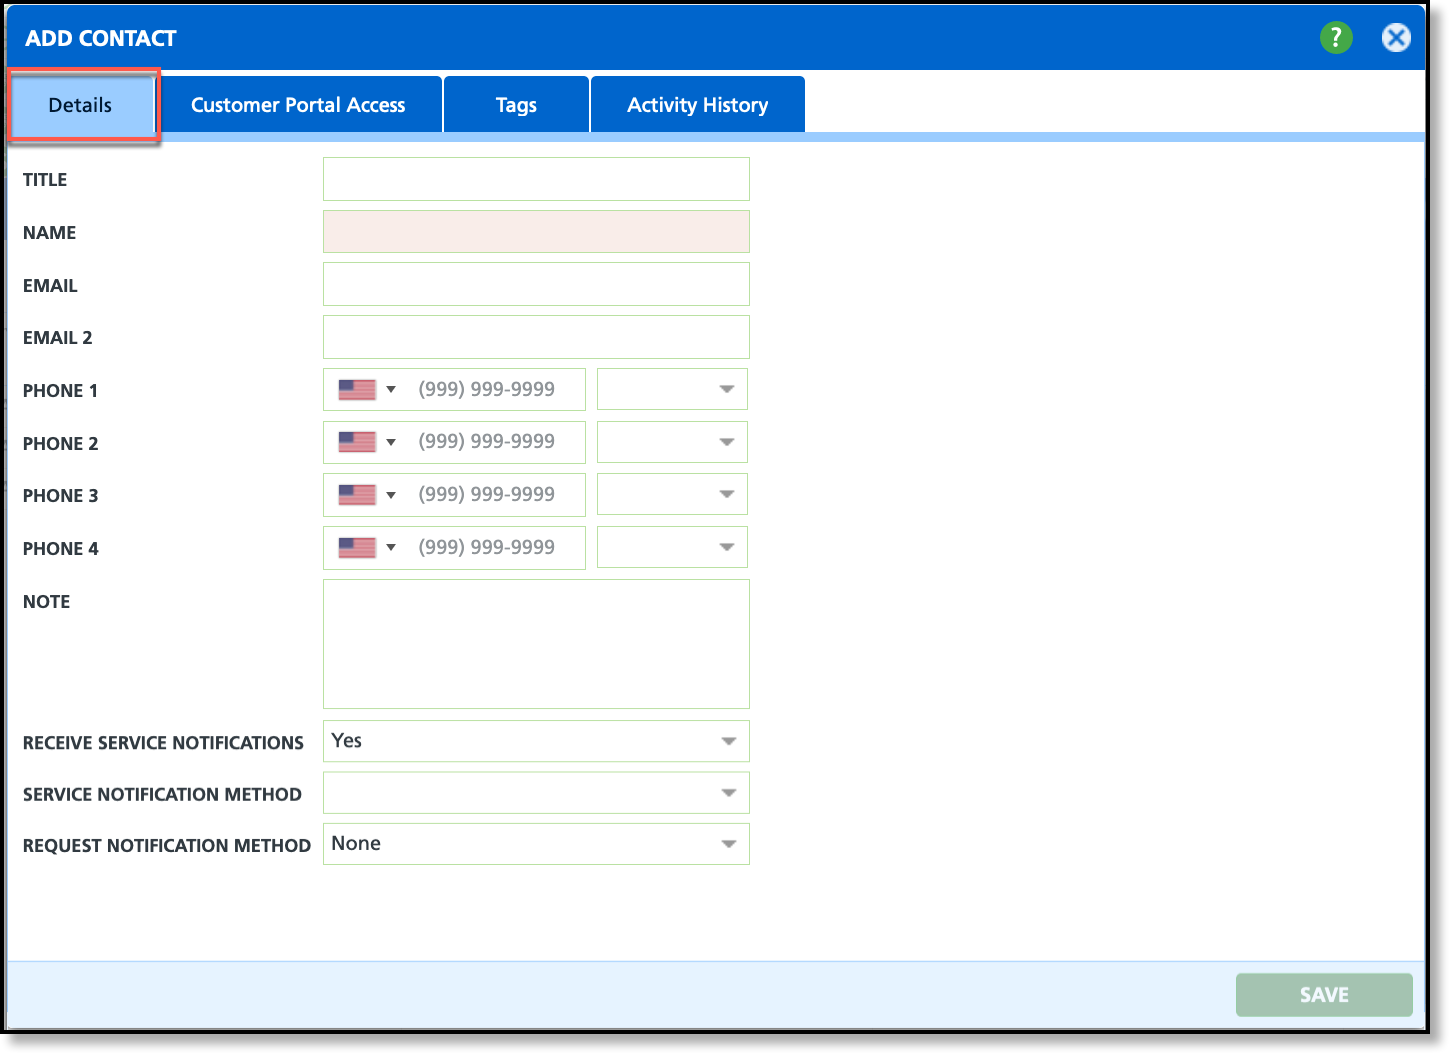
The Details tab of the Add/Edit Contact screen collects the necessary contact information for the contact including the their preferred notification method.
Add Contact
- Select the green +icon in the account section of the Customer Service screen and select Contacts from the list. The Contacts popup editor will display.
- Select the green + icon from the Contacts editor to display the Add Contact editor.
- Select the Details tab.
- Enter the contact's Name and contact information.
- Select Yes if the contact should receive service notifications for all accounts they are a contact for.
- From the Service Notification Method drop down, indicate how they will receive notifications.
- Select Save when finished.
Notification Settings
Notification Setting
|
Description |
Receive Service Notifications
|
Optional setting that allow the account/site contact to receive service notifications to the method identified in the 'Service Notification Method' field.
|
Service Notification Method
|
If 'Receive Service Notifications' is set to 'Yes,' choose the preferred method for the contact to receive notifications.
|
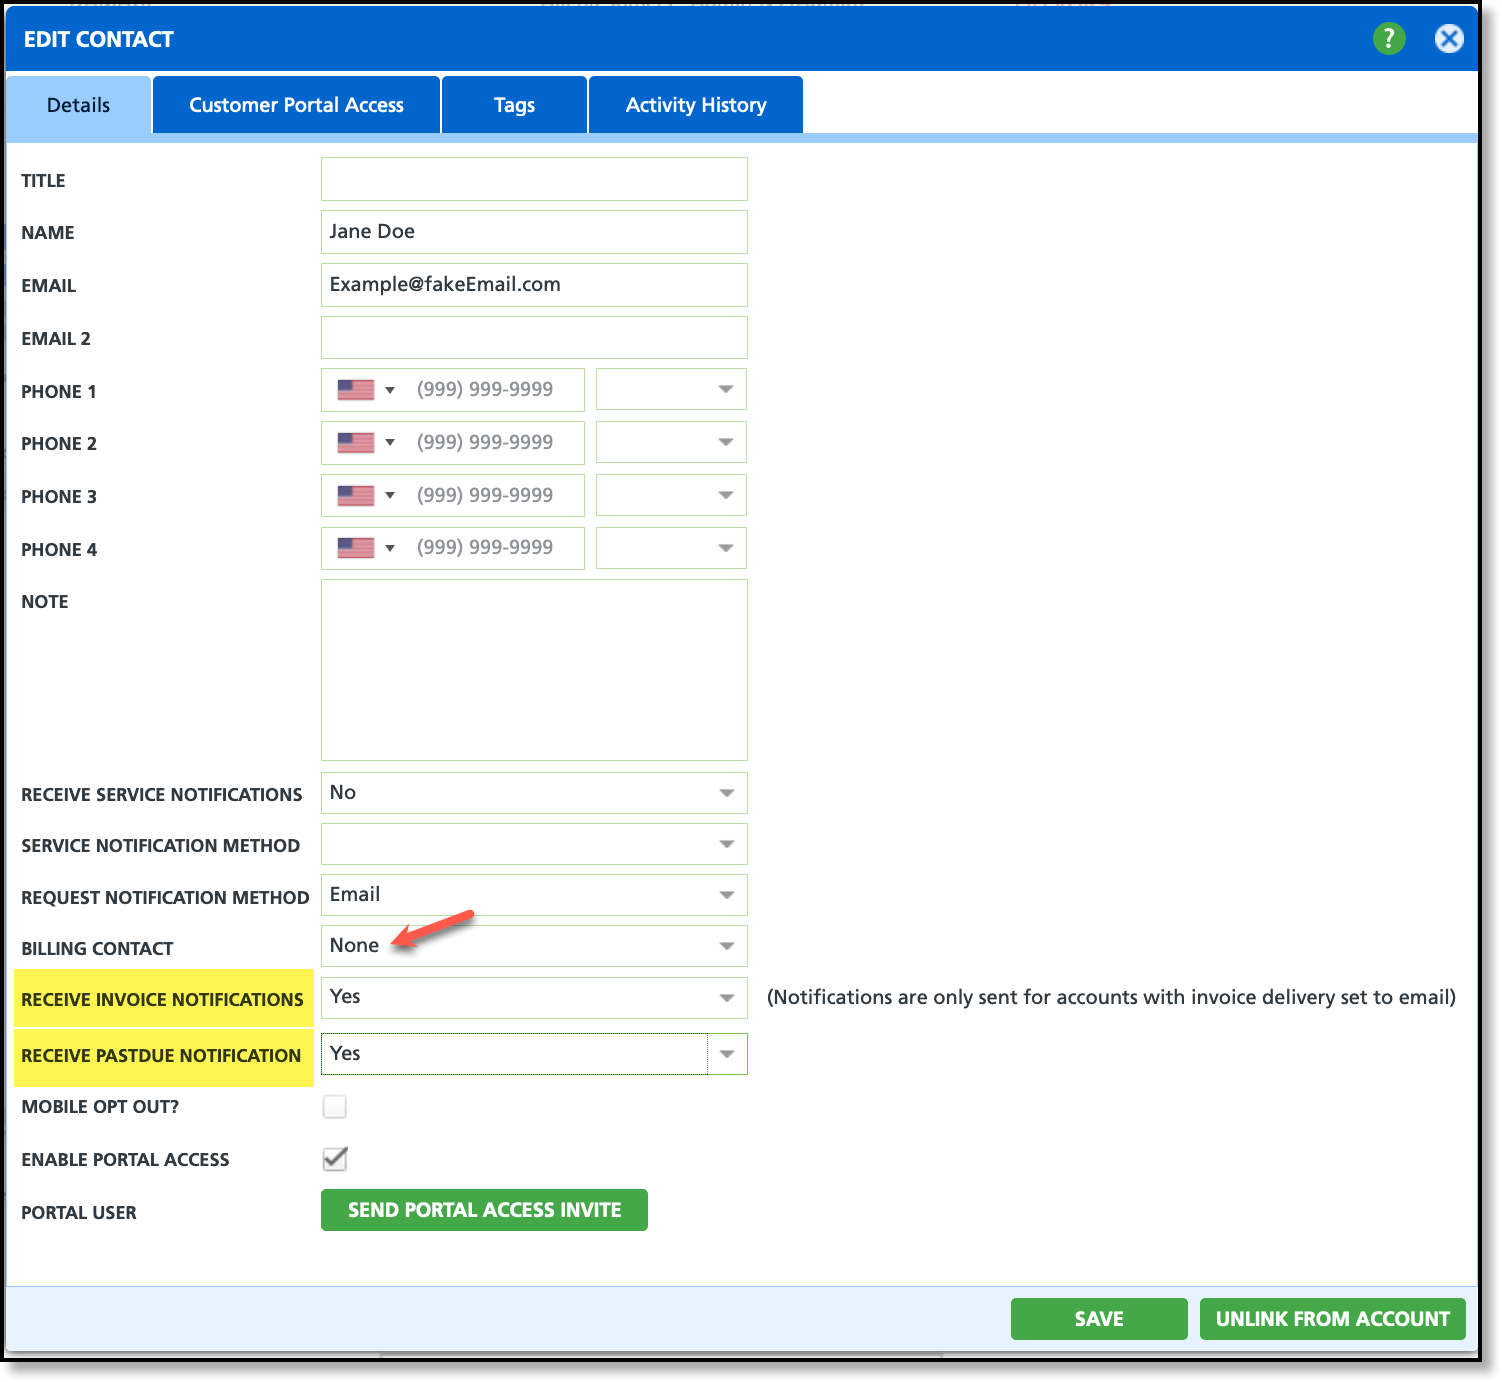
Receive Invoice Notifications
Only displays on Edit Contact screen
|
Option to allow anon-billing contact to receive invoice notifications. To set this up for a non-billing contact, the following is required:
- This field only displays IF 'None' is selected for the Billing Contact field and the contact link type is Account-level.
|
Receive Past Due Notification
Only displays on Edit Contact screen
|
Option to allow anon-billing contact to receive past due notifications. To set this up for a non-billing contact, the following is required:
- This field only displays IF 'None' is selected for the Billing Contact field and the contact link type is Account-level.
- The primary billing contact on the account must have their delivery option set to email. This setting ensures that additional non-billing contacts can also receive invoice notifications via email.
|
The Customer Portal Access tab designates which sites a contact on the account should have portal access to.
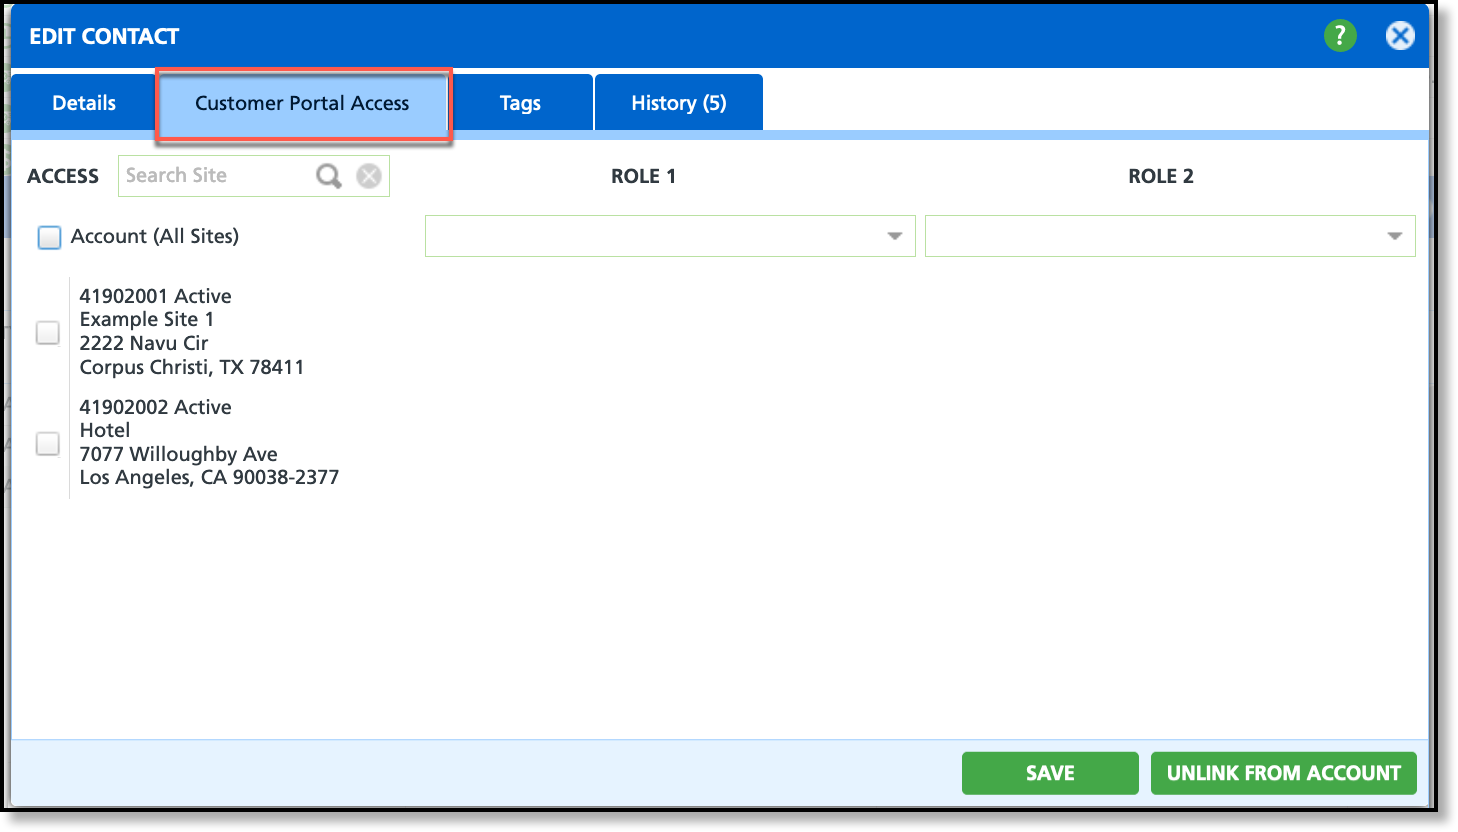
- Select the Customer Portal Access tab.
- Leave 'Account (All Sites)' selected and the user will have access to all sites belonging to the account. Otherwise, unselect the check box and select only the sites the user should have portal access to.
- Select Save when finished.
Tab: Tags
Tags are created in Setup > Sales > Tag Type and are only indicators, or flags for a contact.
Tab: History
The History tab provides a history of emails sent from the Customer Service screen to the contact. This does not include invoice emails sent from AR History.
Add a Non-Billing Contact
Add a non-billing contact to an account for handling non-billing inquiries.
Review the fields highlighted in yellow on this image. Required fields for a contact are name and either an email or a phone number that the contact can be reached at. Review additional fields and determine if the contact should also receive notifications and how they want to receive those notifications.
Allow a Non-Billing Contact to Receive Billing Notifications
Settings are available to send invoice and past-due notifications to non-billing contacts on an account. The requirements for this include:
- The account must have a billing contact.
- The billing contact must have their 'Request Notification Method' set to Email.
- The non-billing contact's setup should include:
- Valid email address.
- Billing Contact field set to 'No.'
- Receive Invoice Notifications and Receive Past-due Notification fields set to 'Yes,' dependent on which notifications they should receive.
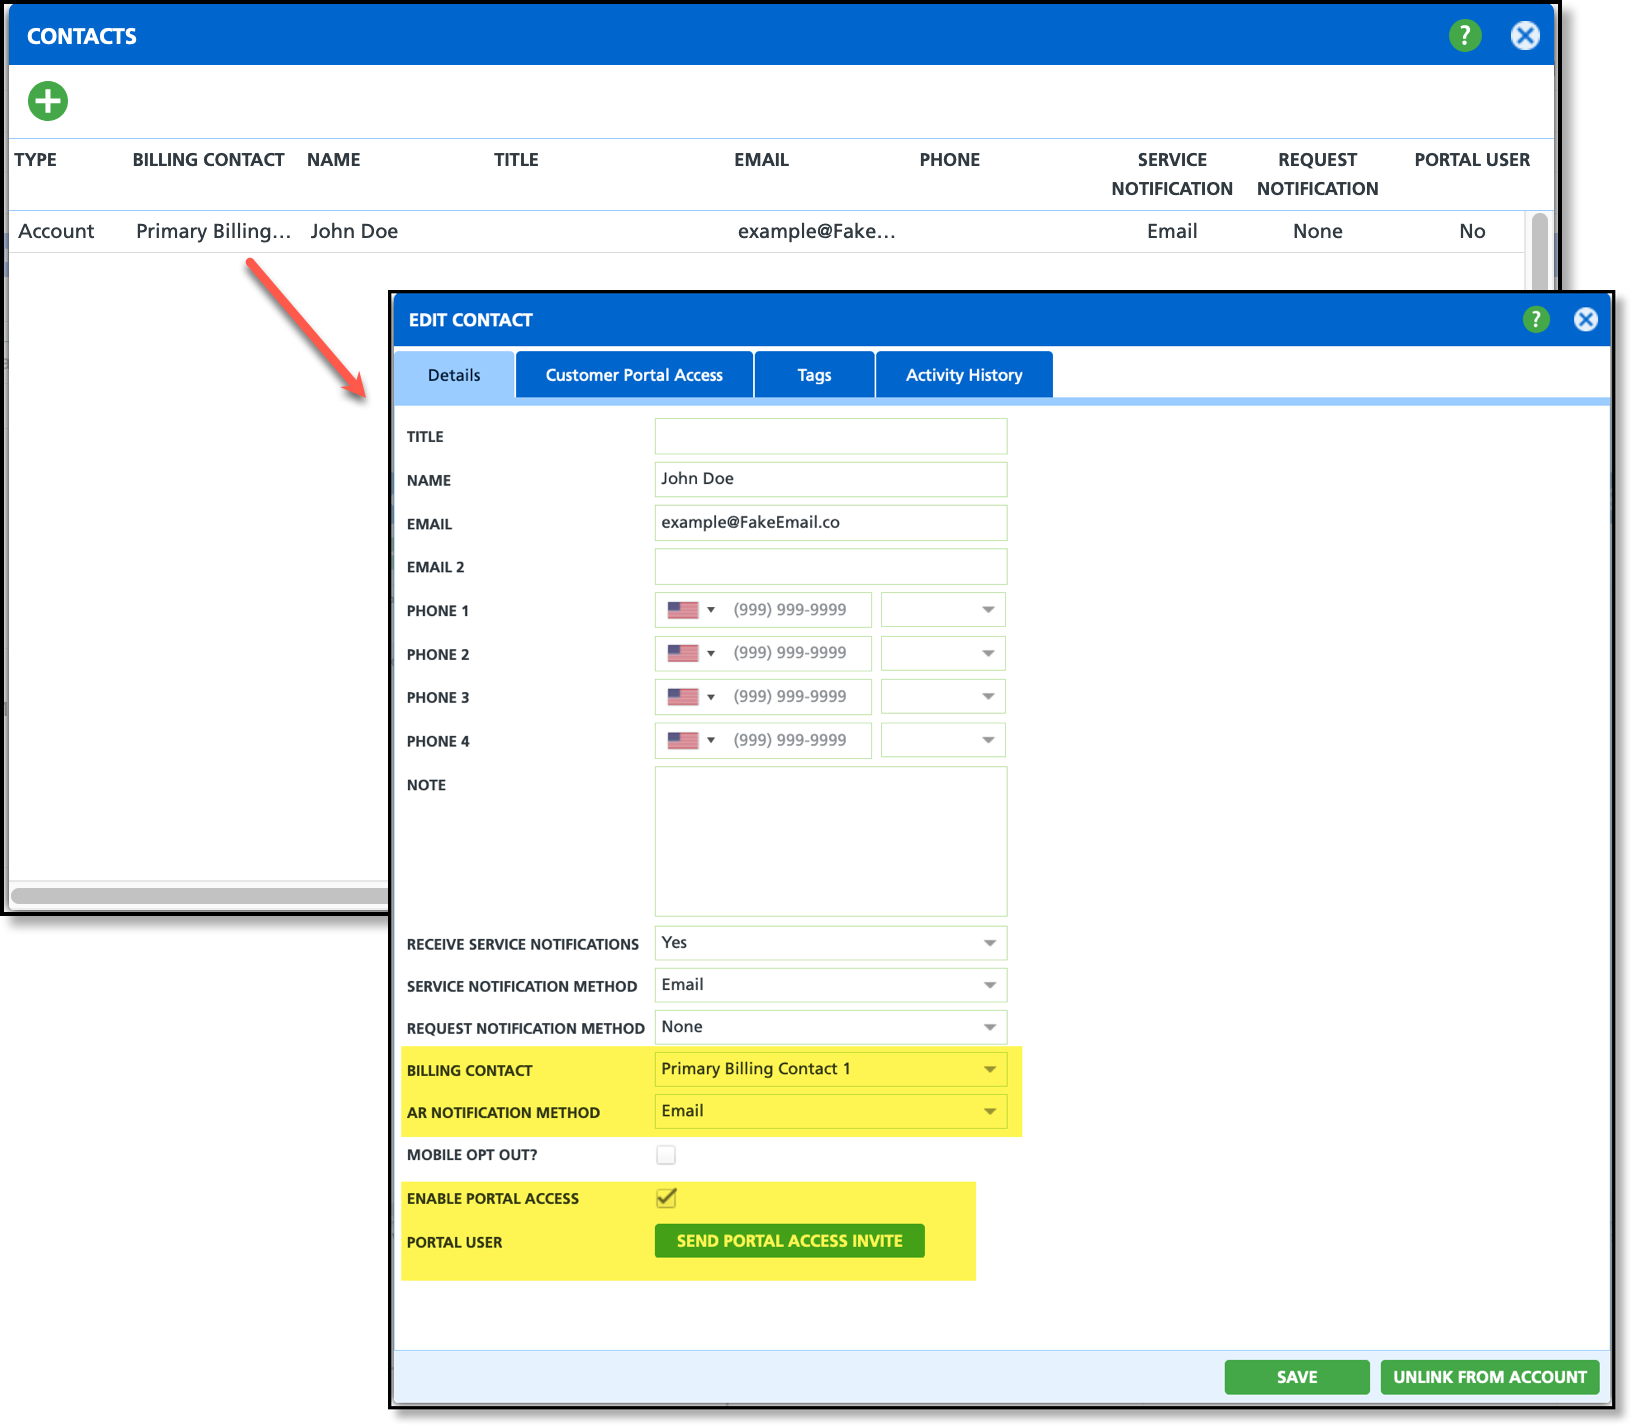
Add a Billing Contact
Add a billing contact to the account to manage billing inquiries and receive invoice notifications.
After saving a contact to an account, double-click the contact's name on the Contacts screen to open the Edit Contact popup editor. Unlike the Add Contact screen, the Edit Contact screen includes the Billing Contact identifier field and other fields specific to billing contacts. You can also decide whether to grant portal access to a billing contact, enabling them to process payments and manage auto-pay settings.
In the Account section of the Customer Service screen, select the 'View Contacts' icon to open the Contacts screen. Double-click on a contact to open the Edit Contact popup editor and make your changes.
Remove a Contact
In the Account section of the Customer Service screen, select the 'View Contacts' icon to open the Contacts screen. Double-click on a contact to open the Edit Contact popup editor where you can then unlink the contact from the account.
Granting Customer Portal Access to Contacts
After adding a contact to an account or site, you can grant them portal access directly from the Edit Contacts screen. Configure their access as an account-level contact or restrict it to specific sites, ensuring they only see what you want them to. Additional information regarding system setup requirements for Customer Portal can be found here: Customer Portal Setup.
Optional setup is available to automatically send portal invitations to new contacts and to allow customers to self-register for a Customer Portal account, following the process outlined in this article: Setting Up Portal Access for Contacts
Details (Tab)
Use the Details tab to add a contact and enable their portal access. The fields on the Details tab will update once the contact is added, saved, and reopened. This includes the Send Portal Access Invite button, which requires the contact's email address to send the portal invite.

Customer Portal Access (Tab)
Use the Customer Portal Access tab to manage a contact’s access level. Access can be granted at the account level or restricted to the site level.
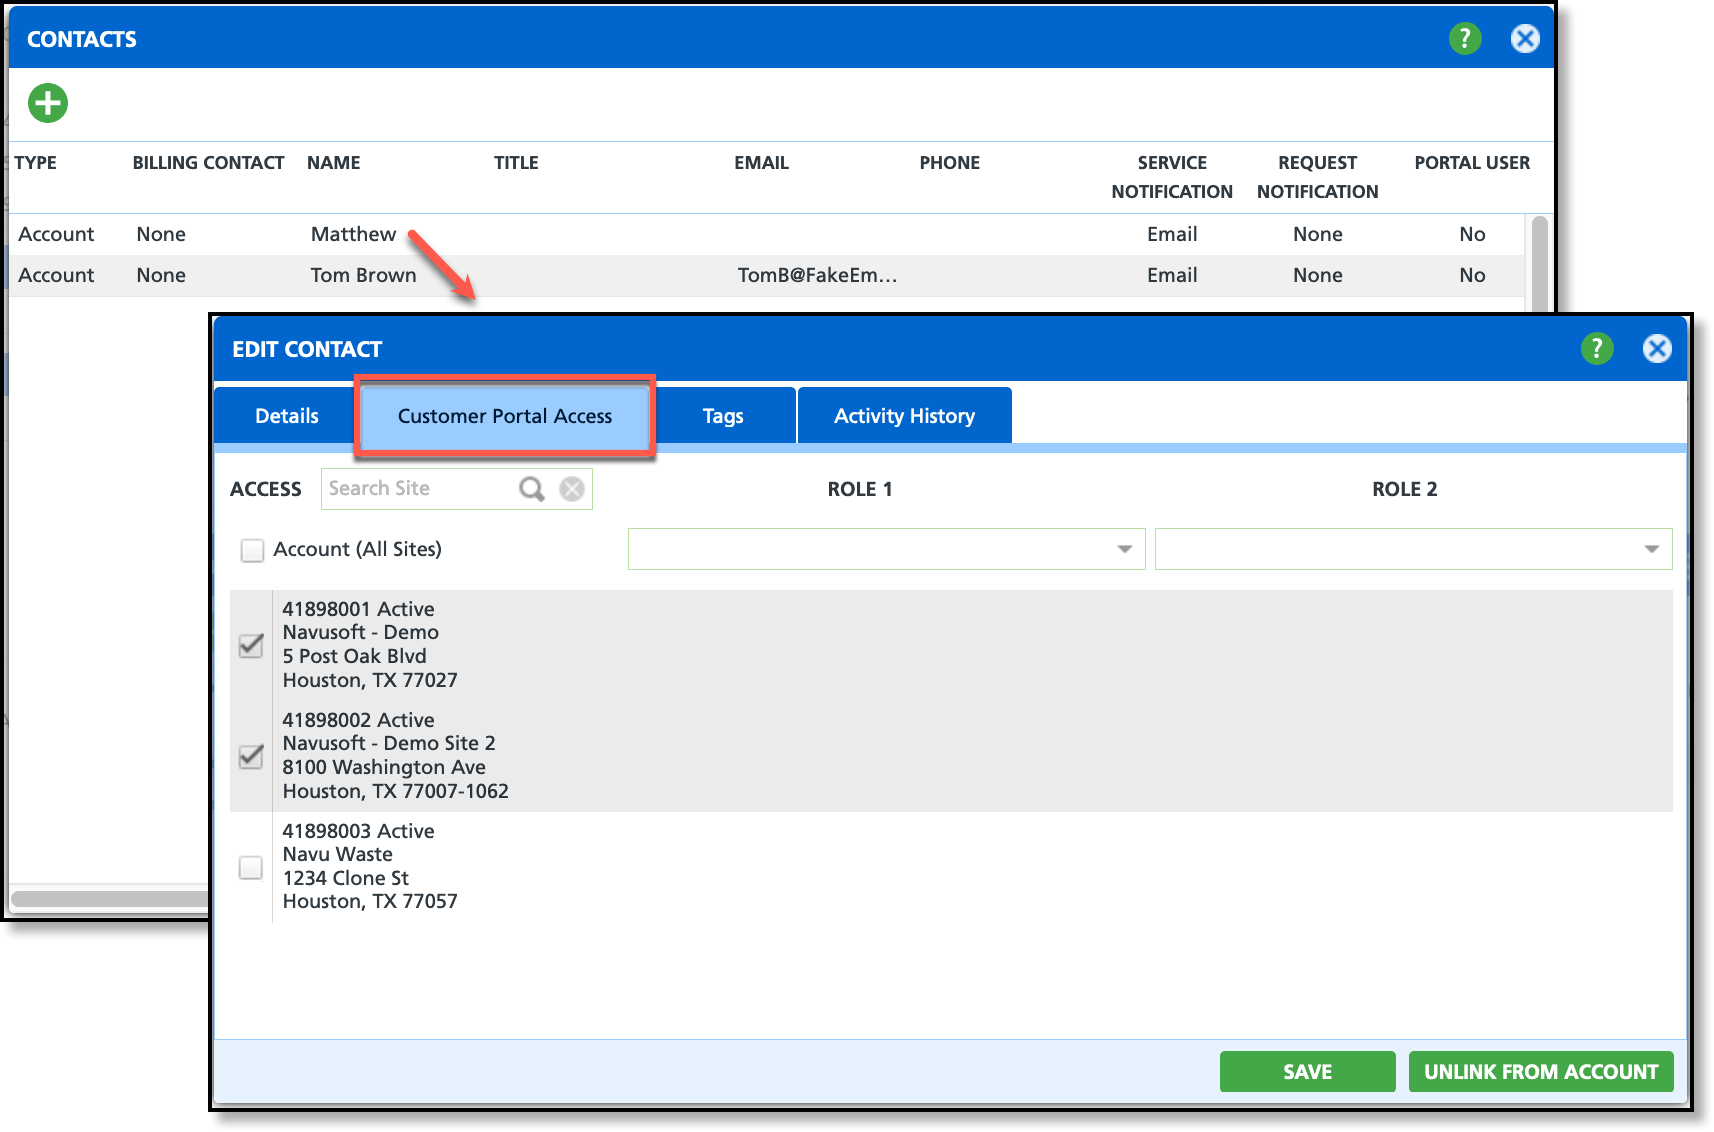
Grant Access to All Sites
To grant a contact access to all sites that belong to the account, select the Account (All Sites) checkbox.
Grant Limited Site Access
To restrict a contact's portal access to specific sites, deselect the Account (All Sites) checkbox and check only the boxes for the sites the contact is permitted to access.
Related Articles
Setting Up Customer Portal Access for Contacts
Customer Portal Setup


