Current (Tab)- Modify a Route
Last Modified on 06/25/2026 7:19 am PDT
Pathway: Operations > Route Management > Current (Tab)
ChatGPT said:
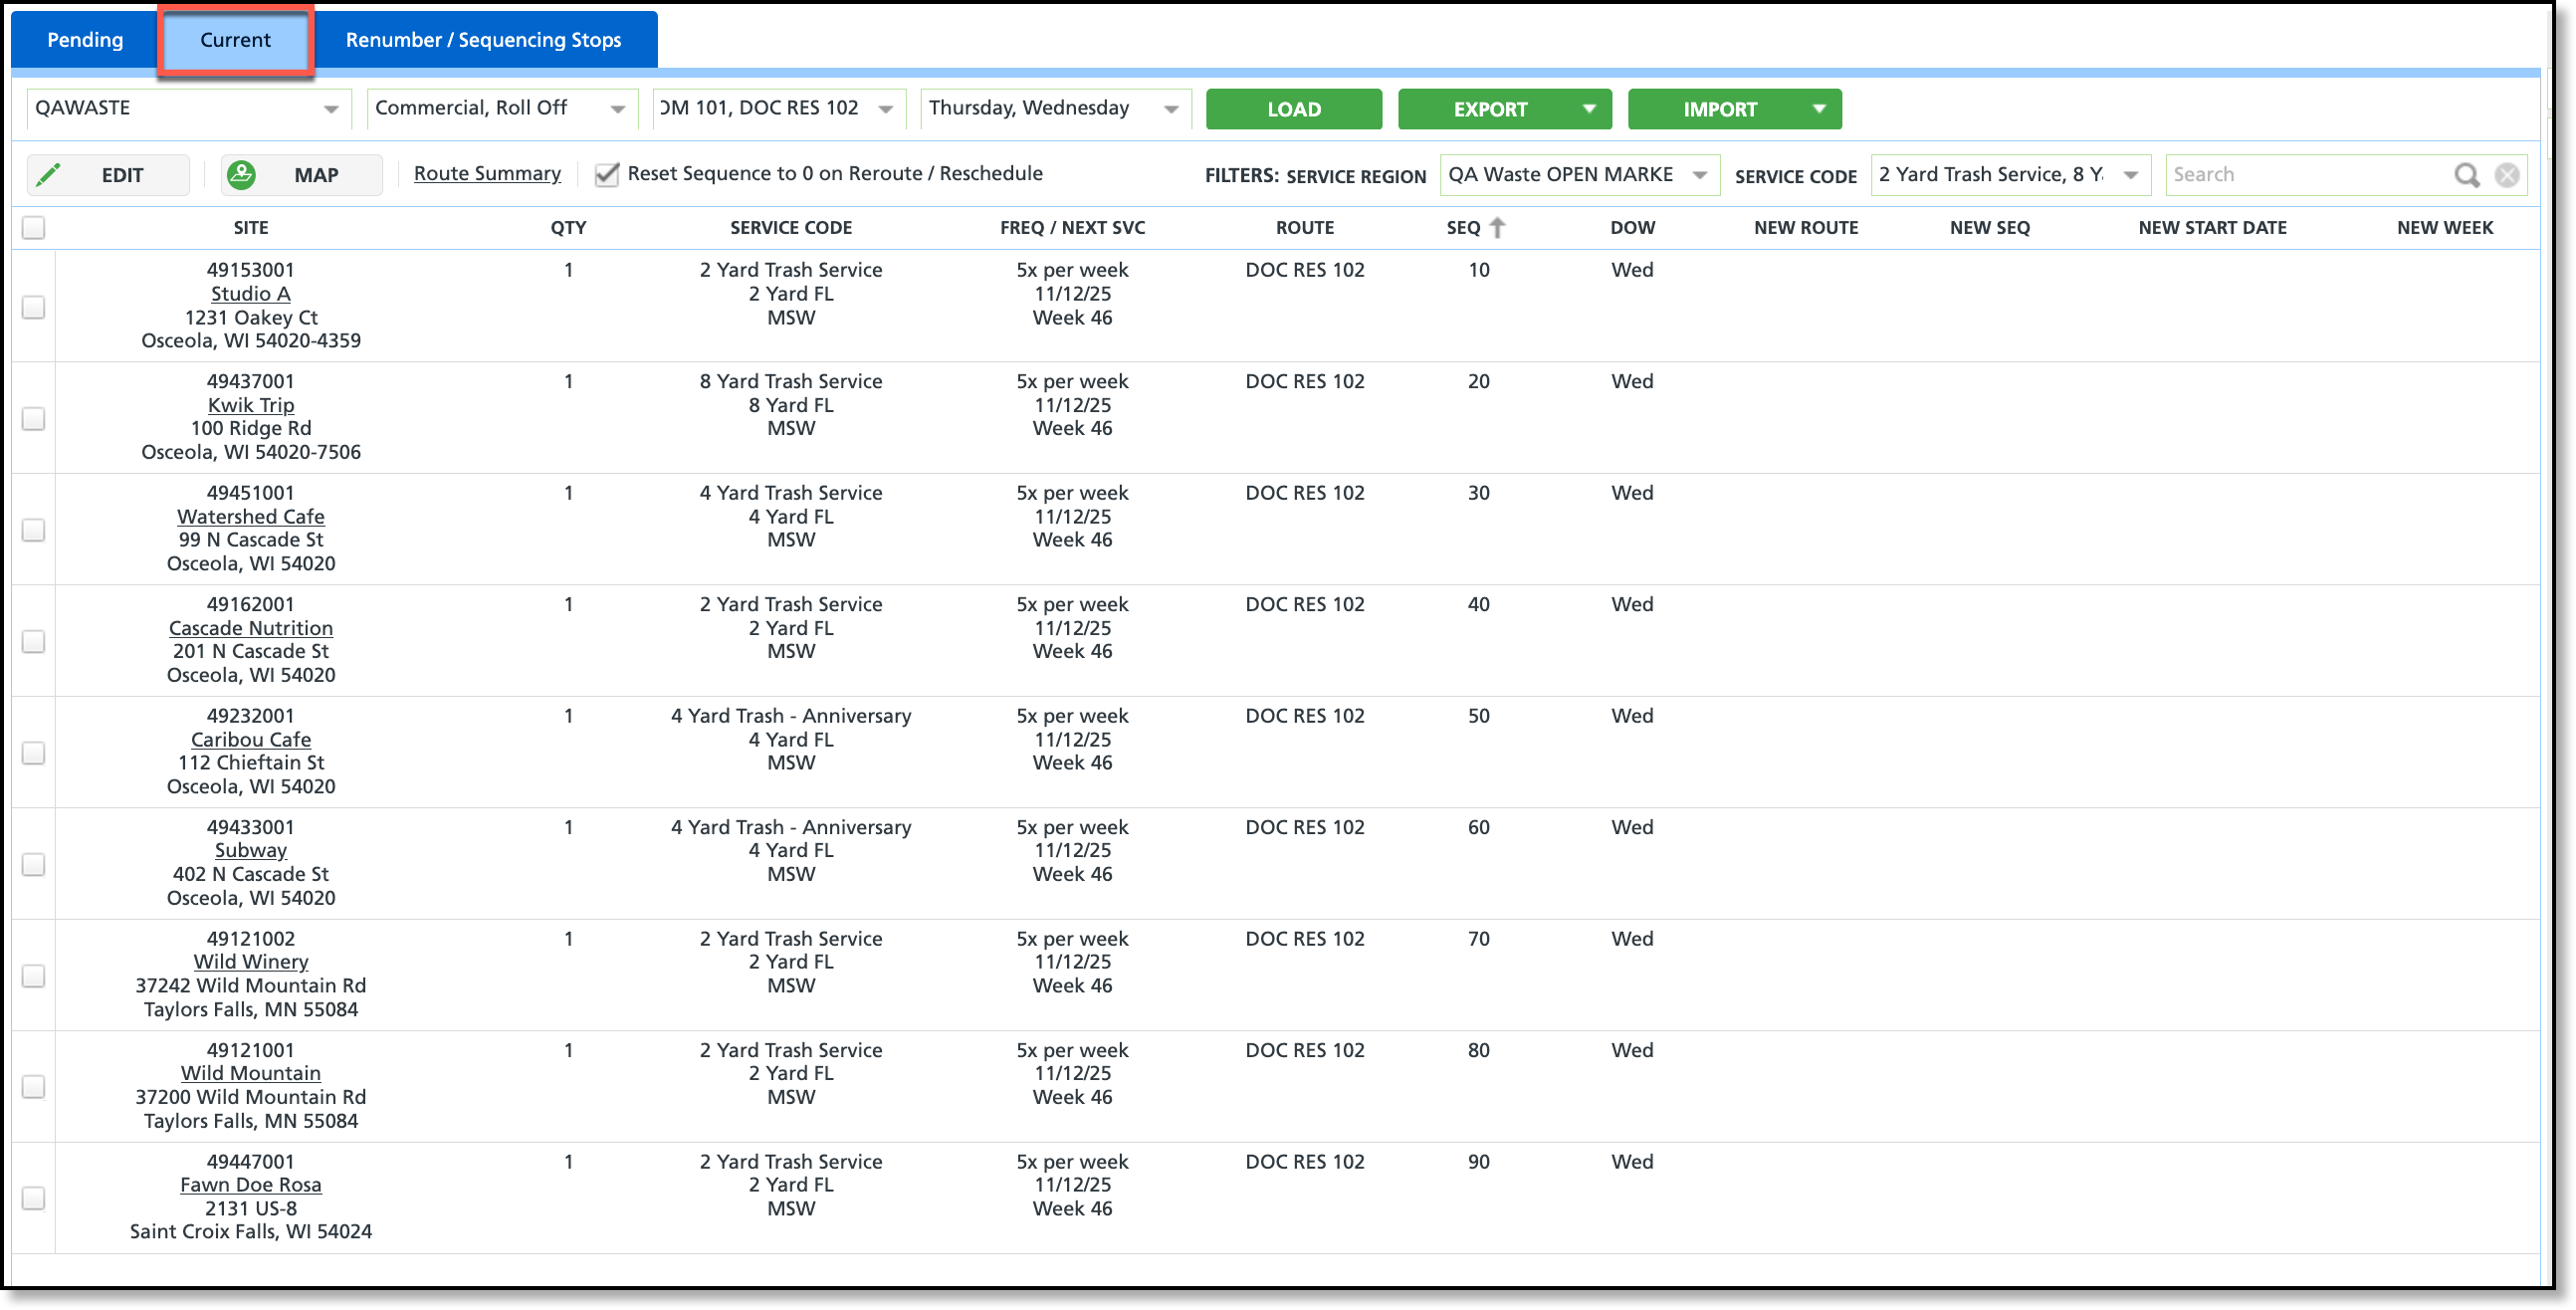
The Current tab on the Operations > Route Management screen displays a list of service locations (stops) assigned to a route. Changes made to a stop from this tab are permanent. For one-time changes, use the Dispatch tool under Operations instead.
Permissions
The following permissions are required to process a route change for a location:
| Permission ID | Permission Name |
| 87 | Route Management |
| 445 | Import/Export Current Routes from Route Management Note: If a user does not have this permission, the Import/Export buttons are hidden from view. |
Process a Route Change
From the Current tab, users can quickly make route modifications to one or multiple locations at a time using features available on the screen.
Before making changes, select the Route Summary link to review the distribution of services across all routes. This will help to maintain a balance when assigning stops to new routes.
- Select from the following required screen filters. Additional filters, Service Region and Service Code, become available once the results have loaded on the screen.
- Select the Division you would like to review stops for.
- Select a Line of Business. Allows for multi-selection.
- Select a Route. Allows for multi-selection.
- Select a Weekday. Allows for multi-selection.
- Click Load and the screen will load stops matching the selected filter criteria.
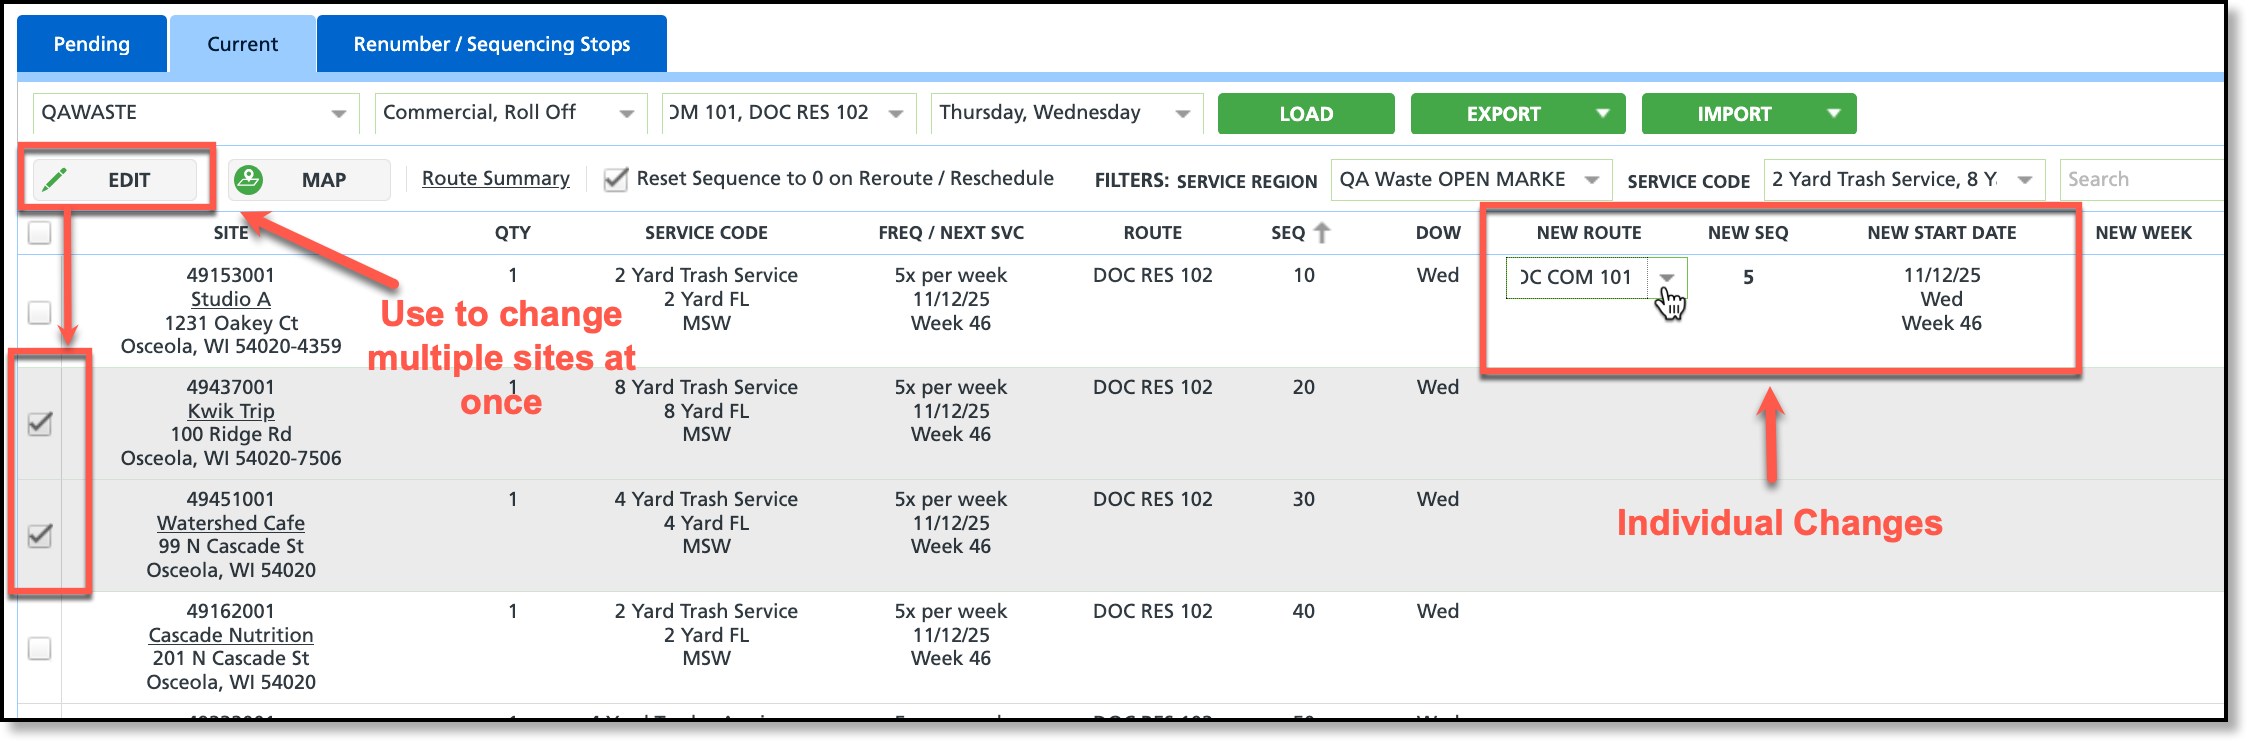
- Assign a new route to a site using one of the following methods:
- Option 1 - Apply a route change to multiple sites:
- Select the checkbox next to the site(s) you want to update, then click Edit. This opens the Edit Site Service Schedule pop-up editor, where you can enter a new route and effective date. The changes will apply to all selected sites.
- Option 2- Apply a route change to a single site:
- Click in the New Route column for a site, then select a new route from the drop-down list.
- Click Post Routing Change to update the location(s).
Process a Route Change Using Current Route Map
From the Current tab, users can quickly make route modifications to one or multiple sites at the same time using the Current Route Map feature.
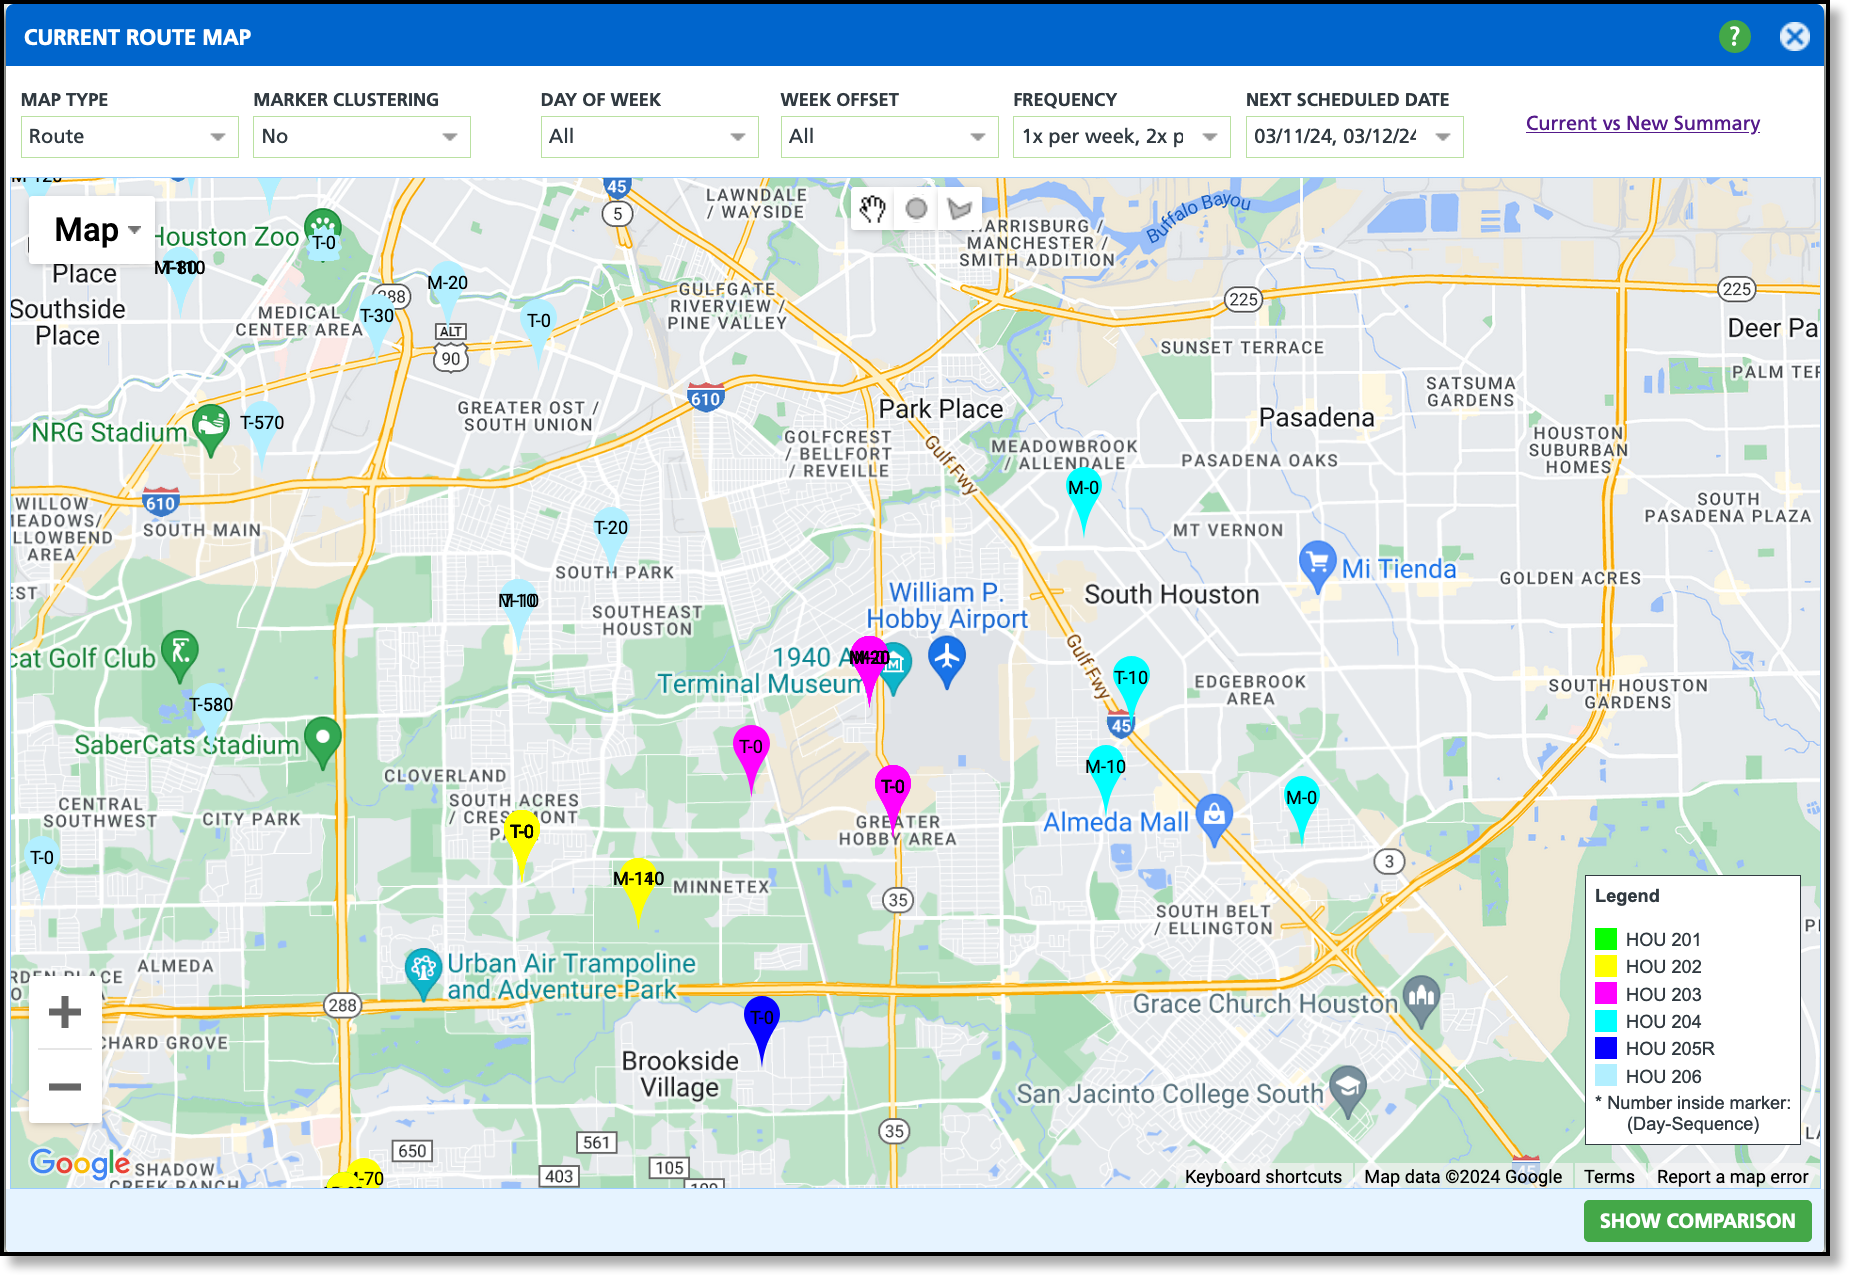
Generate a Map

- Make a selection from the following screen filters:
- Select the Division you would like to review stops for.
- Select a Line of Business. Allows for multi-selection.
- Select a Route. Allows for multi-selection.
- Select a Weekday. Allows for multi-selection.
- Click Load and the screen will load stops matching the selected filter criteria.
- Select the check box to the left of the site(s) you would like to view on the map.
- Click on the Map button to display the Current Route Map in a popup window.
Make a Route Change to Multiple Locations
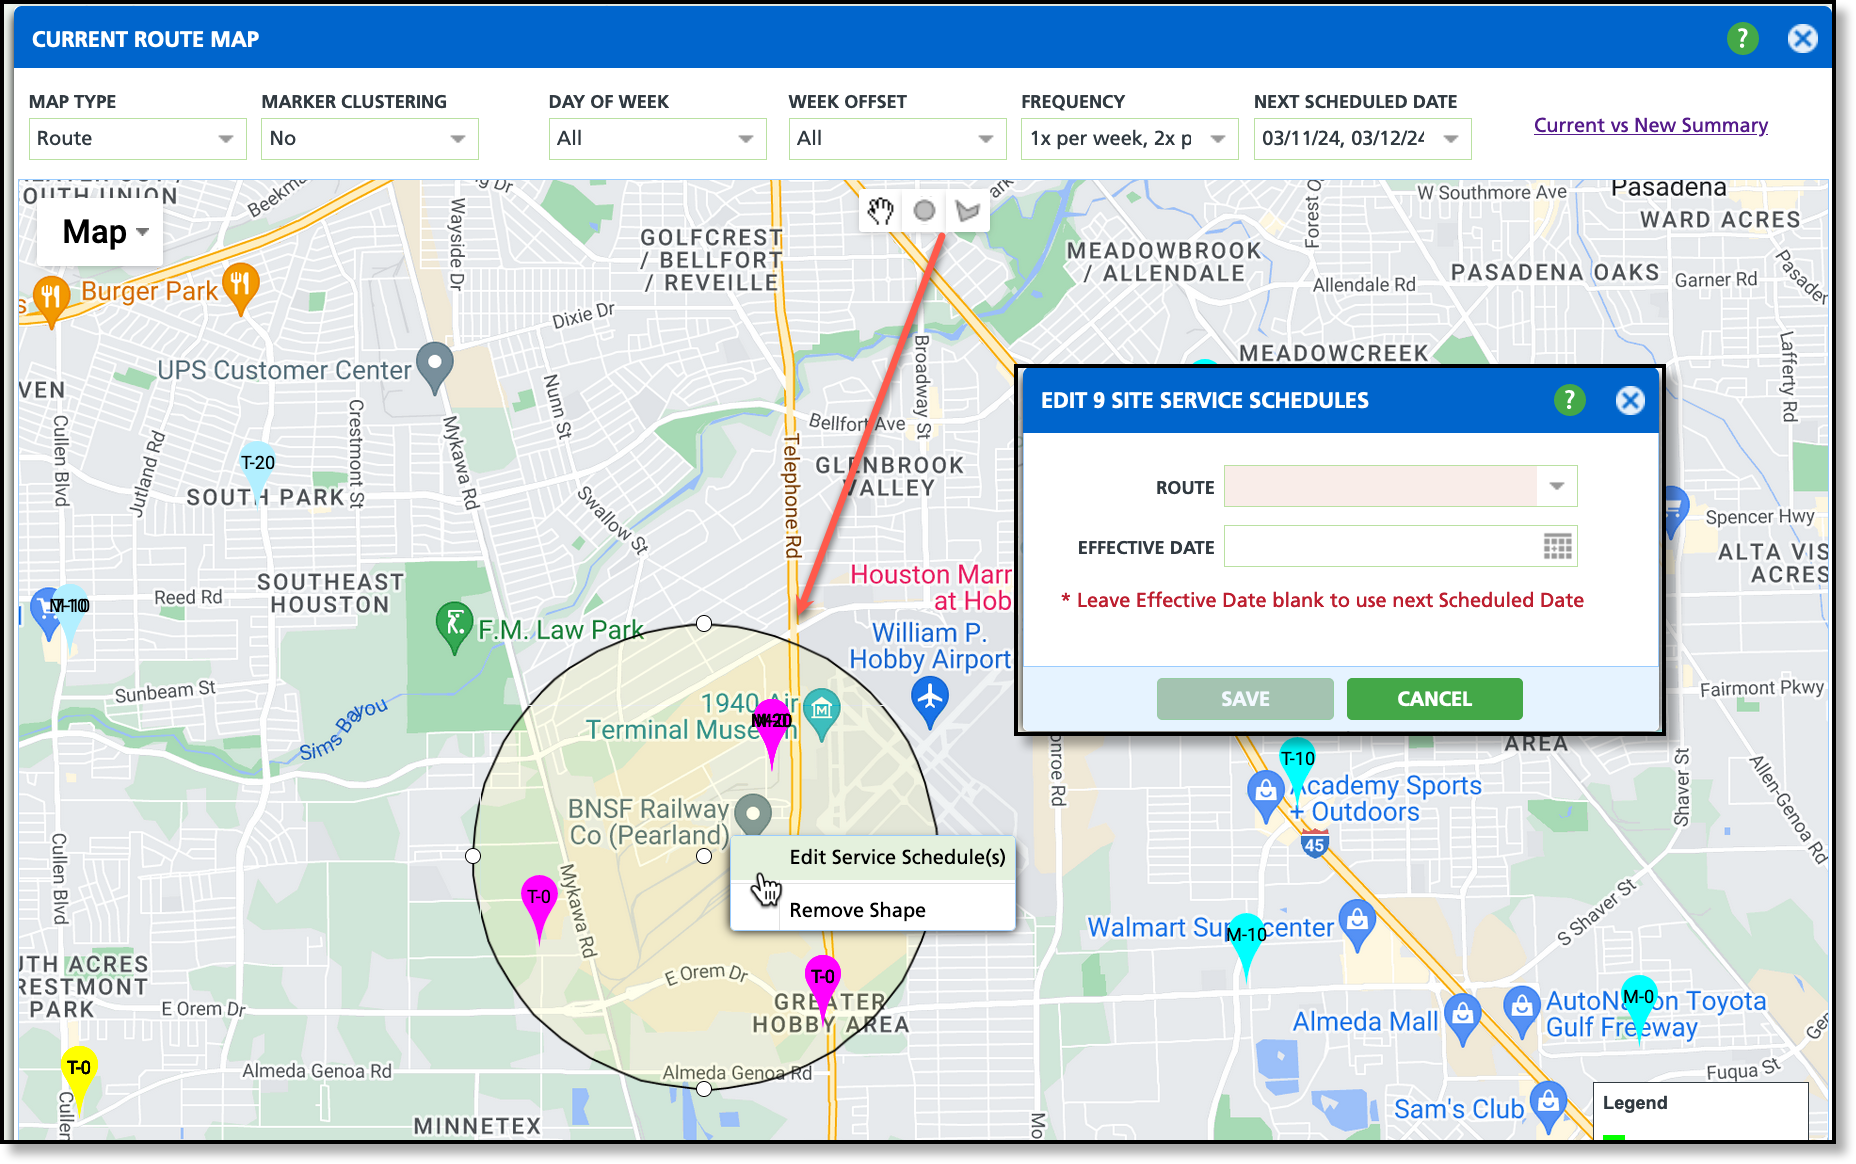
- Use one of the available radius tools to draw a radius around the sites you want to update with a new route.
- Right-click anywhere within the radius and select Edit Site Service Schedule(s).
- Select a Route from the Edit Site Service Schedule editor that displays.
- Enter an Effective Date. Leave the Effective Date field blank and the location's next scheduled service date will apply.
- Select Save and all service locations within the radius will update to the new route.
- To remove a a radius, right click within it and select "Remove Shape."
Make a Route Change to a Single Location
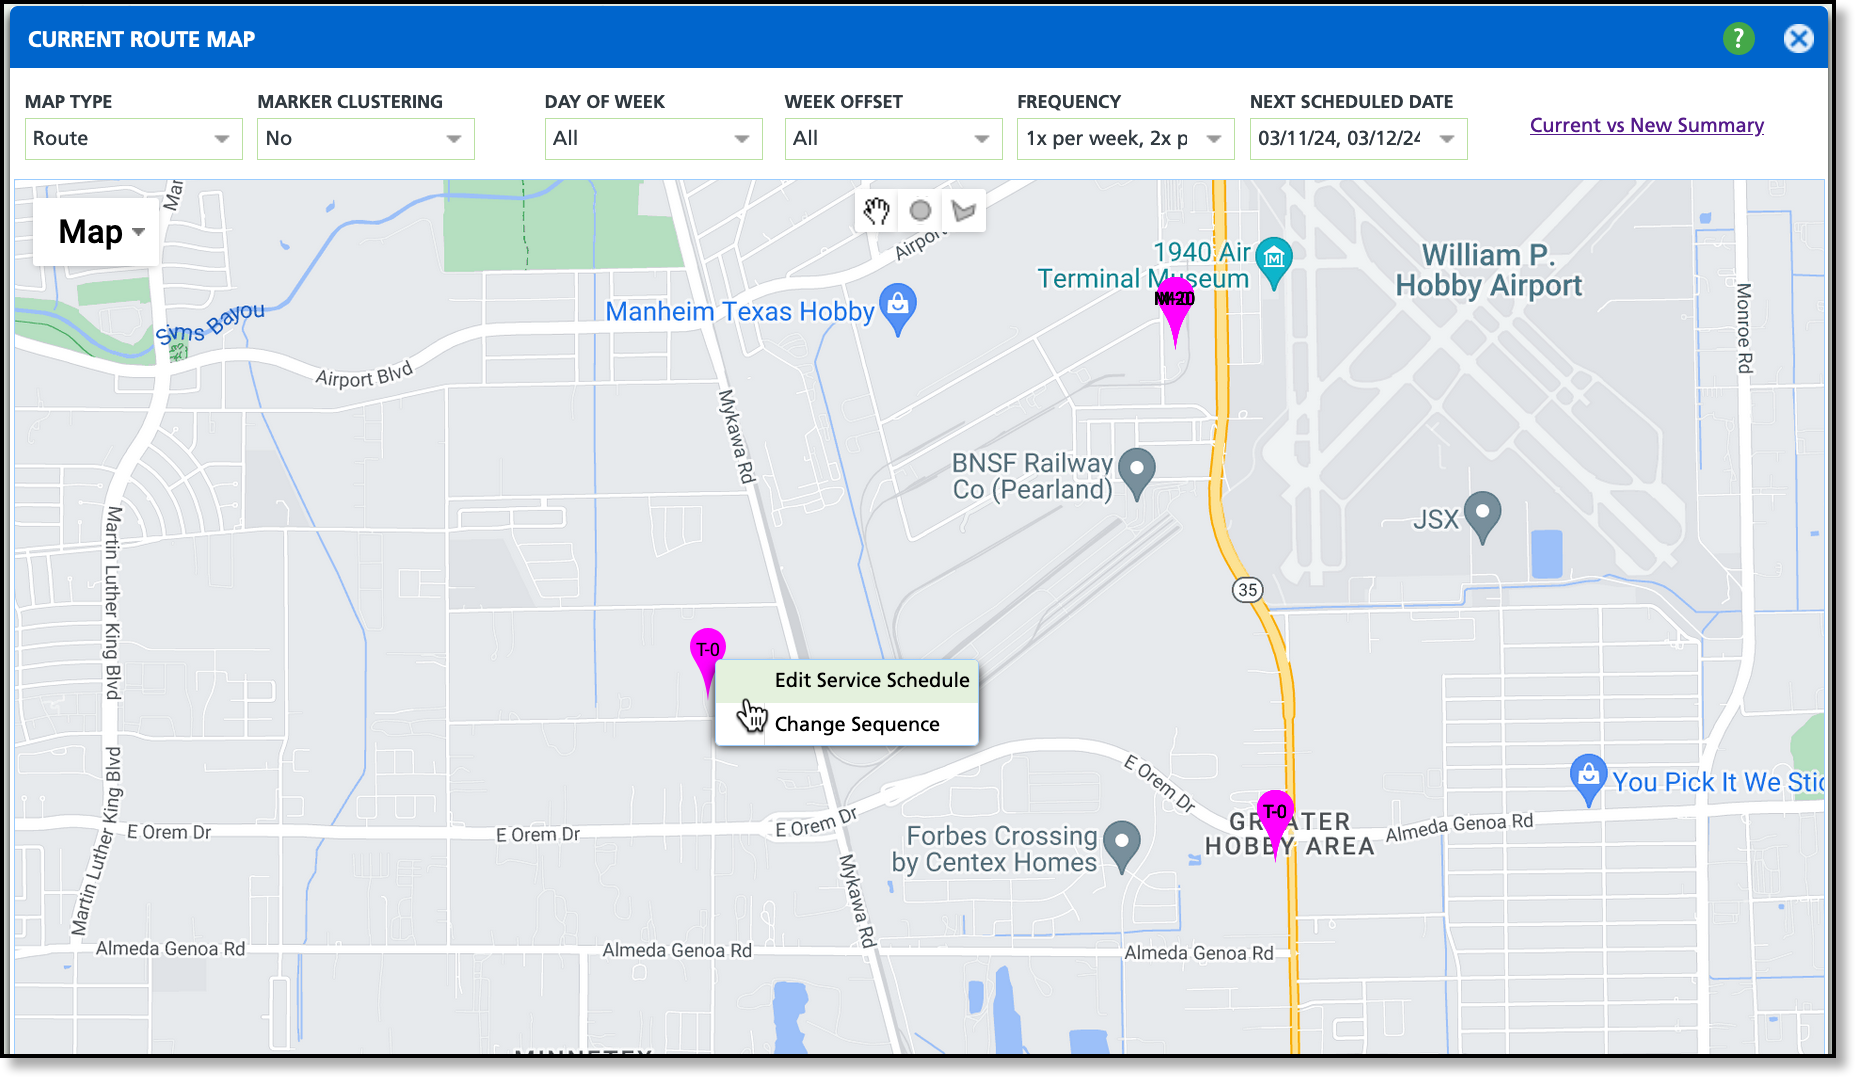
- Right-click on the pin for the service location you are modifying.
- Select Edit Service Schedule.
- Select a Route from the Site Service Schedules editor that displays.
- Enter an Effective Date. Leave the Effective Date field blank and the location's next scheduled service date will apply.
- Select Save and the location will be updated.
Export and Import
Use the Export and Import feature to modify routes externally, then import them back into Route Management to post the routing changes in the system. Refer to the Export/Import article for key import logic and step-by-step instructions.
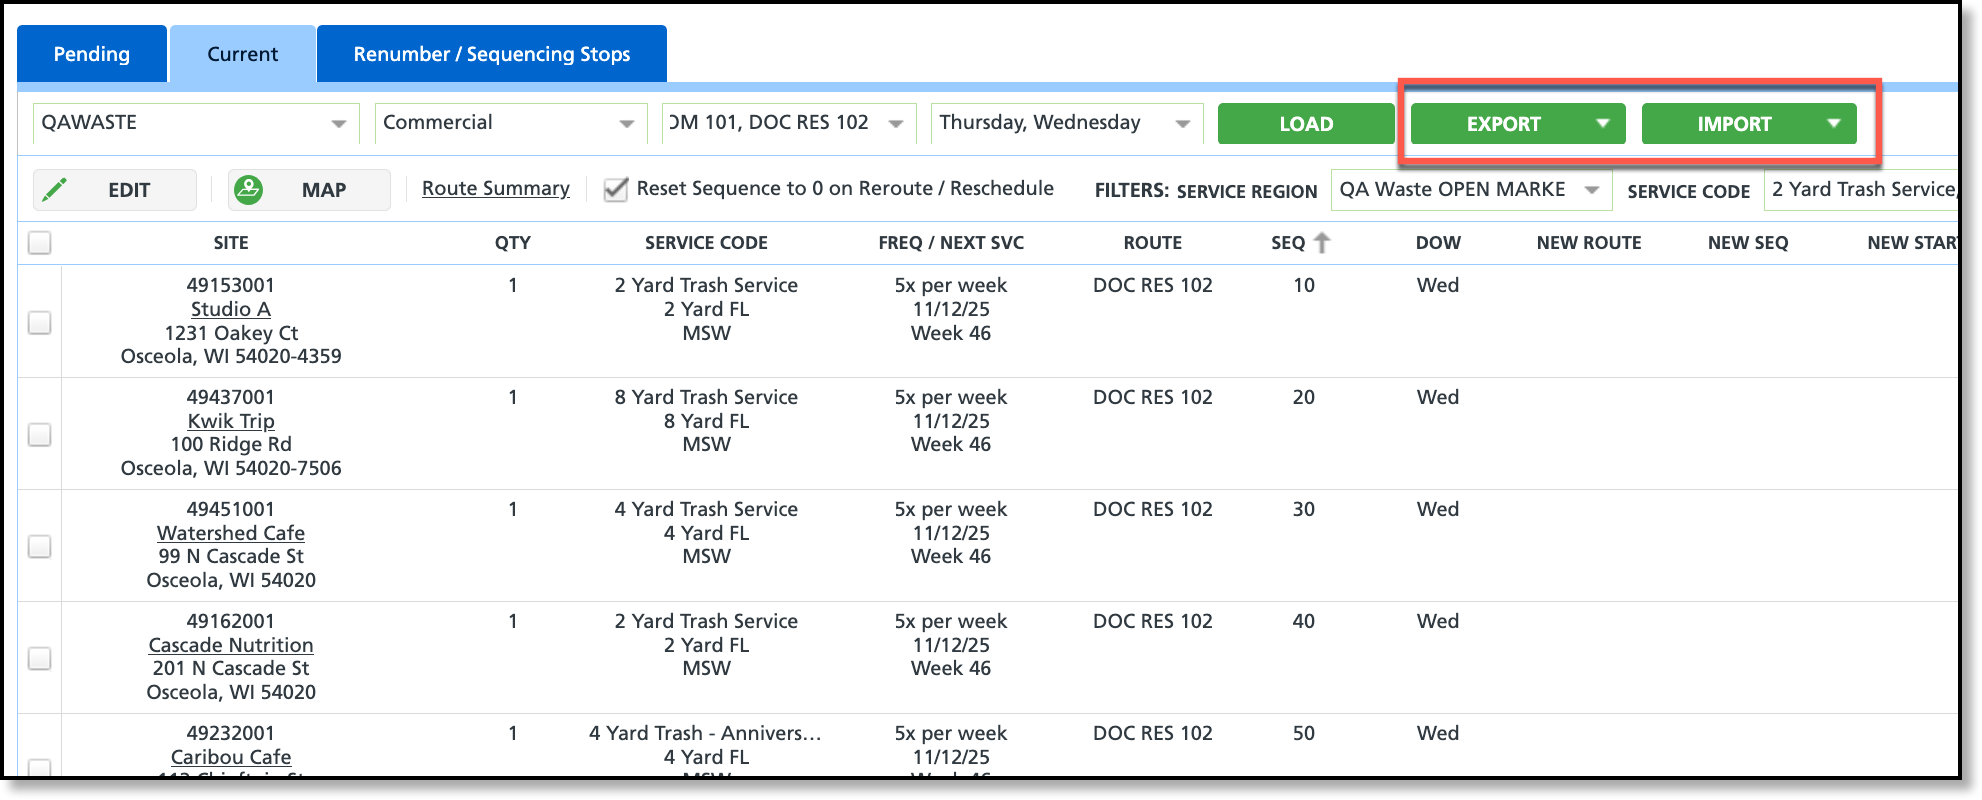
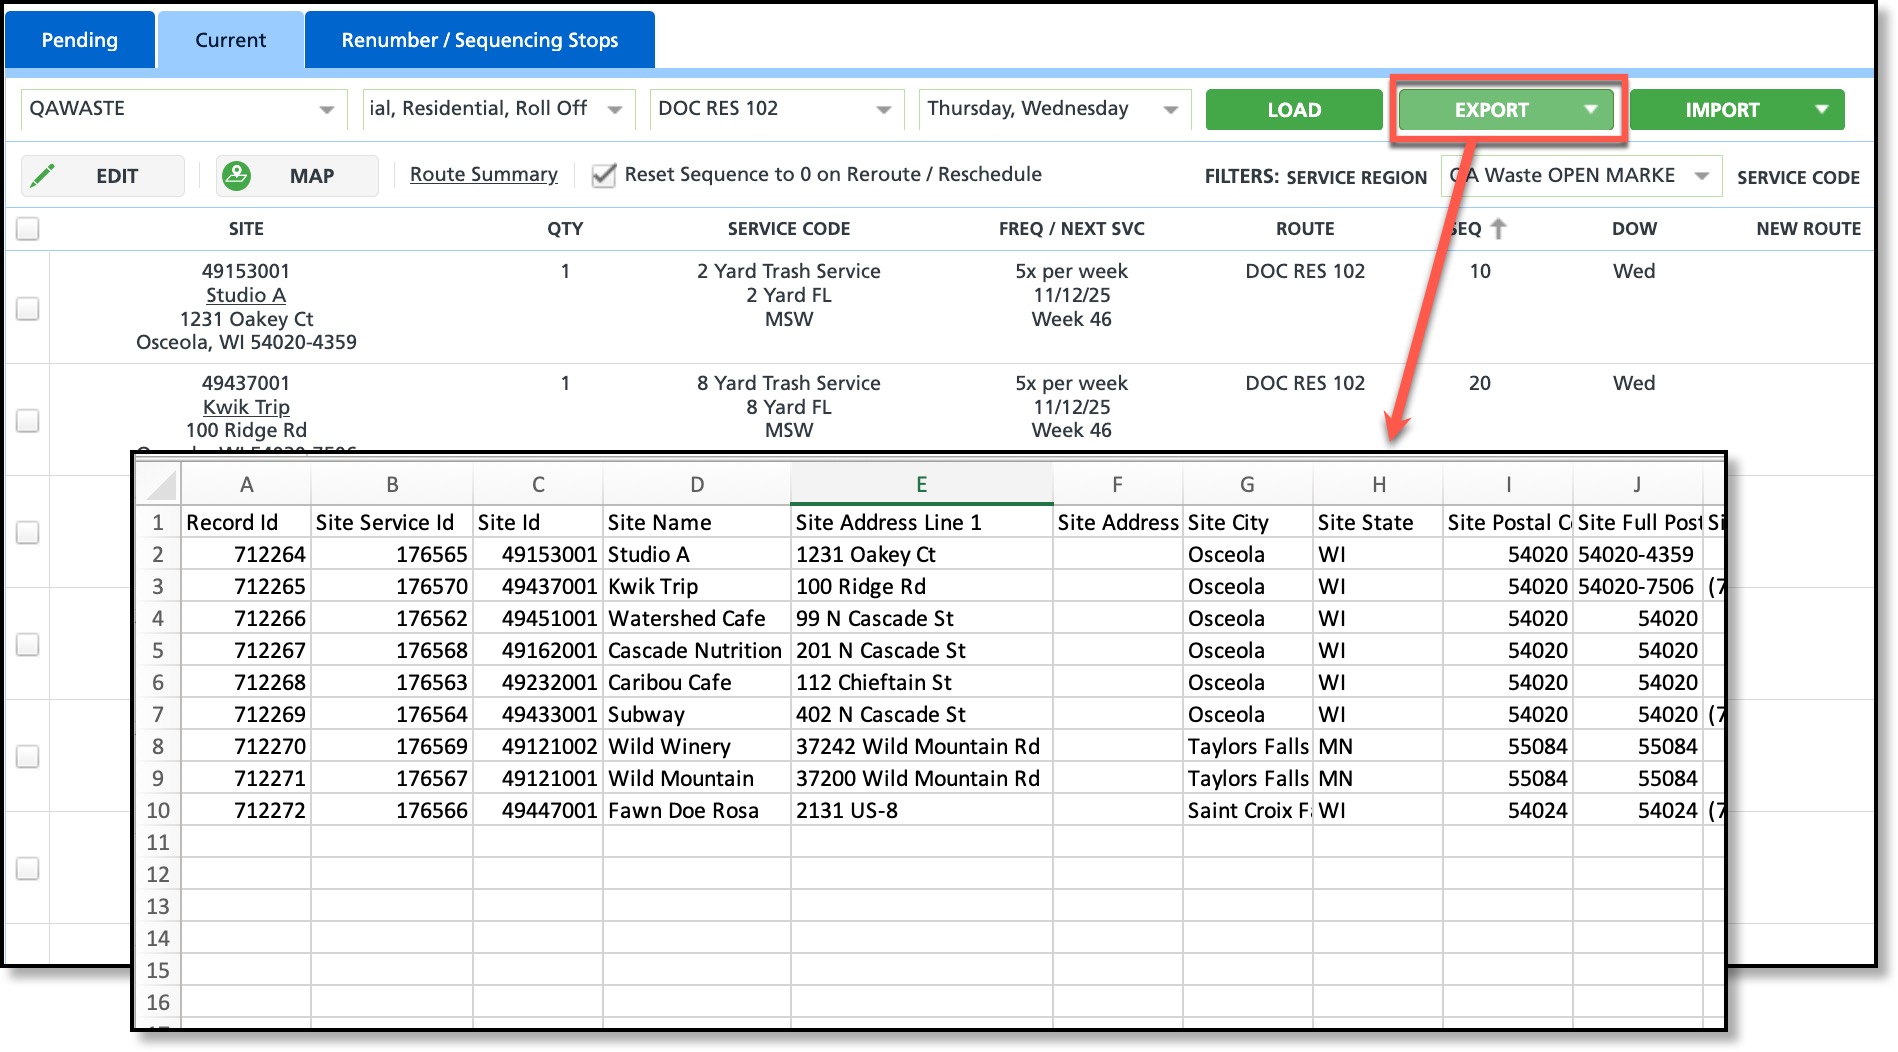
Export
Filter the screen to load only the routes intended for export. Once the screen loads, select the export option that aligns with the process. The data for each service location will be exported in .csv format, allowing for route information edits.
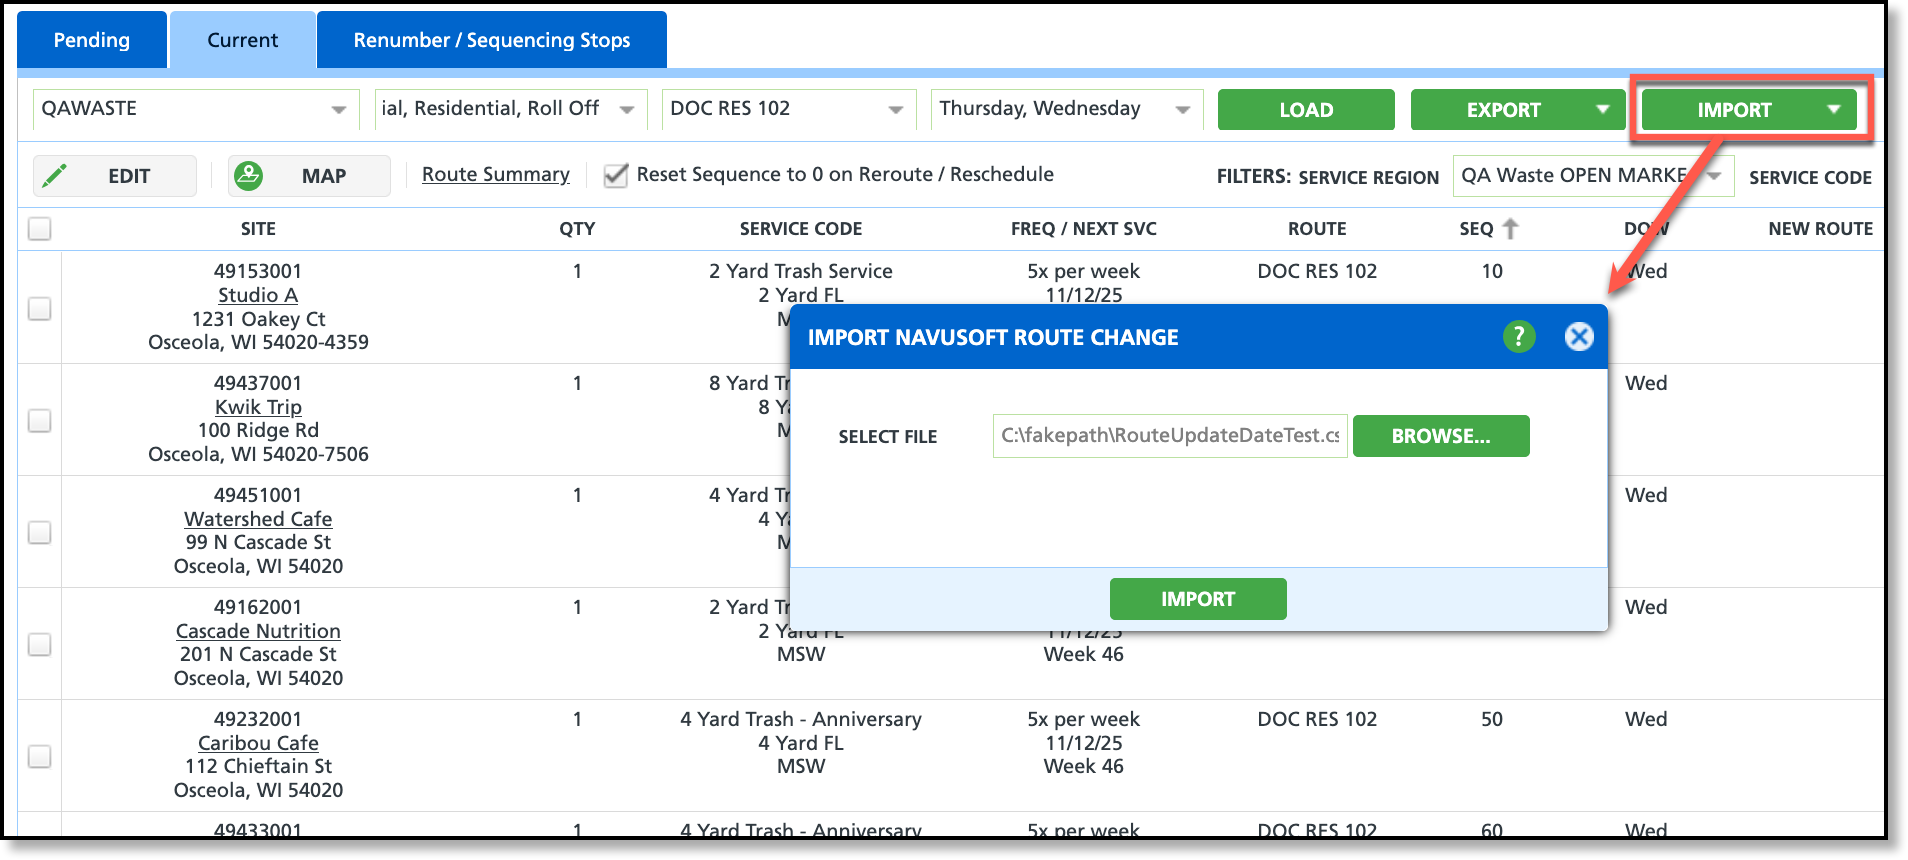
Import
After all route edits are complete, save the file and import it back into Route Management using the Import feature. Import logic will map the revisions based on the Route ID found in the file. A blue notification icon will display when the import is complete. Imported changes are applied to the affected routes once "Post Routing Changes" is selected.
File format requirement: CSV
Related Articles
Route Management Overview
Pending Tab
Re-Number Tab
Export/Import


