Temporary Services - Setup and Application
Last Modified on 10/24/2024 9:59 am PDT
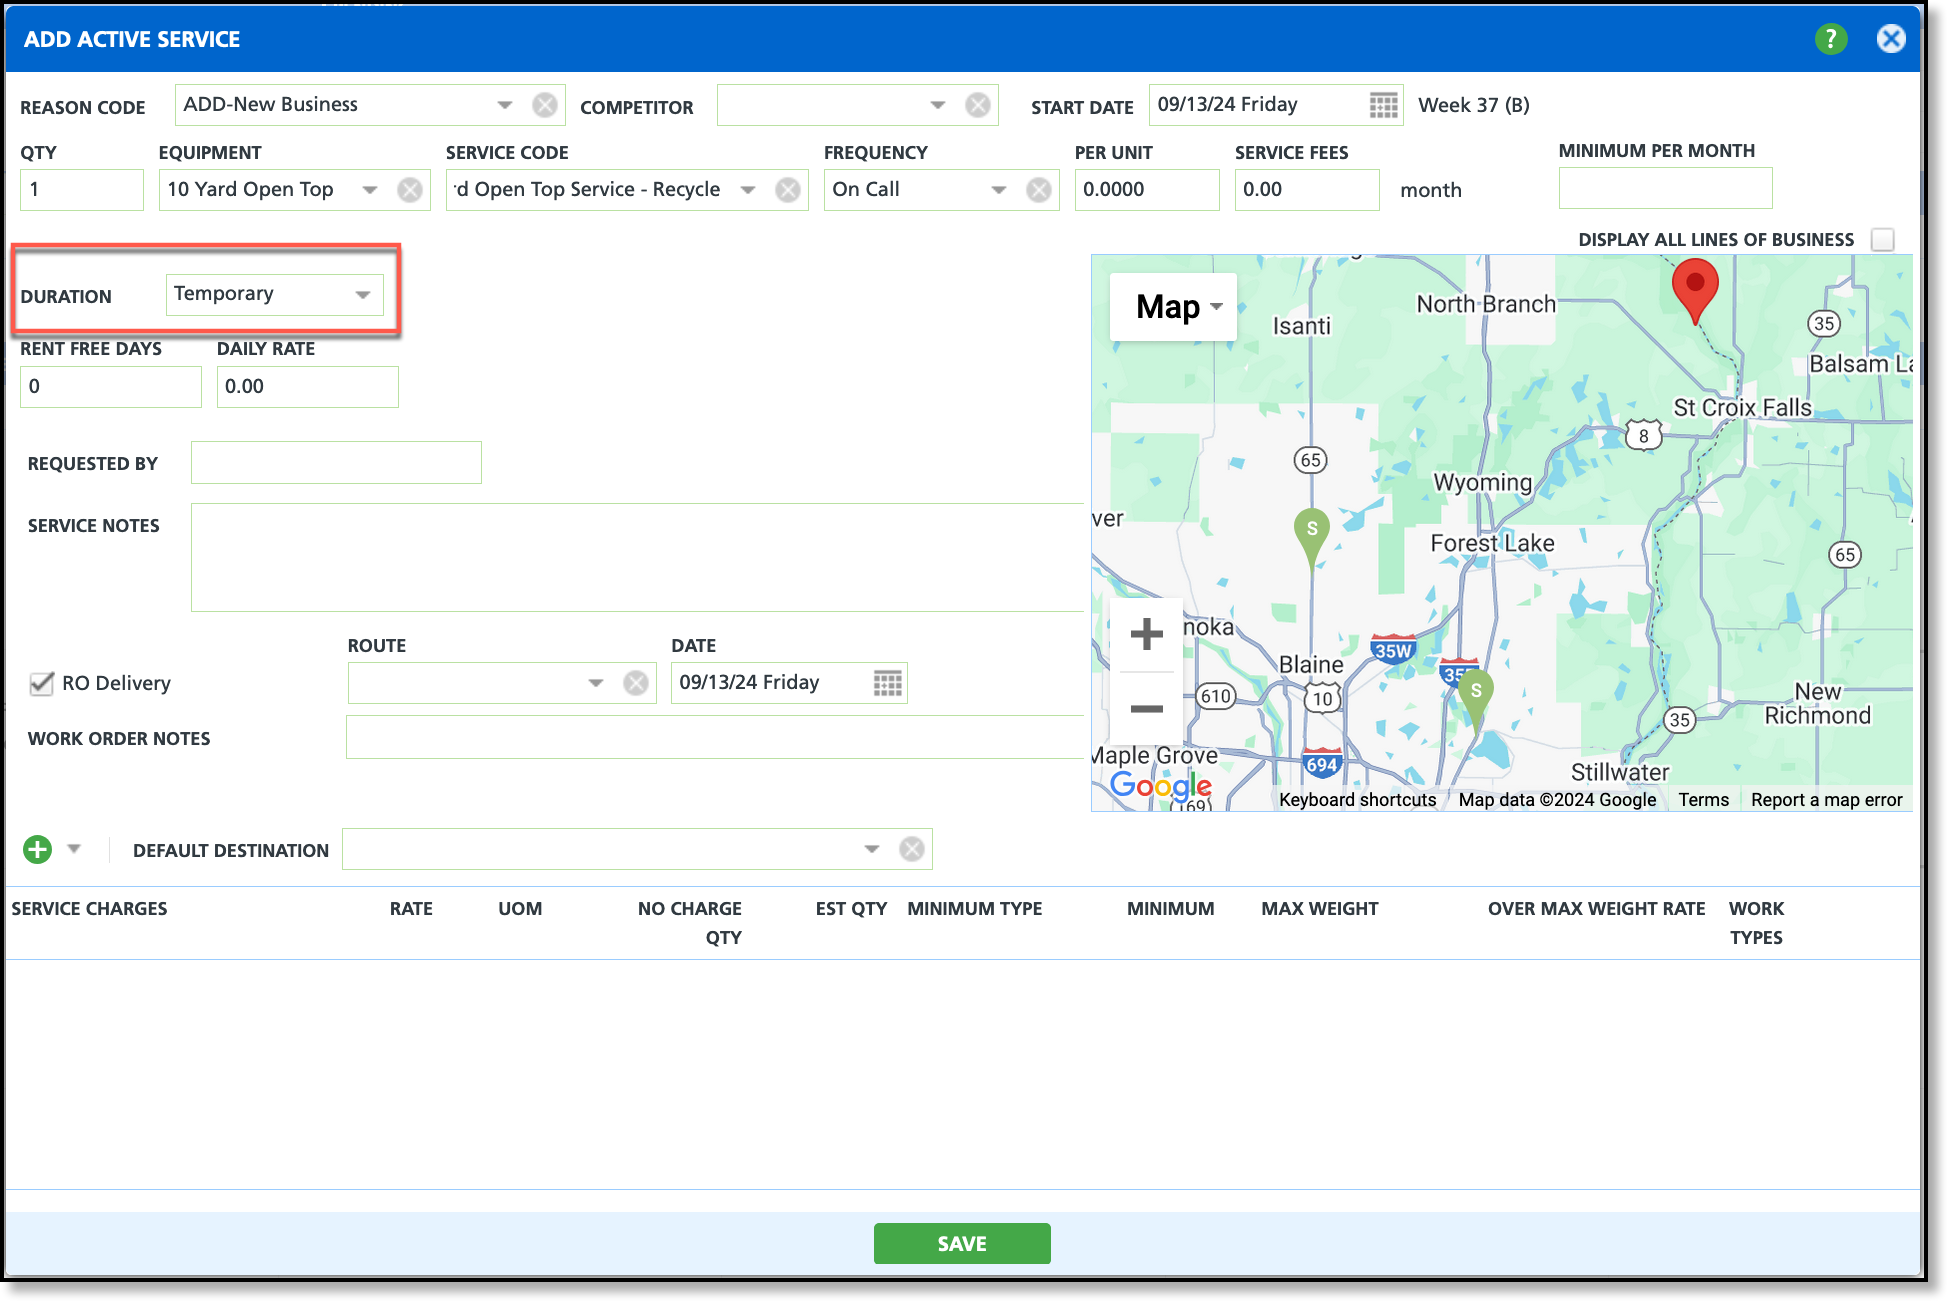
The primary reason to enable temporary services is to track temporary service revenue. This article explains how to set up and apply temporary services to a site. When adding a service, if the reason code permits temporary services, the Add Active Service screen will display a Duration field, allowing you to specify whether the service is temporary or permanent. Additionally, if a temporary service is selected and a designated GL account for temporary services is configured, the revenue will be reported under that account.
If tracking revenue for temporary services separately from permanent services is not necessary, this setup is not required. These settings are primarily used to track temporary service revenue for billing and general ledger (GL) accounts.
Permission Requirements
The following permissions are required to establish the availability of temporary services, including the creation of a GL account:
| Permission ID | Permission Name | Purpose of Permission |
| 22 | Setup \ Accounting | Required to create a GL Account for temporary service tracking.
|
| 118 | Setup \ Services | Required to add/edit Service Codes, Charge Codes, Surcharges and Line of Business. |
| 120 | Setup \ System and Security | Required to add/edit Reason Code Setup. |
Temporary Service Setup
This setup is used to establish temporary services specifically for tracking and reporting their associated revenue.
Create a GL Account for Temporary Services
Pathway: Setup > Accounting > GL Account
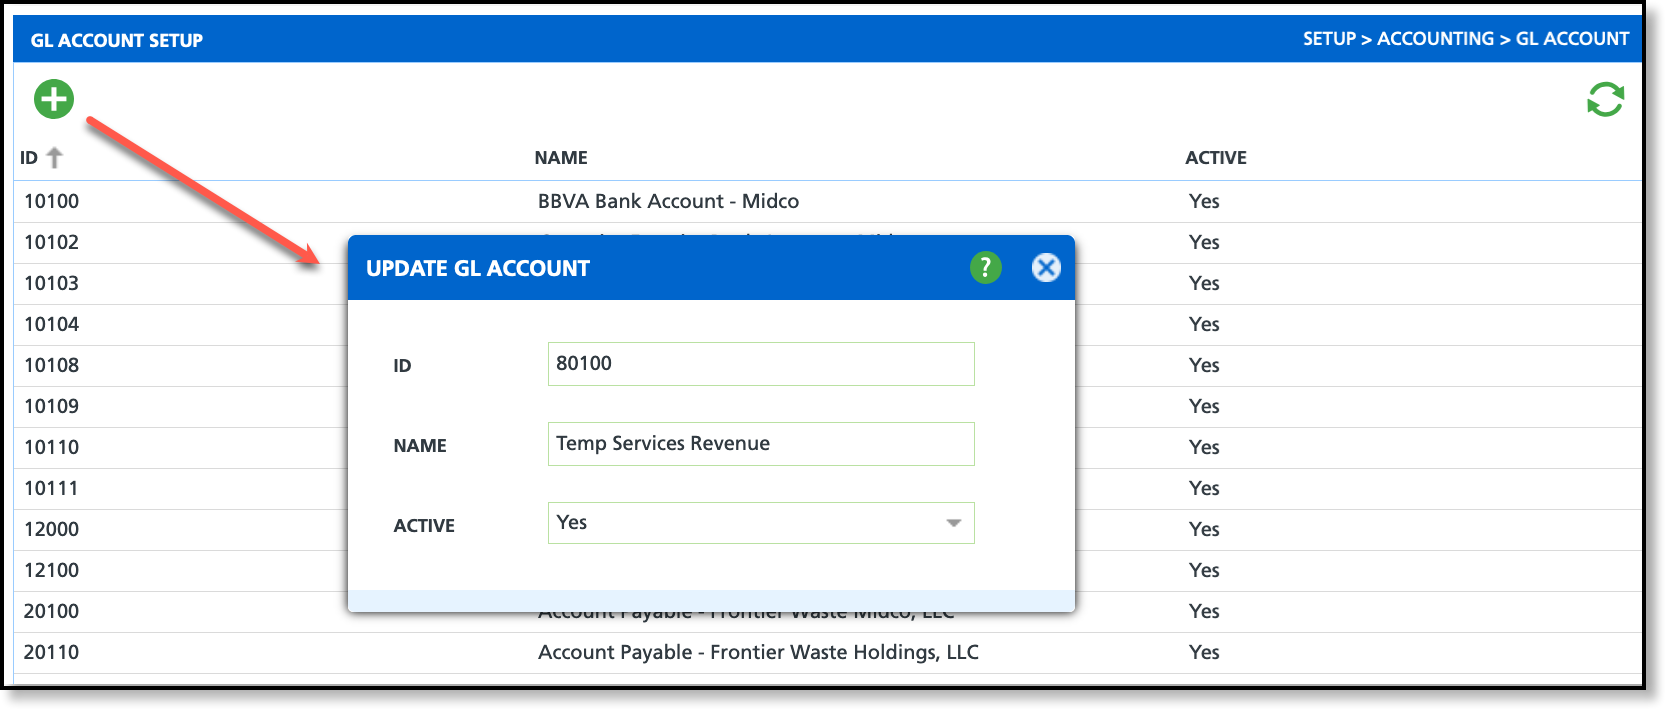
Before proceeding with any other setup, a GL Account to track temporary service revenue must be created. Each subsequent setup step depends on the selection of this temporary GL Account, based on how your company chooses to track and monitor temporary service revenue.
Reason Code Setup & Document Type Setup
Reason Code
Pathway: Setup > System > Reason Code
Setup here controls the display of the Duration field in Add/Edit Active Service. If 'Yes', the Duration field is displayed with drop down options 'Permanent' or 'Temporary.'
Document Type
Pathway: Setup > Document Formats > Type
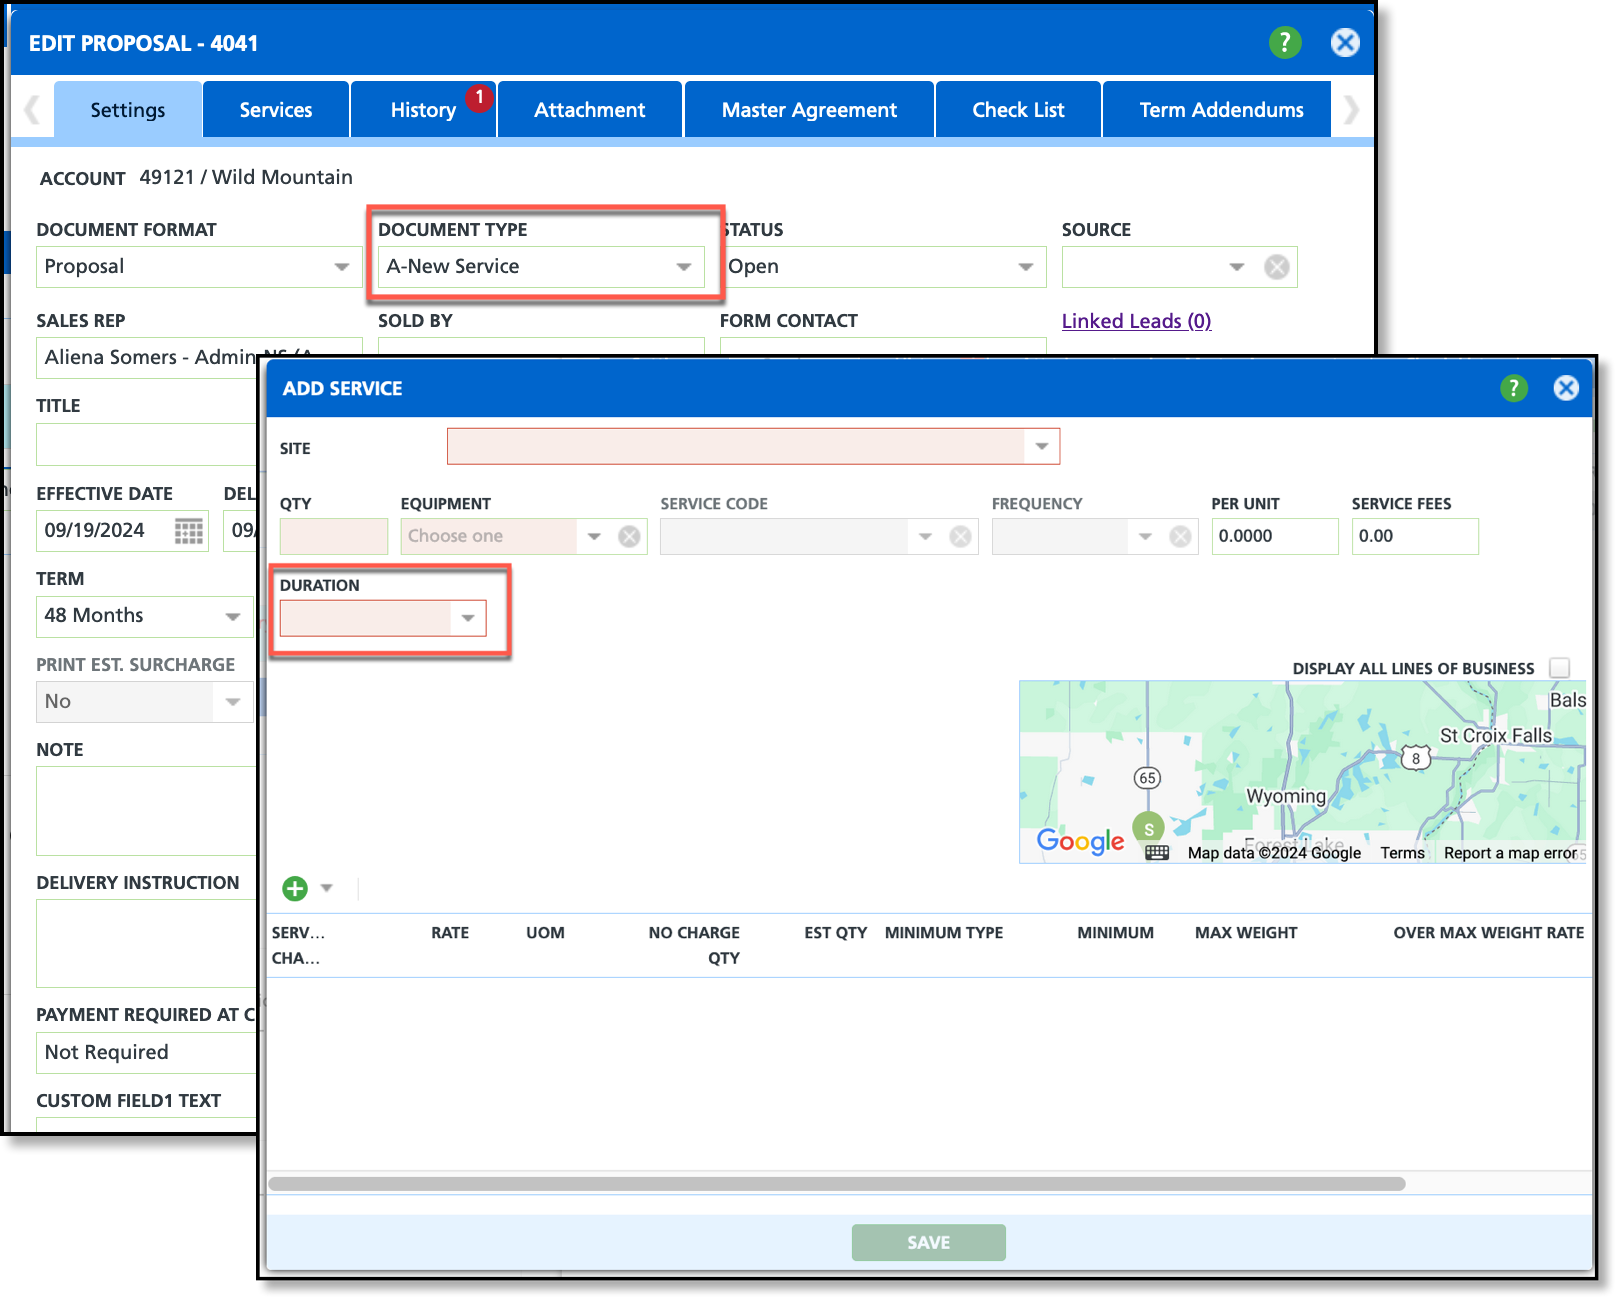
Sales proposals and contracts do not require a reason code when adding a proposed service. Instead, the reason code assigned to the 'Form Type' in Document Type Setup determines whether the Duration field is displayed, allowing the service to be marked as either 'Temporary' or 'Permanent'.
Line of Business Setup (Optional)
Pathway: Setup > Services > Line of Business
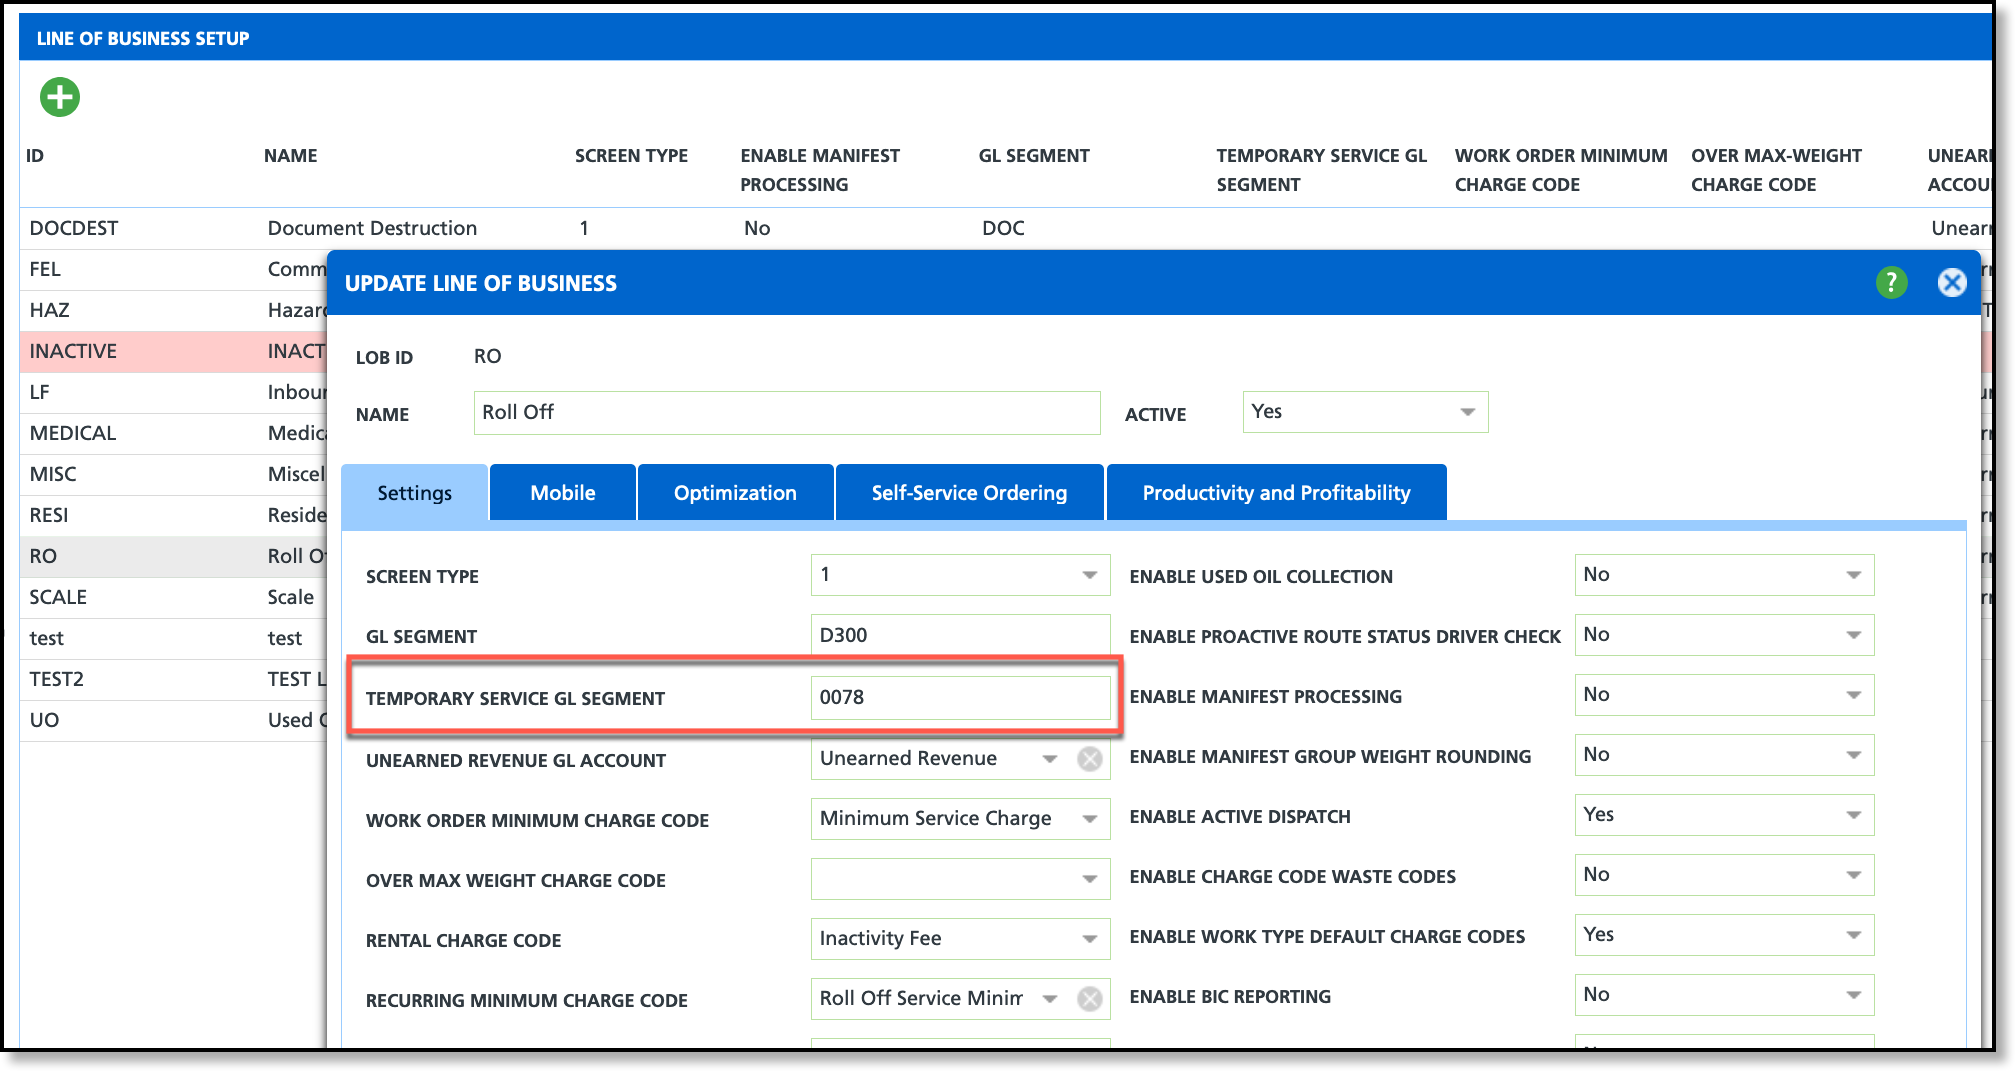
If a line of business includes temporary service offerings, identifying the Temporary Service GL Segment allows for a deeper break down into the specific sources of temporary service revenue.
Service Code Setup
Pathway: Setup > Services > Service Code
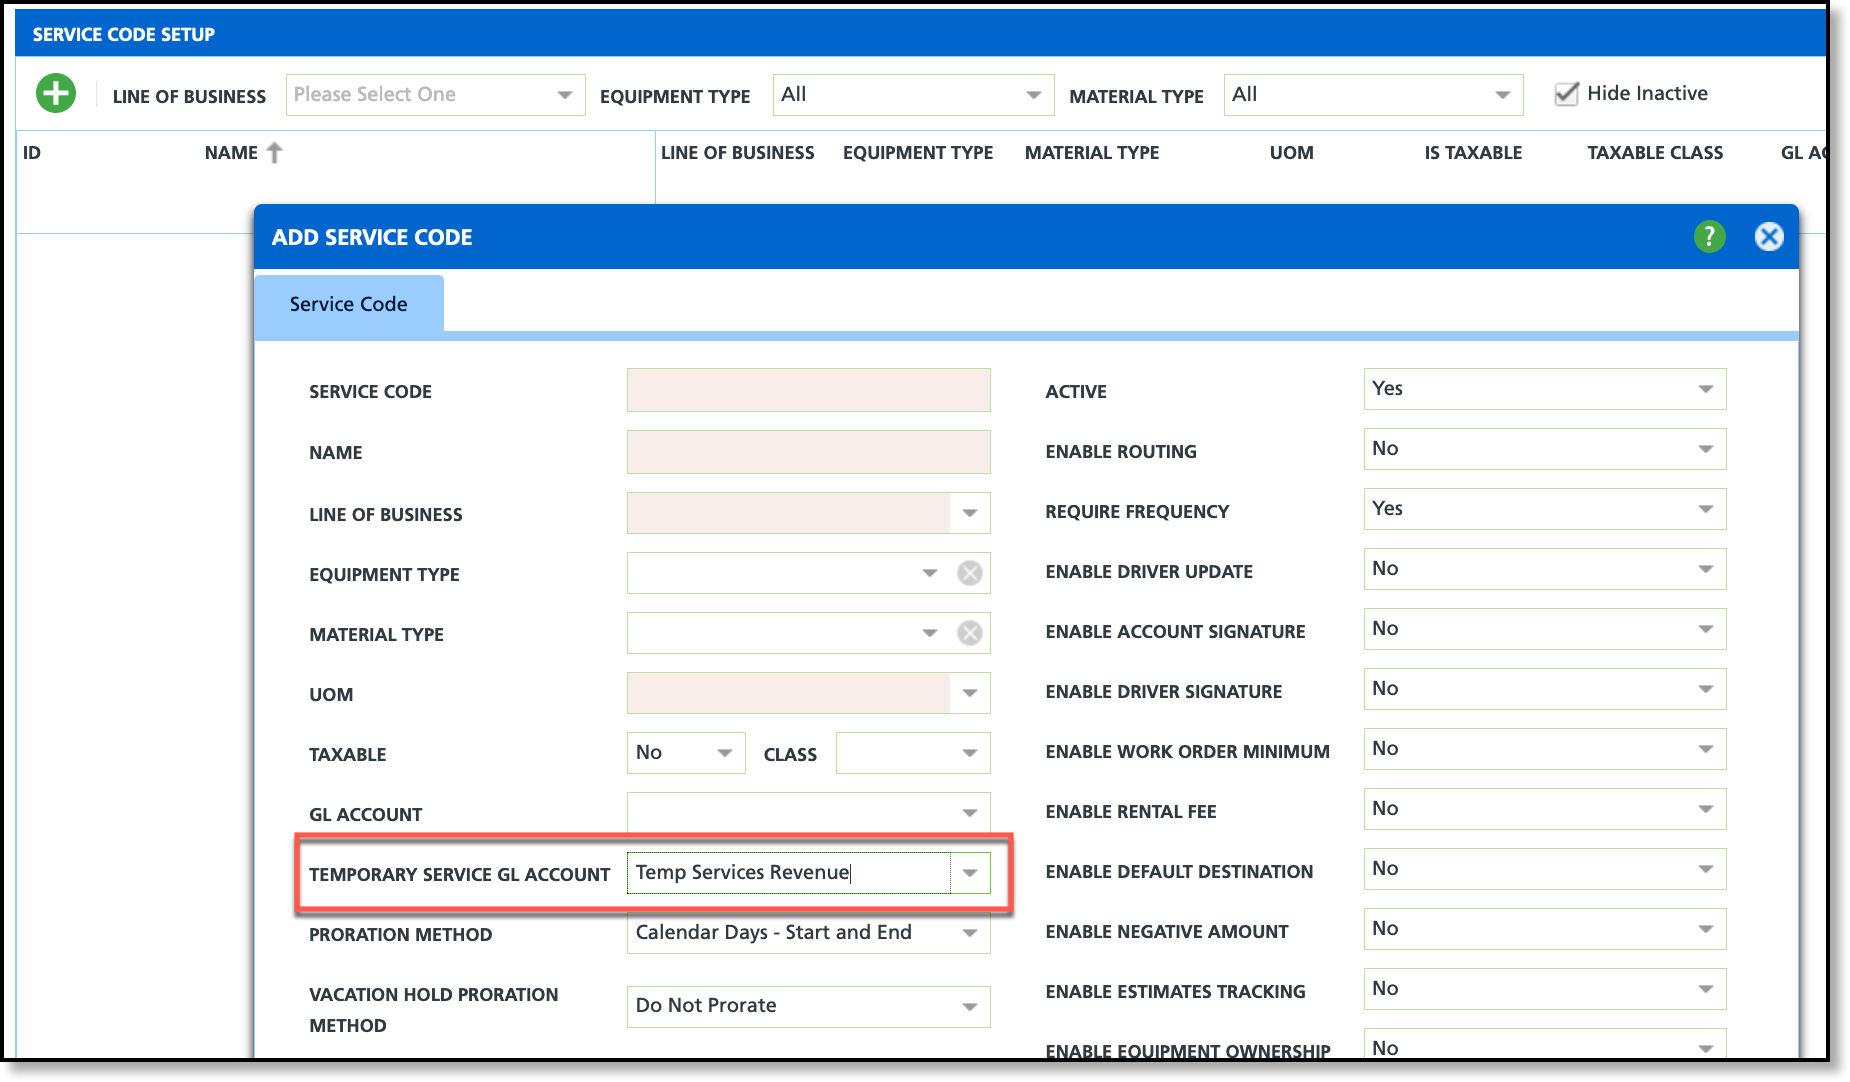
For service codes that may be offered as a temporary service, designate a Temporary Service GL Account to record the service under.
Charge Code Setup
Pathway: Setup > Services > Charge Code
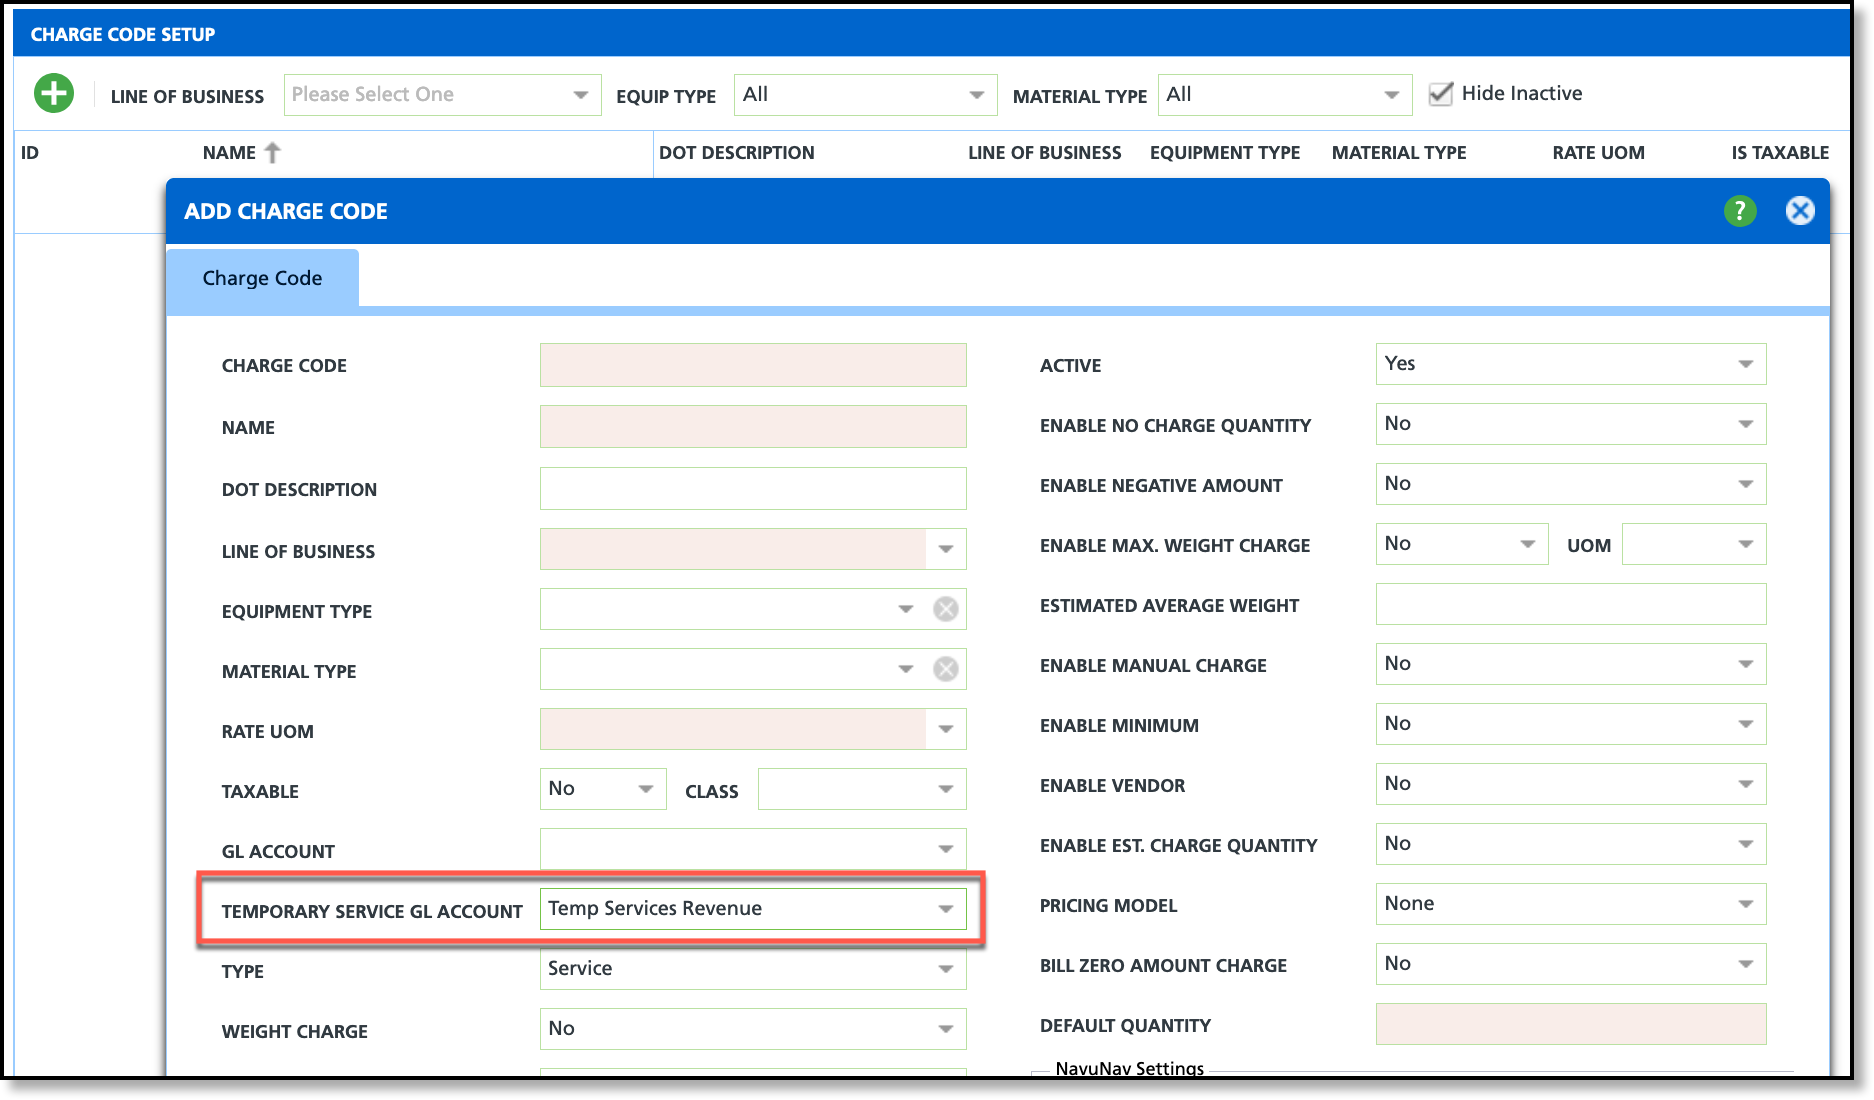
For charge codes that are part of a temporary service, designate a Temporary Service GL Account to record additional charges under.
Surcharge Setup
Pathway: Setup > Services > Surcharge
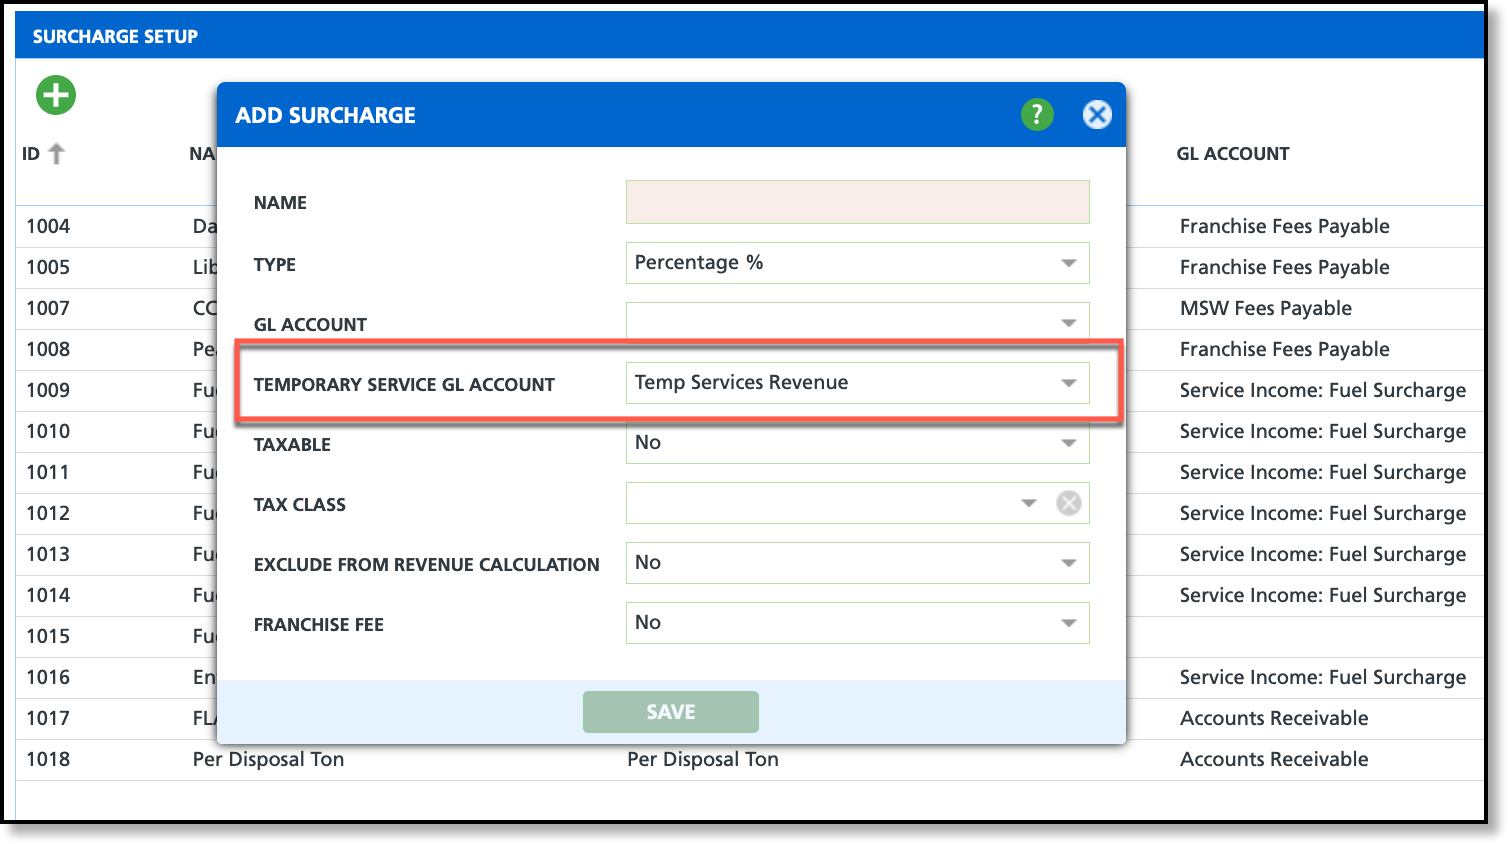
If a temporary service may have surcharges associated to it, designate the Temporary Service GL Account they should be recorded under.
Add a Temporary Service to a Site or Contract
Active Services
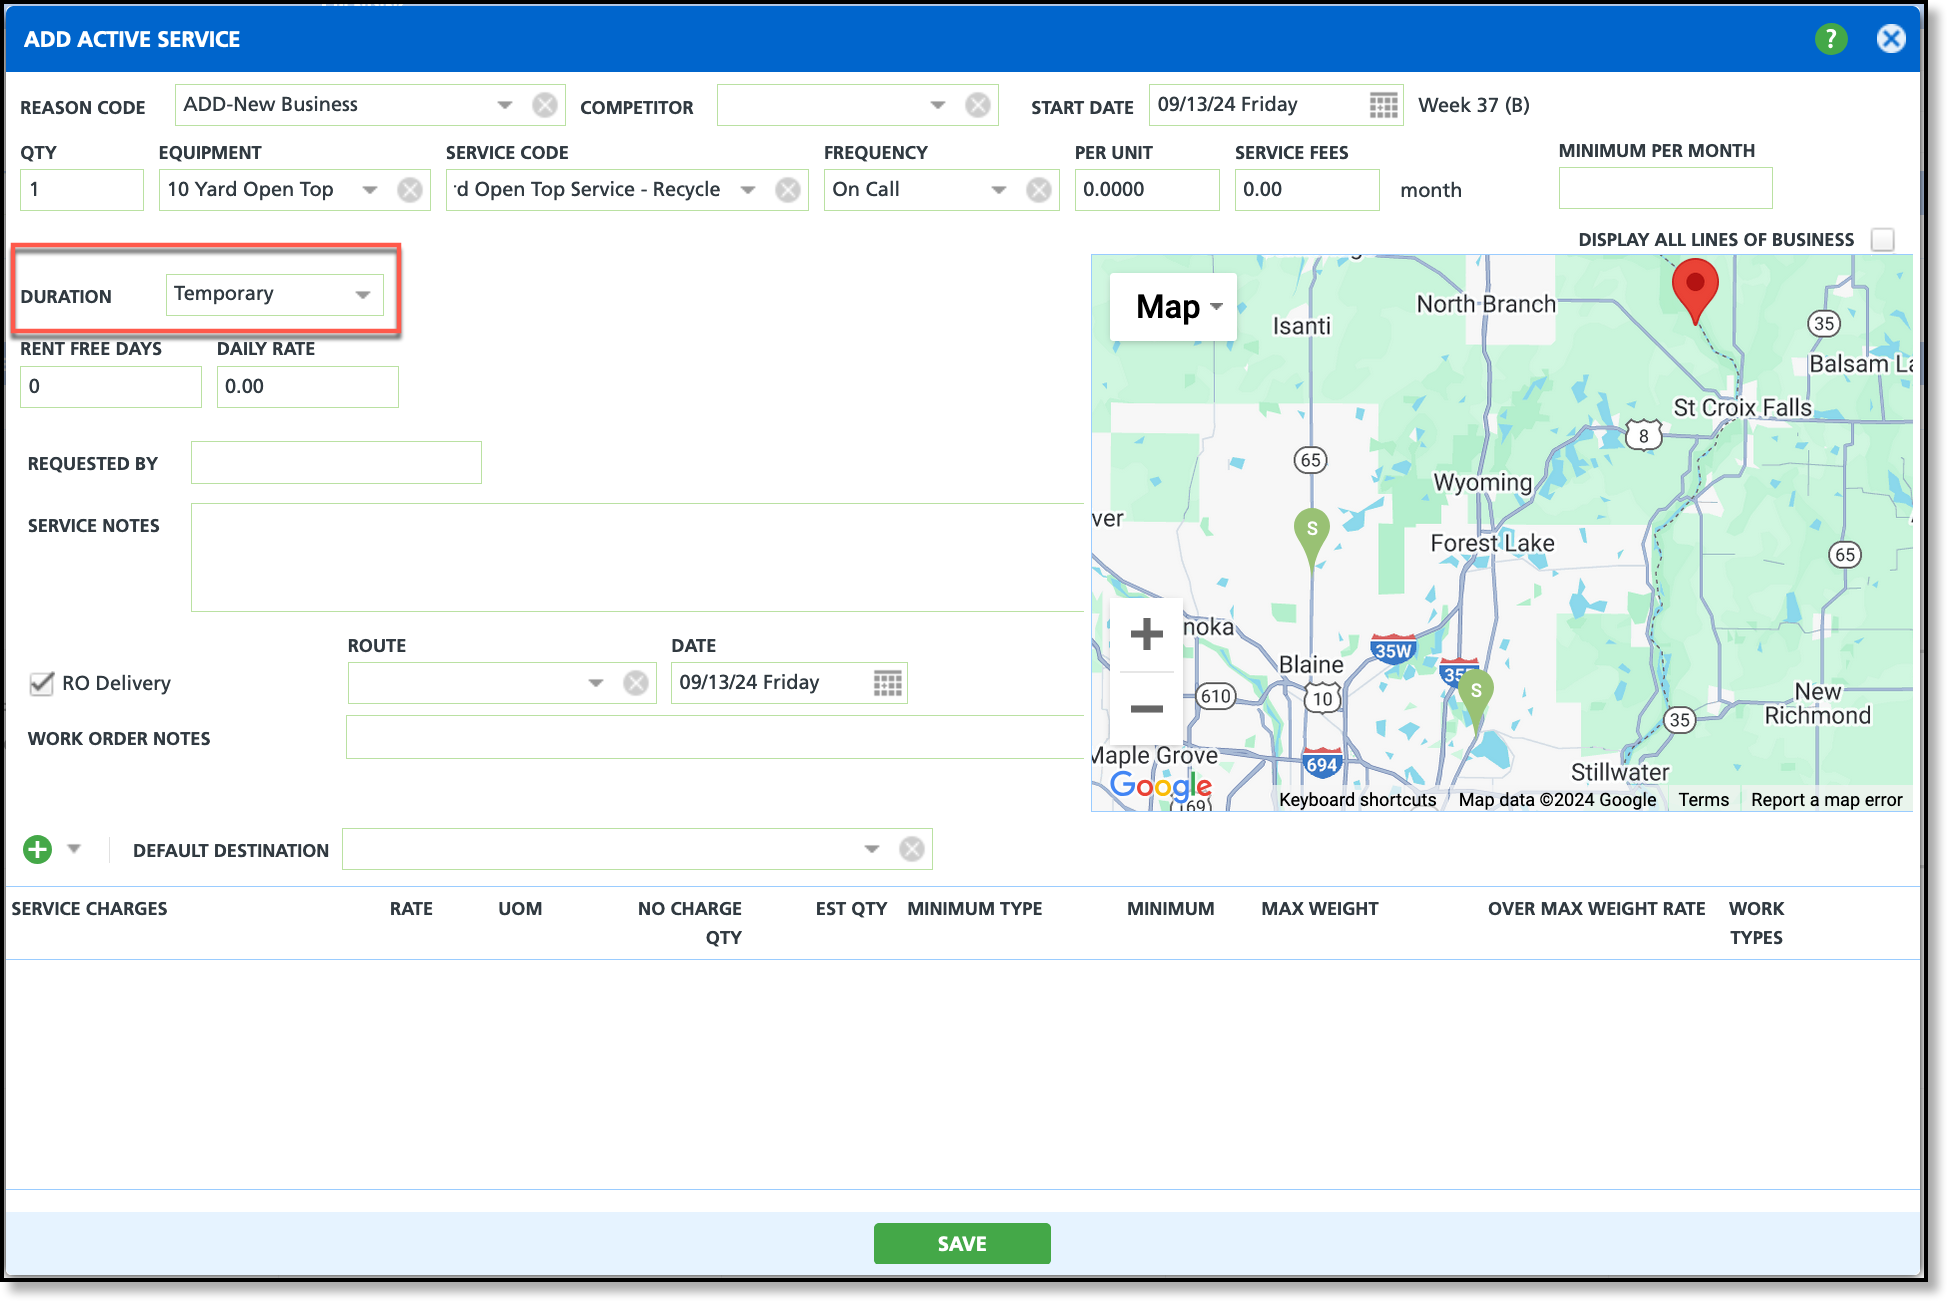
Once setup is complete, adding a temporary service to a site becomes straightforward. When a user adds or edits an active service on a site with temporary service enabled (via the reason code), a 'Duration' field appears on the Add/Edit Active Service screen. To designate the service as temporary, the user selects 'Temporary' from the field, which applies the established accounting and billing rules for temporary services.
Contracts/Proposals
If the Document Type for a contract or proposal has a reason code that allows temporary services, the Duration field will automatically display when the service is added.
Change a Temporary Service to a Permanent Service
The billing process uses the duration assigned at the time of billing.
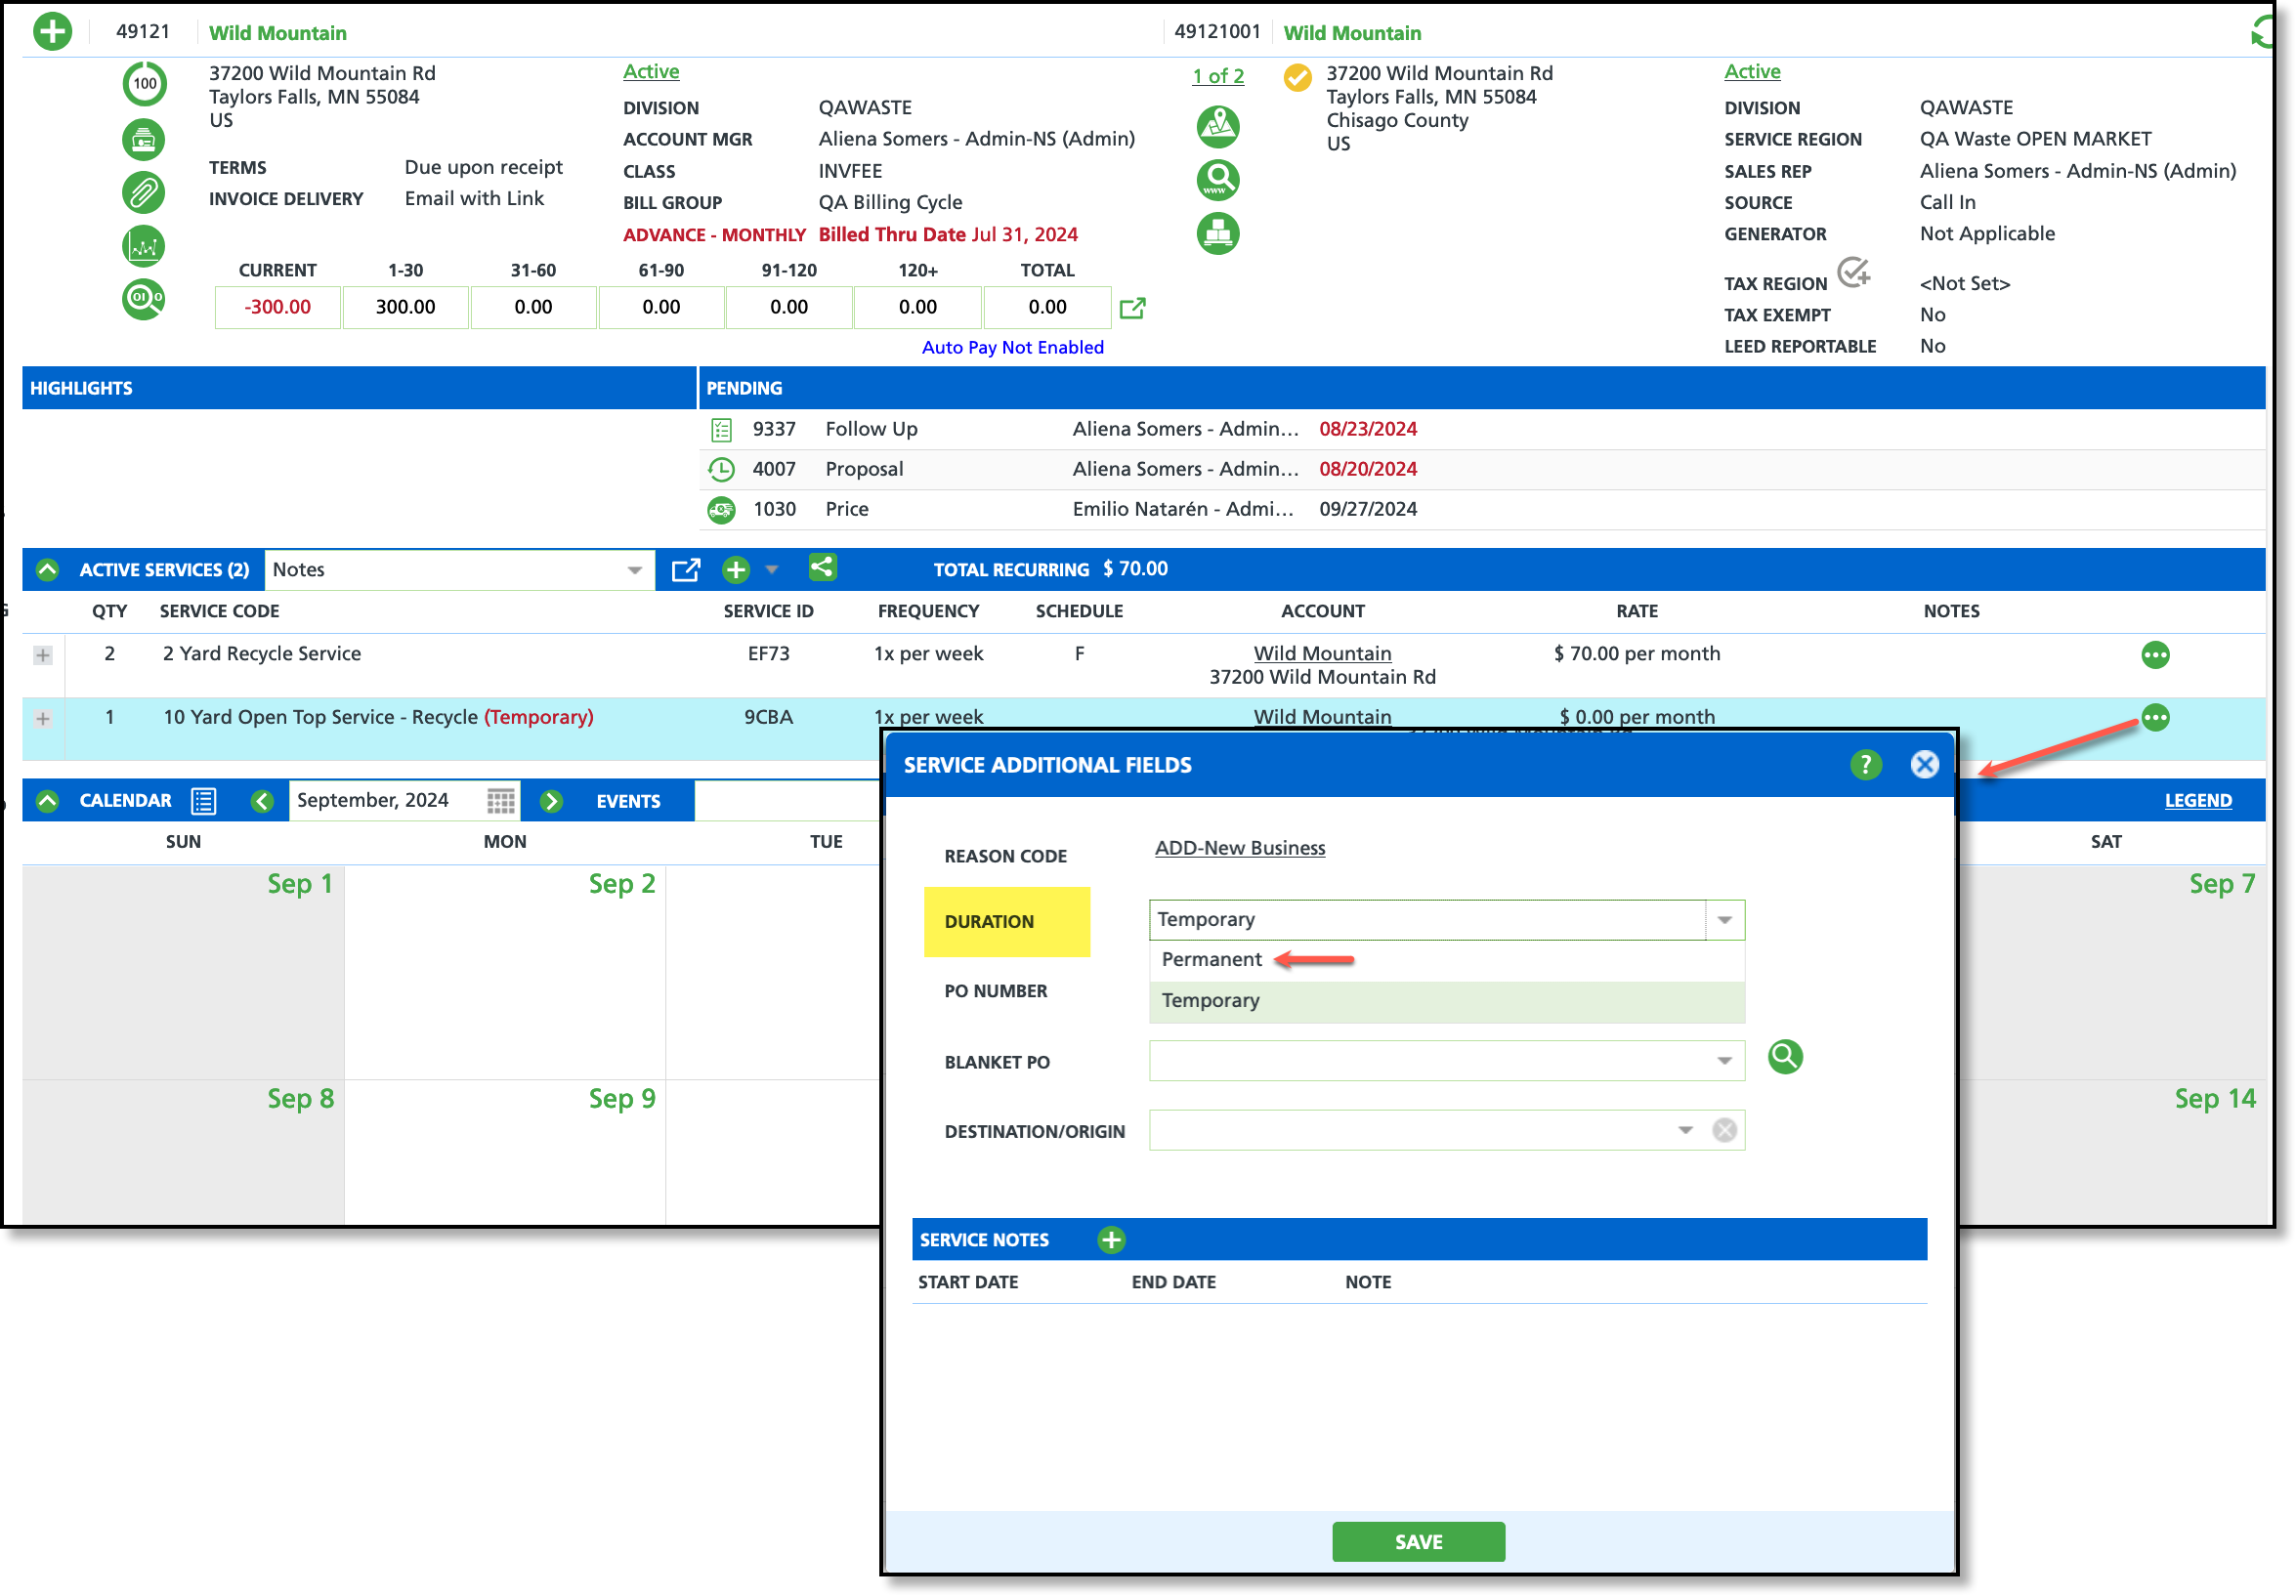
To update a temporary service to a permanent one, follow these simple steps:
- In the Active Services section, click the 3-dot icon to open the 'Service Additional Fields' editor.
- From the 'Duration' drop down, select 'Permanent.'
- Click 'Save' to apply the changes.
*Note: If the service includes additional changes, such as increased frequency, and not just a shift from temporary to permanent, right-click on the service and select 'Edit' to capture all necessary updates.
GL Transaction Processing
Pathway: Accounting > GL Transaction Processing
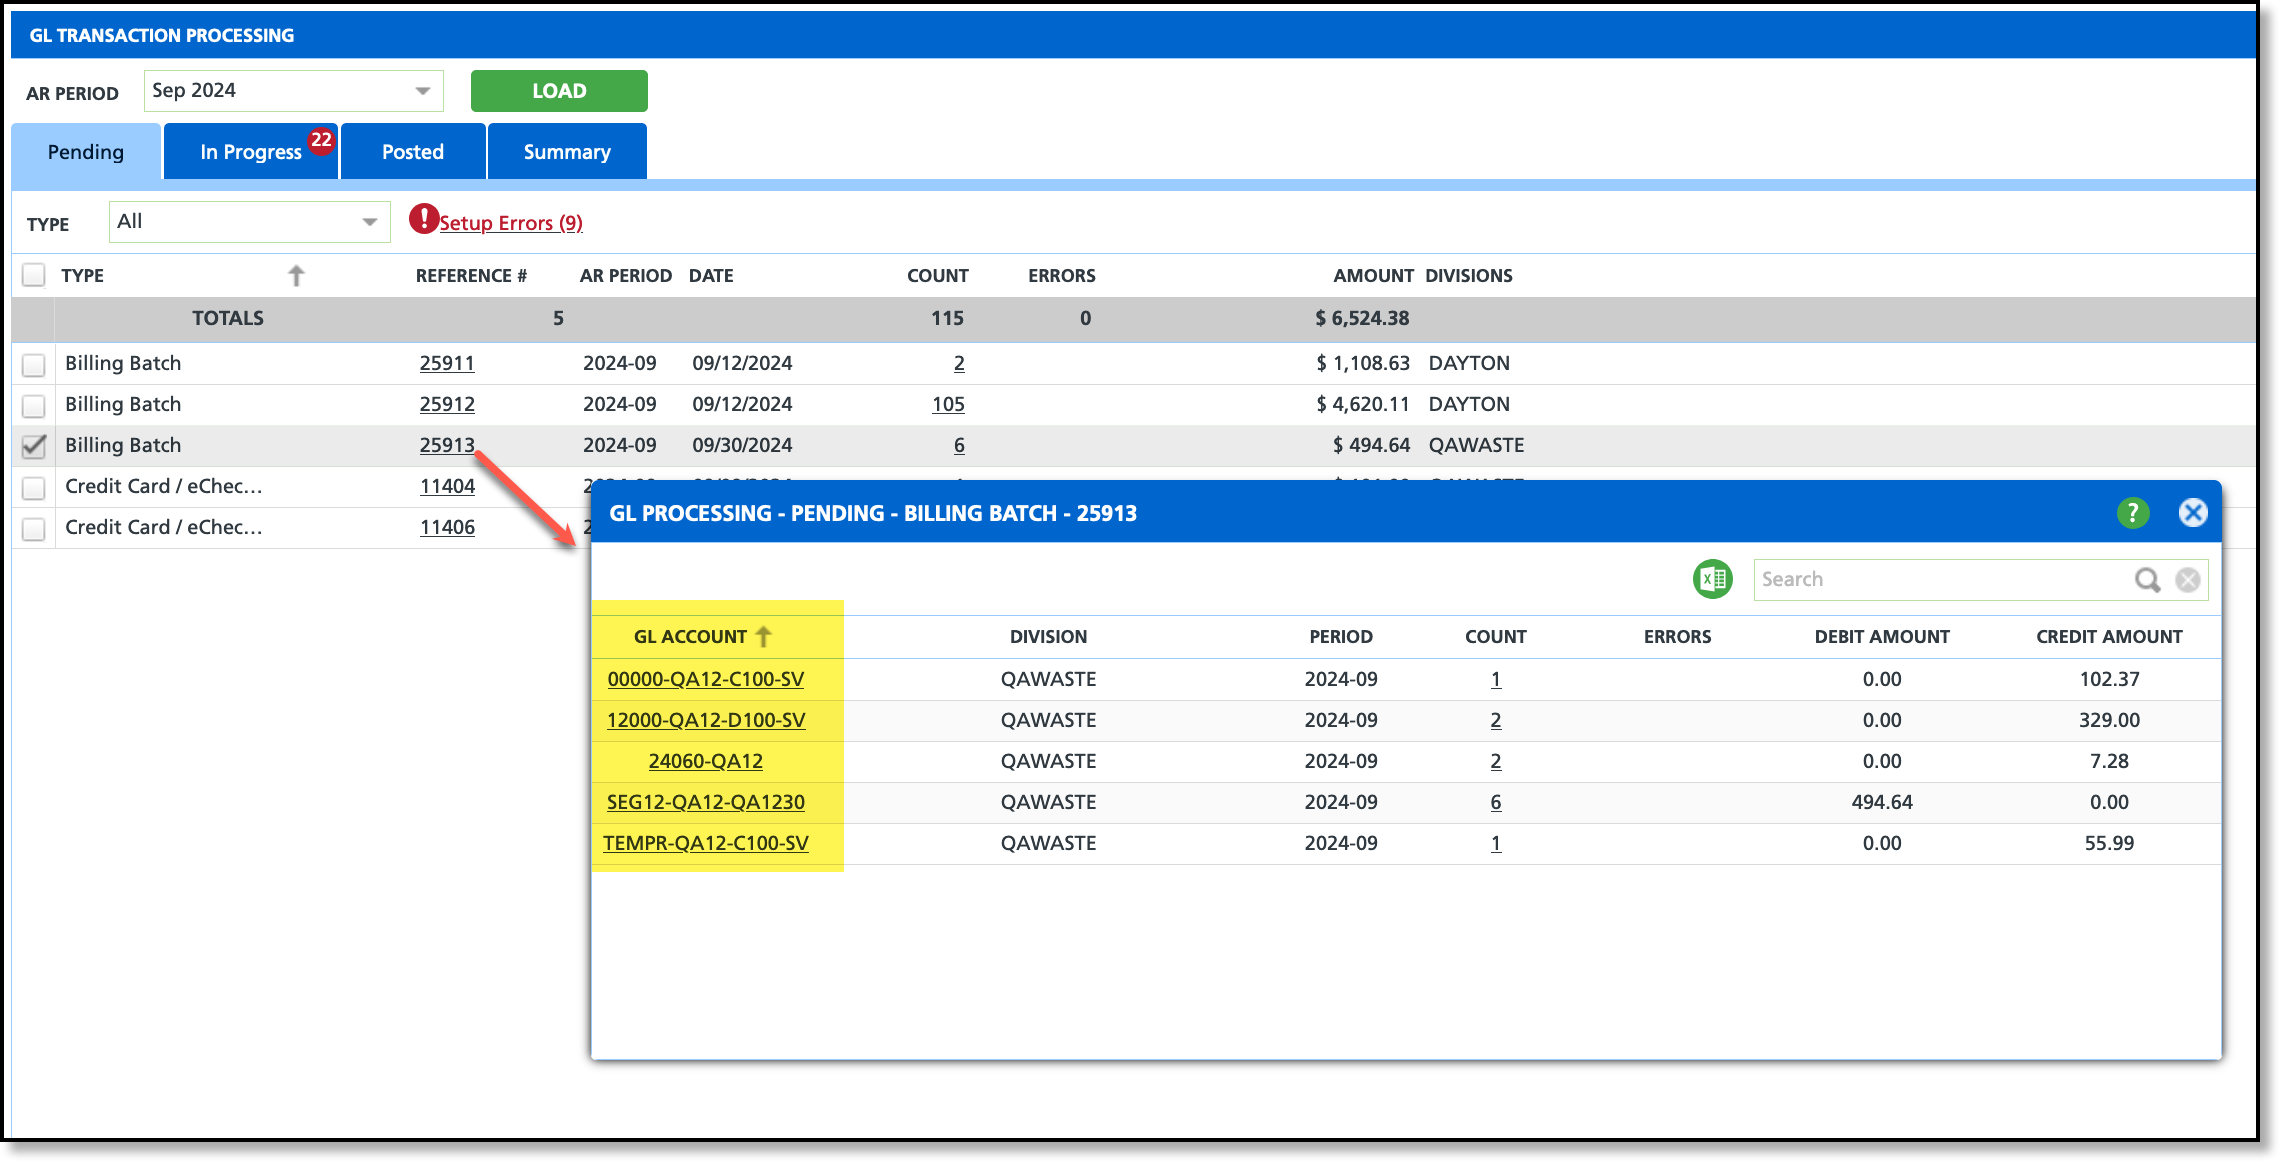
In the GL Transaction Processing screen, track and review all GL accounts, including those specific to temporary services. The GL segment for each account is displayed under the GL Account column, with segmentation formatting defined in Setup > Accounting > GL Segmentation. Further information on the GL Transaction Processing screen can be found here: Create a GL Batch - GL Transaction Processing.
