Change a Site's Status
Last Modified on 11/20/2024 12:55 pm PST
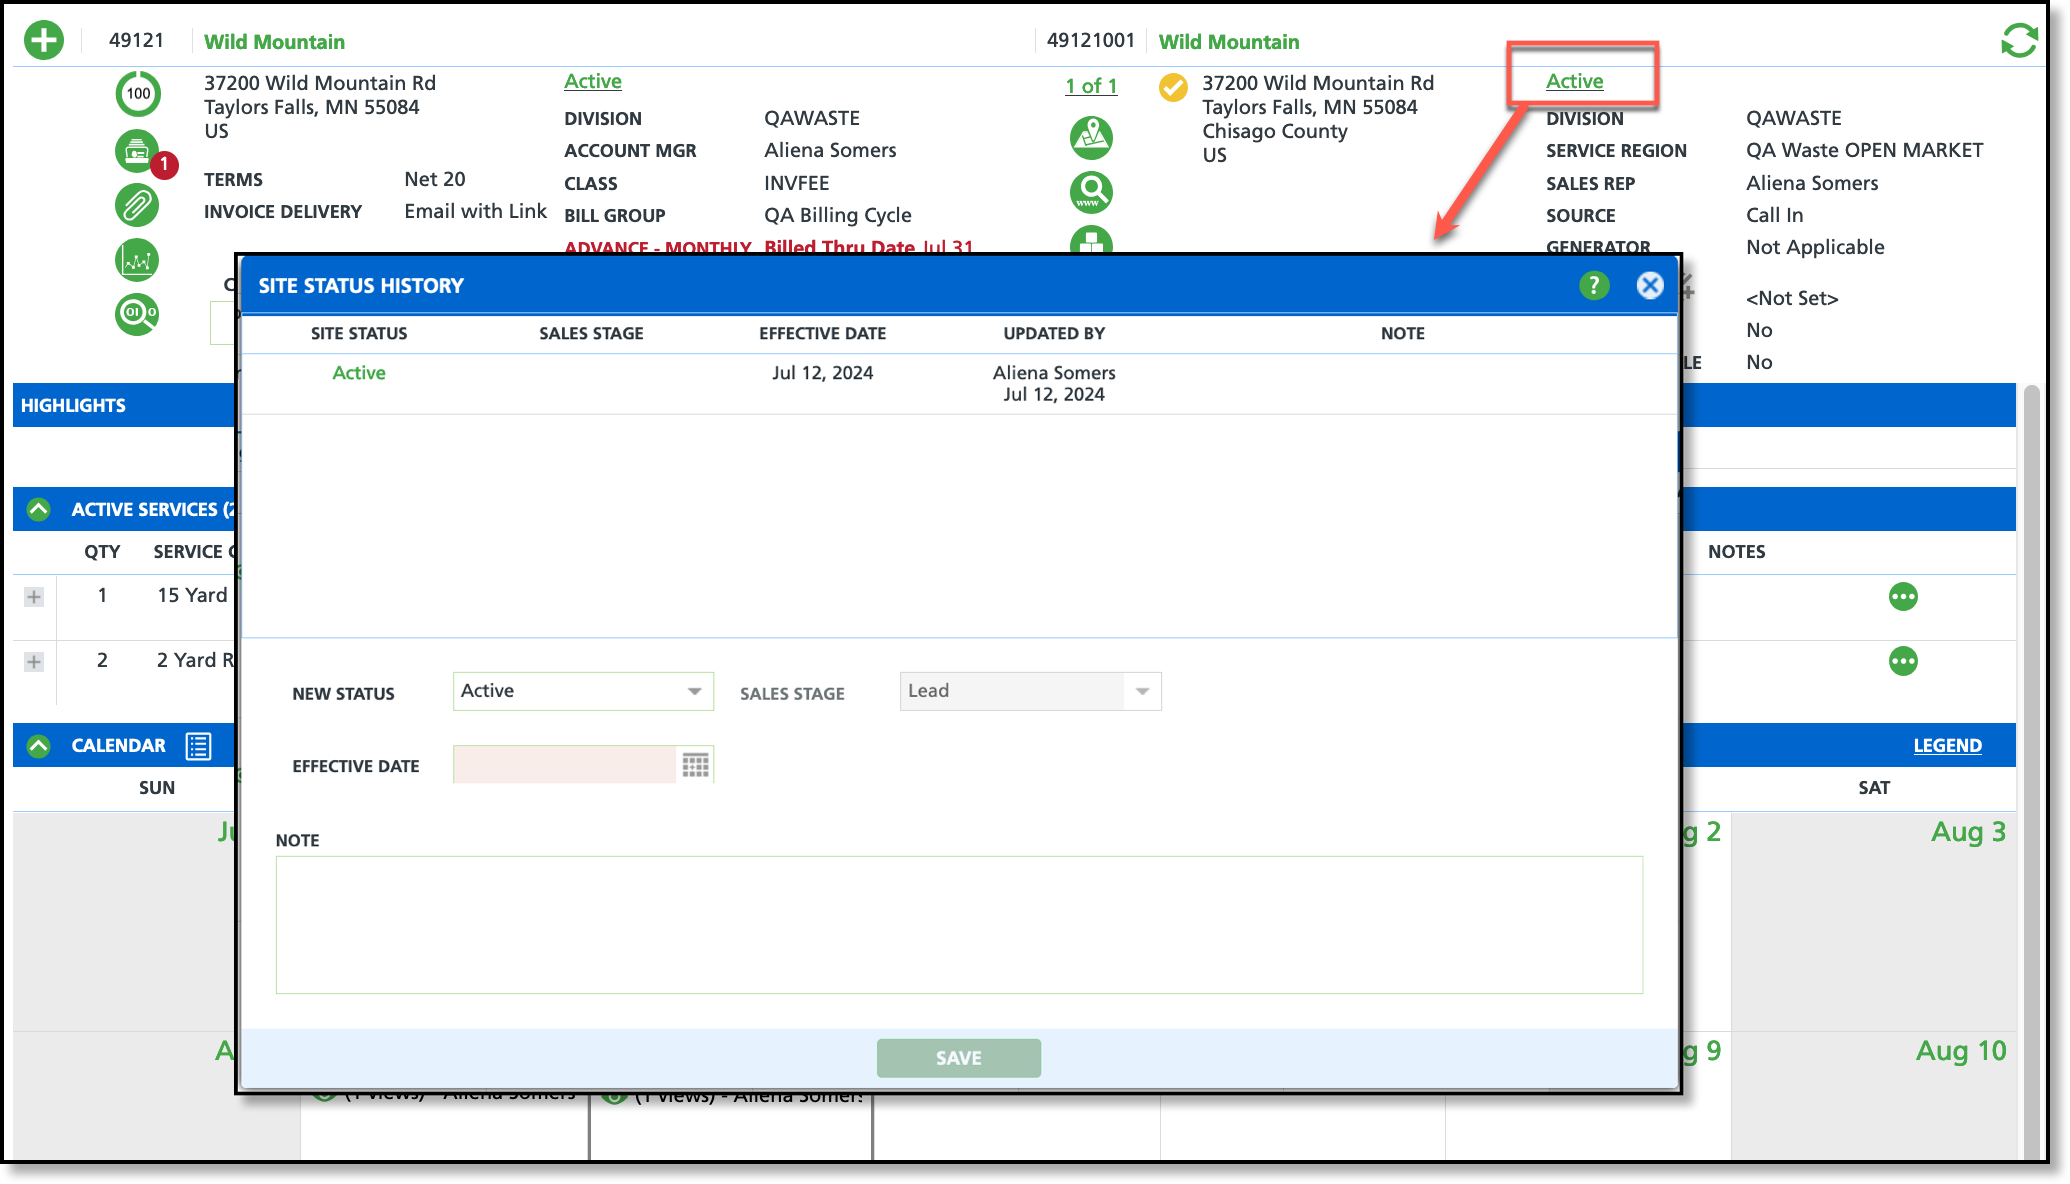
Pathway: Account > Search > Select Account
The current status of a site is shown in the Site Details section of the Customer Service screen. Click the status to open the Site Status History popup editor, where you can view the status history or update the site's current status.
Permissions
The following permissions are required to change a site's status:
| Permission ID | Permission Name |
| 5 | View Account |
6
| View Site |
| 135 | Modify Non-Prospect Account/Site Status |
Site Status History Field Descriptions
Field | Description |
|---|
New Status
| The current status of the site. Click on the drop down to view a list of all status's and to assign a new status. Status Options: - Active: The site is currently receiving active services.
- Inactive: Requires the site does not have any active services for status to apply.
- Prospect: No active services as the site is still in the sales process.
- Vacation Hold: Active services are on hold but will continue to be billed for any monthly rates and/or fees.
- Site Credit Hold: Only available if ‘Bill By Site’ in the account's setup is set to ‘Yes’. Bill By Site is used when an account has multiple sites that are individually billed.
- Vacant: Requires the site does not have any active services for status to apply.
- Exempt: Used in cases where a waste provider has a municipal contract (meaning they have to service all the houses in an area) but a particular property is exempt from being serviced.
|
Sales Stage
| Indicates the stage in the sales lifecycle the prospect account is in. This field is only available for selection for the Prospect status. |
Effective Date
| The date the status change will go into effect.
Example: Customer calls today (9/9/22) and says they will be on vacation from 9/19/22-9/30/22. Select the Vacation Hold status and enter the Effective Date as 9/19/22. |
Note
| Option to include notes regarding the reason for the change of status.
|
Change a Site's Status
- From the Site Details section of the Customer Service screen, click on the current status displayed for the site. This will open the Site Status History popup editor.
- In Site Status History, select a status from the New Status drop down field.
- If Prospect is selected, select the status the prospect account is in from the Sales Stage drop down. This field is inactive for all other status selections.
- Enter an Effective Date.
- Enter a Note to record additional information for the status change. This field is optional.
- Select Save when finished.
