Service bundles are predefined groups of services tailored to specific geographic regions, ensuring customers see only the options available to their location. These bundles streamline the selection process and enhance user experience. Service bundles are available in three locations: online ordering, quick order and the active services menu, providing flexibility and convenience across different access points.
Required Setup
Service Region Setup
Pathway: Setup > Services > Service Region
Service bundles are linked to specific service regions, which define the geographic boundaries where services are available. Establishment of these regions ensures that service bundles are displayed for availability only when they align with the address provided.
Create a Service Region
In Service Region Setup, once a service region is added and saved, it appears on the Service Region Setup screen with a mapping icon. The icon is red if the service region has not been mapped and green if it has. Service regions configured here are used for selection and assignment in the Service Bundle setup screens. Review the Service Region Setup documentation for additional setup information. Note: For online and quick orders, once a service contract is submitted, the default sales representative for the region is automatically assigned. The contract will then appear under their Quotes and Contracts list on the Recent Activity home screen.
Map Area
Service region mapping is critical to service bundle setup as it determines which bundles are available for a given address. If an entered address falls within the defined perimeter of a service region, only the service bundles associated with that region will be displayed as available. This ensures accurate service availability and prevents the display of options outside the specified geographic boundaries.
To create:
In the Service Region Setup screen, click the map icon to open the map. Then, select the Perimeter icon at the top of the map screen to draw a perimeter around the service area. Click Save when finished. Note: This feature allows multiple perimeter groupings within a region.
Service Bundle Setup
Pathway: Setup > Services > Bundle
Before proceeding, verify that the necessary Service Region setup covered in the section above is complete. Bundles are what will display for selection in Online Orders, Quick Orders and the Service Menu based on regional location.
Add Bundle
Create a bundle for each Line of Business and Service Region a service bundle is available. Service bundles are specific to the selected service region and can only have one service region linked to it.
Field Descriptions
Field and Application for Use | Description |
The following fields display when first adding a bundle. | |
Name | Enter the name of the bundle that will be available to the service region. |
Active | Controls the availability of the service region in other screens. If inactive, the background color for the row will display in red. |
Bundle Availability | Displays check box options for where the bundle is specifically available for user.
|
Document Format Online Order, Quick Order | Links a service contract to the service bundle. When a service is ordered, a contract is created. Selecting the document format here will auto-populate the Document Format field in the contract. |
Document Type Online Order, Quick Order | Identifies the specific document type used for the service. Settings in Document Type Setup control the approval and pre-authorization process for contracts and influence the workflow for contracts generated from online or quick orders in the sales process. Note: If the Document Type is set to require pre-authorization, the contract will display in the Sales Management screen under the Pre-Authorization Pending column. |
Order Source Online Order, Quick Order | Streamlines source tracking for new accounts created through online or quick orders. |
Quick Order - Max Backdated Quick Order | Setting that places a limit on how far back a quick order's start date can be backdated. |
Forced Future Start Date Online Order, Quick Order | This setting ensures that all new sign-ups within a designated area, such as those under a municipal contract, are assigned a specific start date. This prevents immediate service activation and aligns all customers with the predetermined schedule. The start date here overrides any customer selected start dates. |
Content Image Online Order, Quick Order | Option to upload an image that will display for customers. Images my help customers better identify the service bundle from another if the service region includes more than one bundle option. |
Completion Message Online Order | Message that displays for the customer after they have placed an online or quick order. |
Summary Online Order | Add a summary describing the service to enhance the customer experience by helping them select the service bundle that best fits their needs. Important:
|
Require Prepayment Online Order, Quick Order | Optional setting that will require customers to pay for their services before servicing can start. |
Require Auto Pay Enrollment Online Order | Optional setting that forces customers to enroll in auto pay. NOTE: Verify your system setup includes auto pay before enabling this setting. Auto Pay setup can be reviewed here: Auto Pay Setup |
Account Class Online Order, Quick Order | Default setting that will auto-assign an account class to an account that is created from an online order, or quick order. |
Bill Group Online Order, Quick Order | Default setting that will auto-assign a bill group to an account that is created from an online order, or quick order. |
Terms Online Order, Quick Order | Default setting that will auto-assign a term to an account that is created from an online order, or quick order. |
Add Bundle Service
After creating a bundle, select its row in the upper grid to add included service offerings and applicable charges from the lower grid.
- Select the bundle from the top of the screen to add the services it includes in the lower portion of the screen.
- Click the green "add" icon to open the Add Bundle Service.
- Enter the details of the service that is being added to the bundle.
- Add applicable charge codes to the service by selecting the green 'Add' icon that is display above the Service Charges section.
- Online Order Important Note: A Summary is required for the service bundle to display.
- Click Save when all details have been filled out and the service will be added to the bundle.
- Continue this process until all services have been added to the bundle.
Considerations
Although these settings are not critical to service bundle functionality, they may enhance the customer experience.
Display Bundles in Specific Order
The system arranges service bundles based on their ID, displaying the lowest ID first. To control the display order, such as sorting by bin size in ascending or descending order, manually enter the service bundles in the desired sequence.
Optional Setup
While not required, the following setup enhances the online experience by grouping services and providing additional details for each offering.
System Options Setup
Pathway: Setup > System > System Options > Online Order [tab]
In the Online Order tab of the System Options Setup screen, the 'Group Bundles By LOB' setting organizes services by line of business, improving navigation for customers during the online order process. This setting is necessary for configurations set at the line of business level to operate correctly.
Line of Business Setup
Pathway: Setup > Services > Line of Business
The line of business setup determines how the service appears on the first screen after a customer enters their address, including its description and associated image. While not required for the online order feature to function, this setup helps communicate key service details to the customer.
The Summary and Summary Image options in the Self-Service Ordering tab control what is displayed on the first screen the customer sees after they have entered their address in the available services search. The Content option in the Self-Service Ordering tab allows for the configuration of more detailed information about the services that are offered. Information entered here will display above the service bundle after the customer has selected a line of business from the first screen. Self-Service Ordering (tab)
Summary and Summary Image
Content
Customer Online Order Experience
This section outlines the process a customer experiences based on the service bundle configuration for their region. The illustrated workflow matches the workflow the customer will follow. Some screens shown are optional and will appear only if enabled in the setup.
Search for Available Services | ||
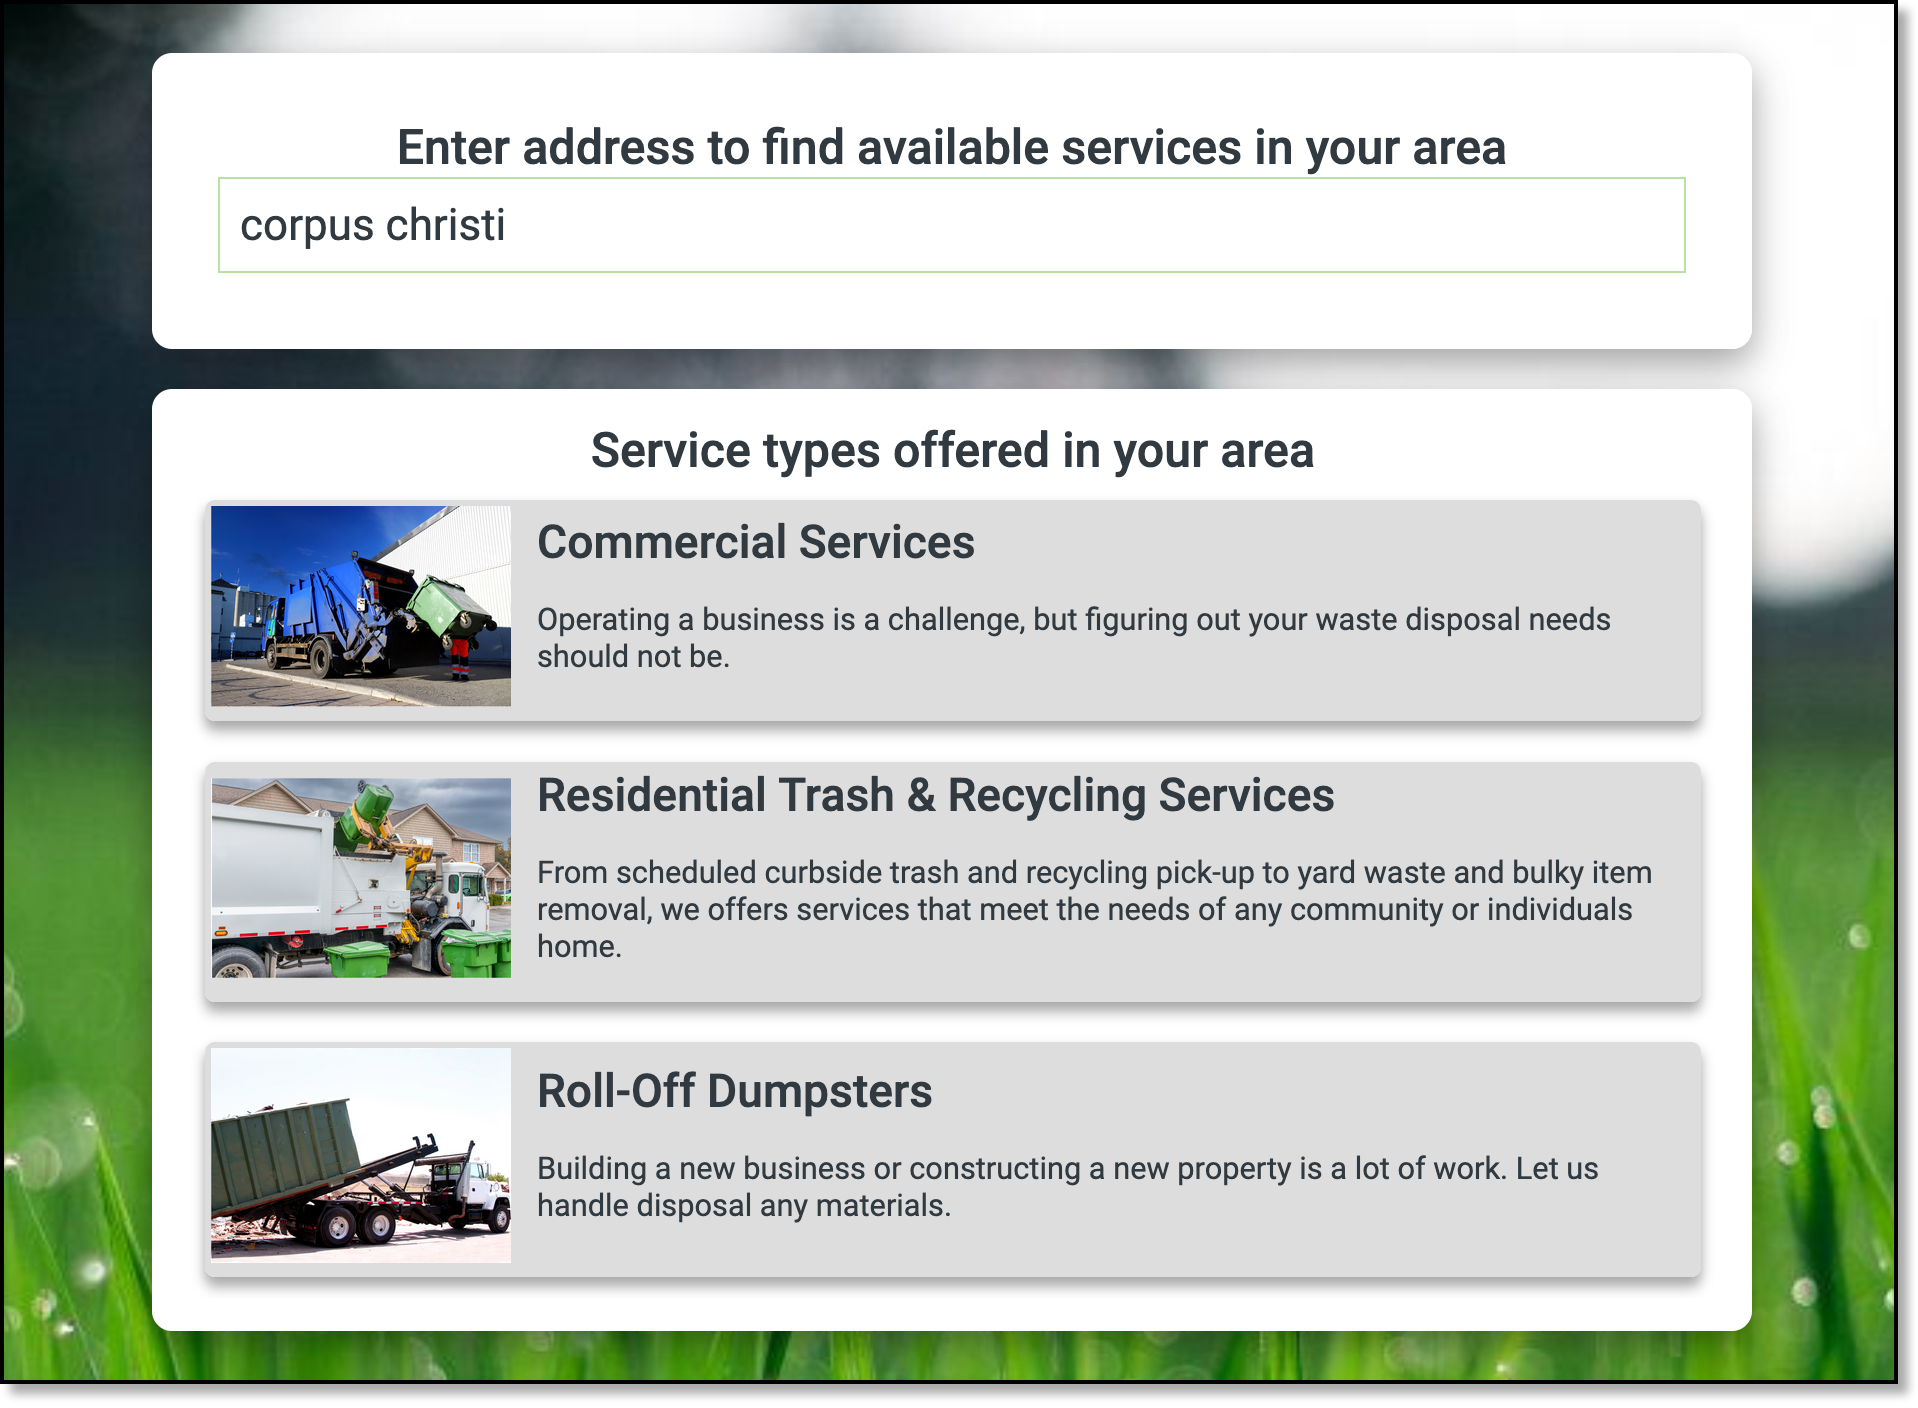
After the customer enters their address, if it is within the mapped area of a service region, the available bundles will display. If multiple service bundles are available for the customer's region, all options will be shown. 
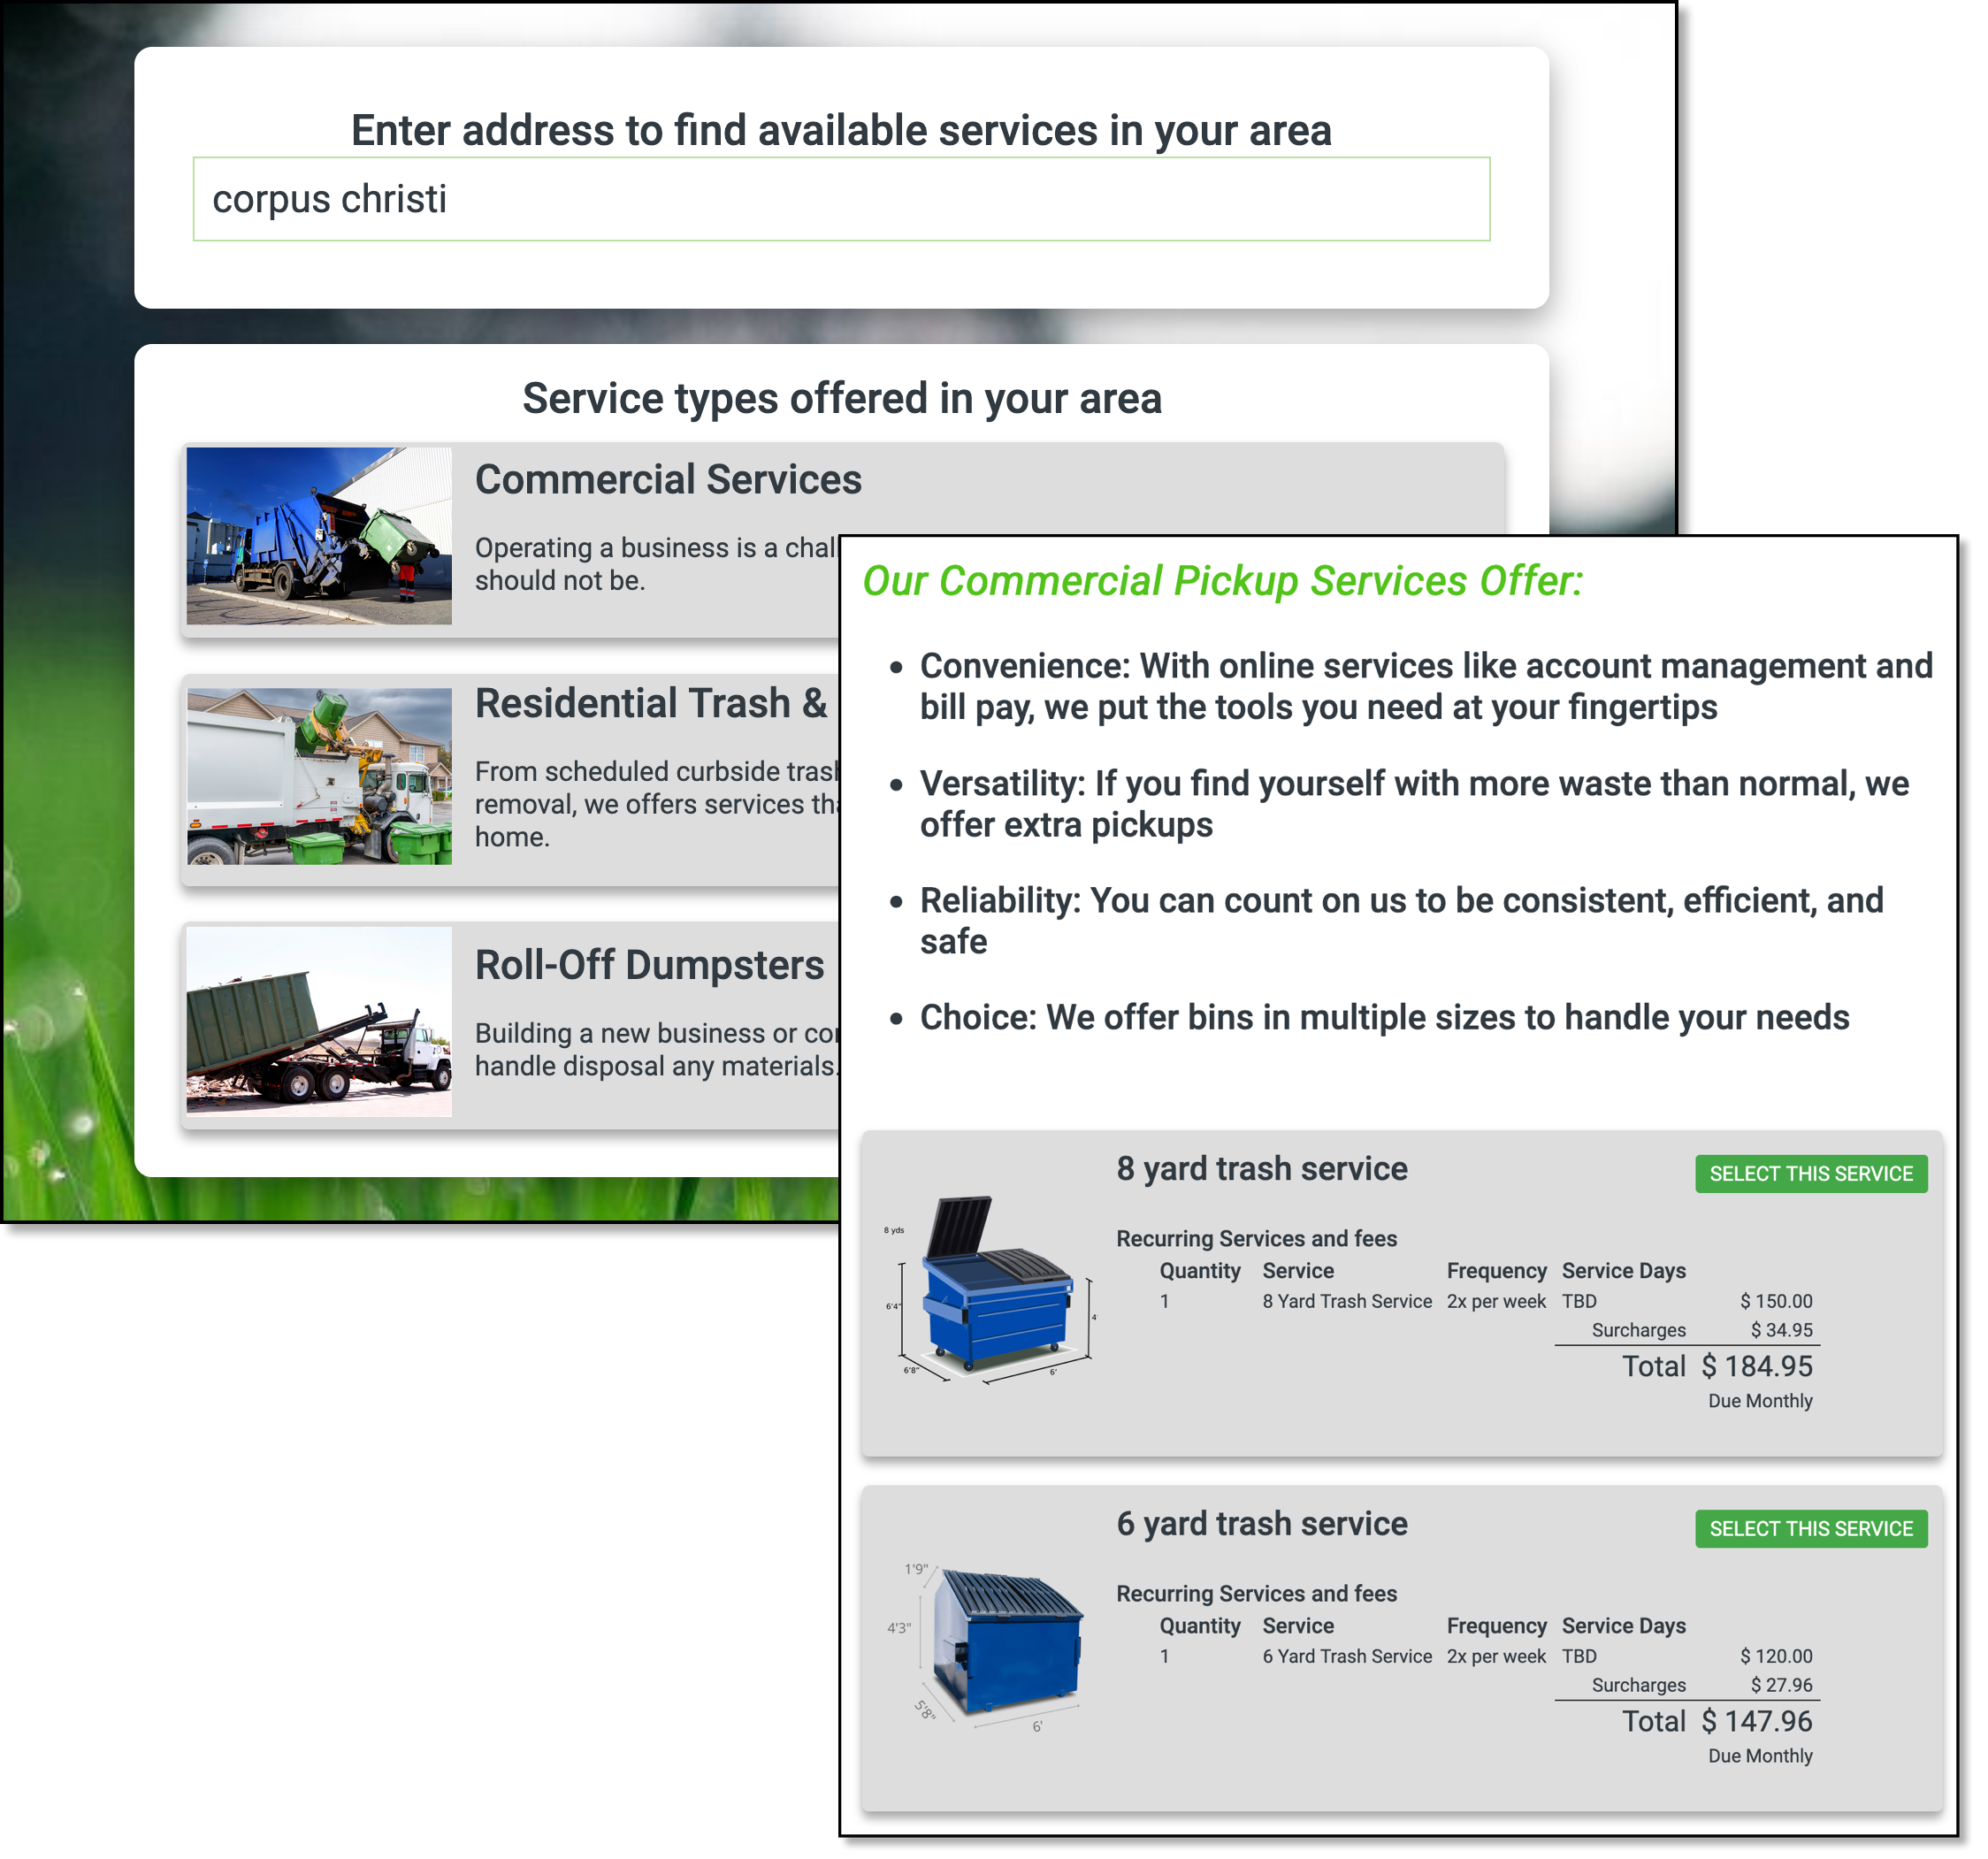
The example illustrated here includes configurations in System Options and Line of Business. If those settings were not configured, only the service bundle options (example: 8 yard trash service and 6 yard trash service) would display. The Content Image uploaded for a specific bundle will be displayed alongside the corresponding bundle. In the example, these are the 8-yard and 6-yard images. | ![]() | |
Enter Contact Information | ||
![]() | Once the customer selects their desired service bundle, they will be prompted to enter their contact information. | |
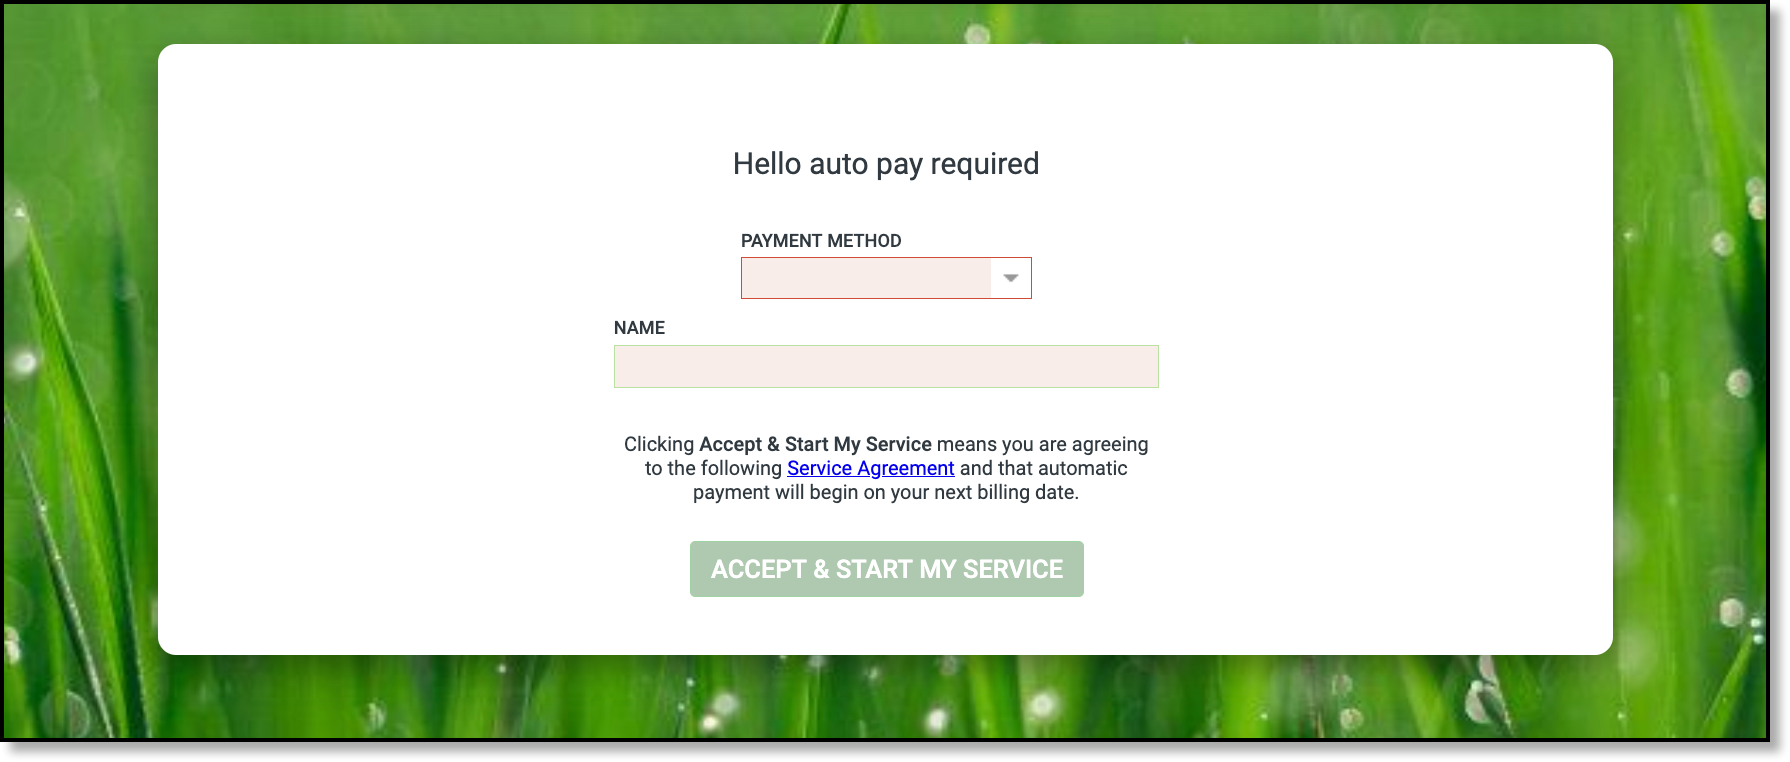
Auto Pay Setup (Optional) | |||
In Bundle Setup, if Require Auto Pay Enrollment is set to 'Yes', the user will be prompted to enter a credit card or bank account for auto pay after providing their contact information. The message that displays above Payment Method can also be configured in Bundle Setup in the Auto Pay Enrollment Message field. | ![]() | ||
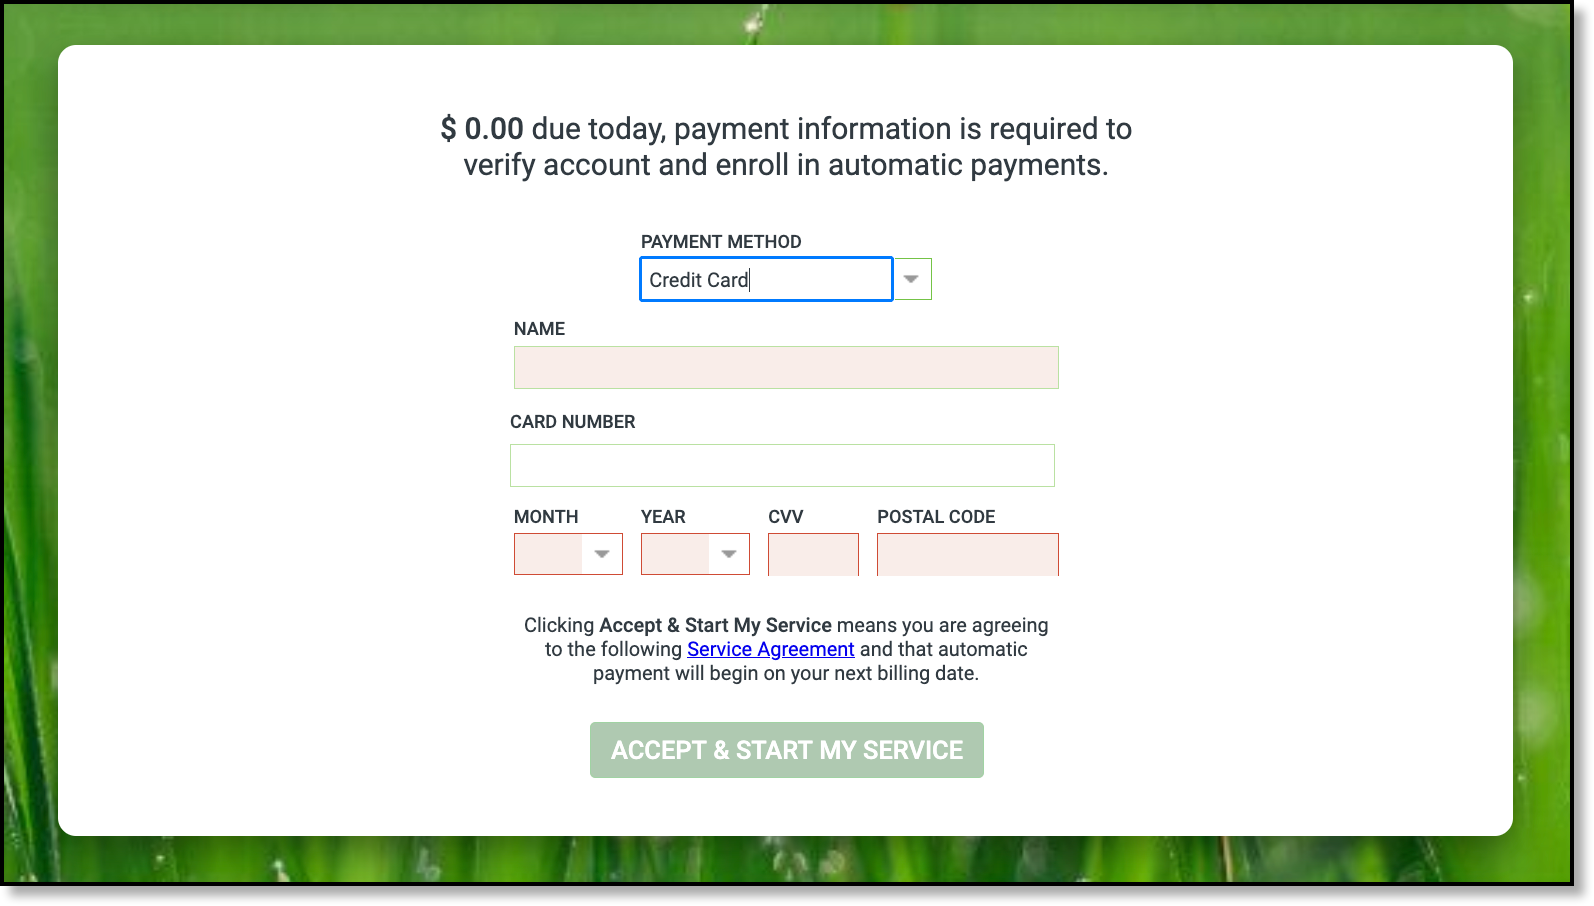
Require Prepayment (Optional) | ||
![]() | In Bundle Setup, if the Require Prepayment field is set to anything other than 'None' the following payment screen is displayed. | |
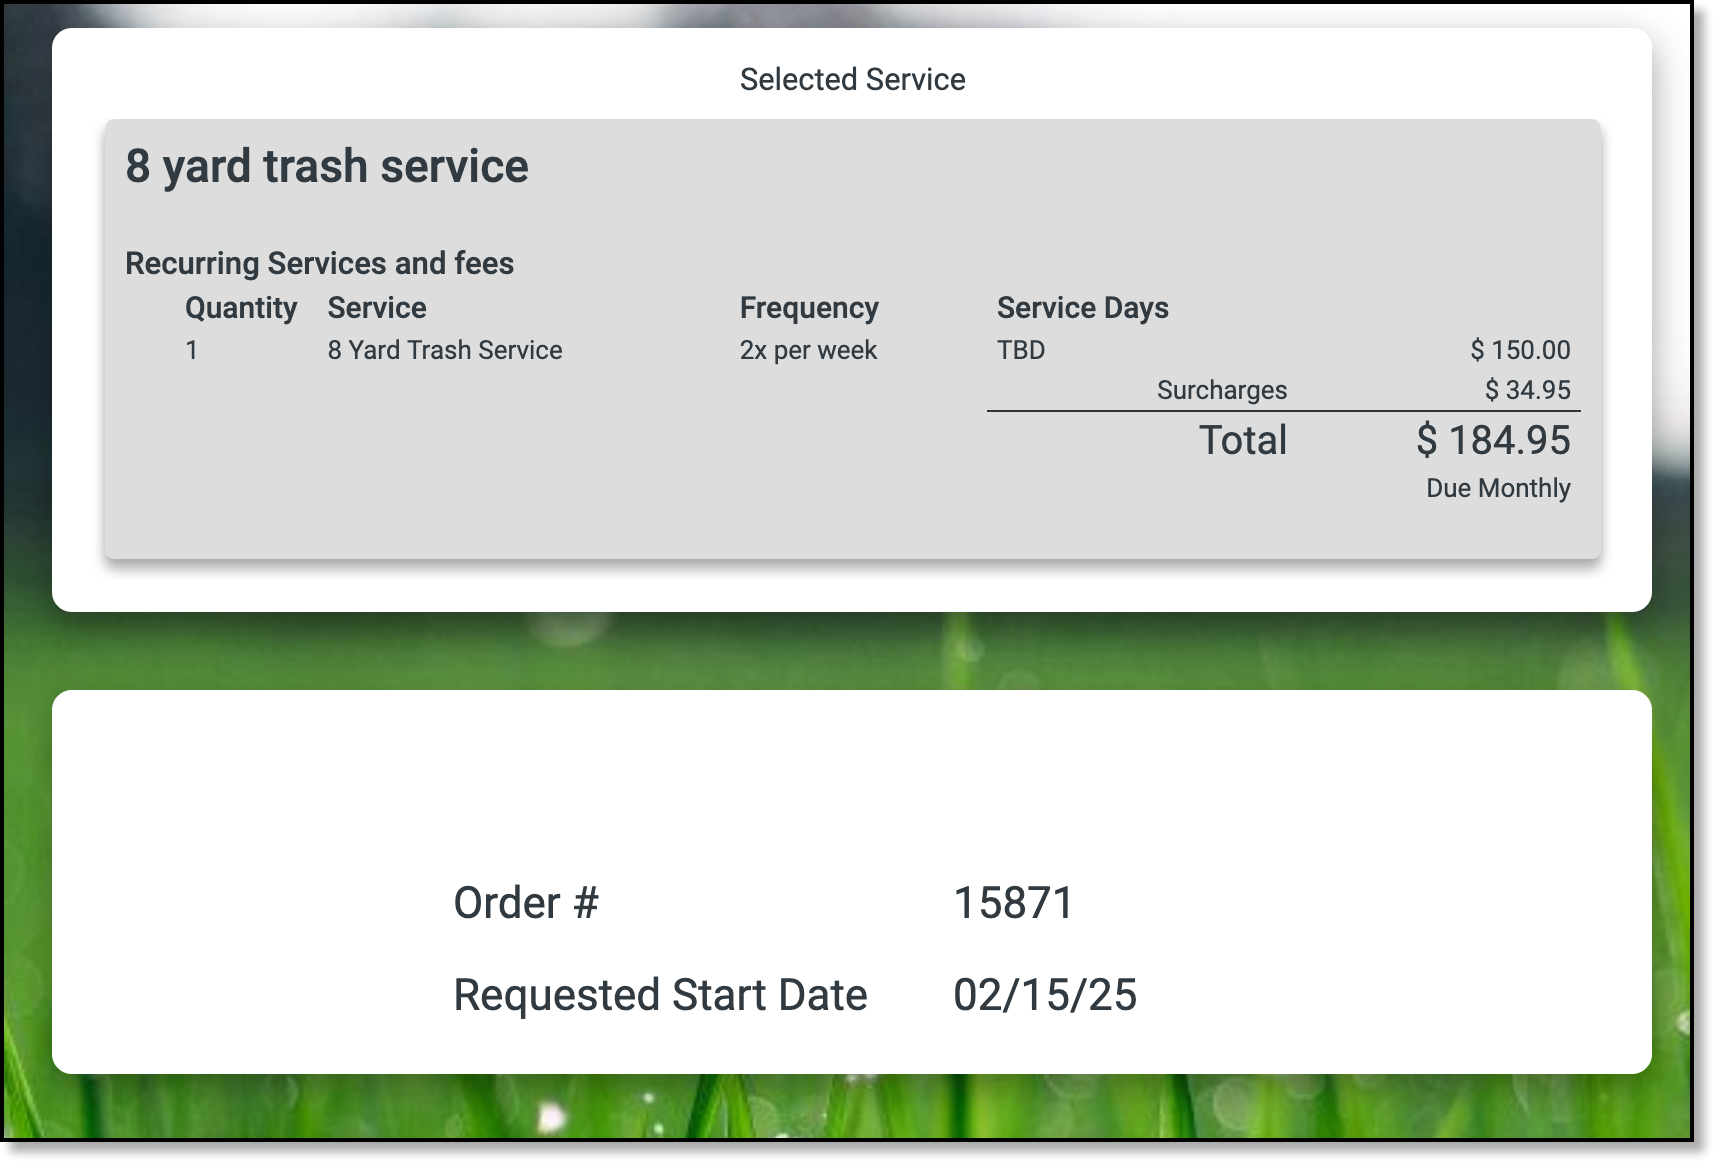
Order Complete | |||
After the customer has submitted their online order, the Completion Message is displayed. Format what is displayed here in Bundle Setup from the Completion Message hyperlink. | ![]() | ||
Quick Add Account and Bundle Process
This section outlines the process a system user will experience using the Quick Add Account and Bundle feature available in the Accounts module.
Accounts Module
Users with permission 463 (Quick Add Account & Bundle) will have access to the Quick Add Account & Bundle option in the Accounts module. Add bundle
From the Quick Add Account & Bundle screen, system users can enter an address to search for service bundles available in the region. Because this process will also create an account, the system will search for potential duplicates, a similar method used by Add Account.
Note: Service Days is defaulted based on the stops closest to the service location.Confirmation of Information
If no duplicates are found and the system user continues, the next screen will prompt them to confirm the contact information for the customer account being created. Once all required fields are completed, the contract will be sent to the customer for review.Order Details
A final order details screen is displayed, confirming that the service notification has been sent to the prospective customer.Orders, Quotes and Contracts
After the order is completed, a new account is created, and the service bundle becomes accessible in the Orders, Quotes, and Contracts sections.
Add Service Menu Process
This section outlines the process a system user follows to add a service bundle from the Customer Service screen. An active account is required to complete the bundle selection process from the Add Service menu.
Add Active Service
Service bundles that have the 'Add Service Menu' check box marked in Bundle Setup, will display as an option in the Active Services drop down list. After selecting the bundle, and entering an effective date, it will be added to the site's active services.