Import Inventory
Last Modified on 06/29/2026 10:19 am PDT
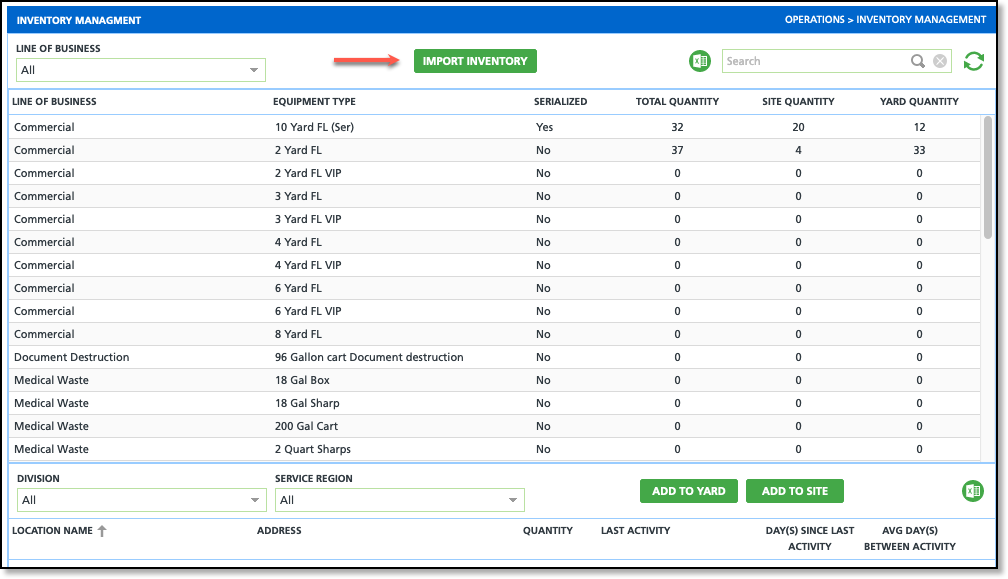
Pathway: Operations > Inventory Management
The Import Inventory tool is used to mass import equipment inventory from an external CSV file into Navusoft. This article details that process and includes the CSV file requirements for a successful upload.
Import Inventory only supports the CSV file format.
Import Inventory
The import inventory process is simple and improves efficiency because it replaces manual, one-by-one data entry with a single, automated action.
- From the Inventory Management screen select the Import Inventory button.
- Select a File to import. It must be in the csv format as described in the next section.
- Select Import and then OK when the Message pops up indicating the import process has started. You will be notified once it is complete.
CSV Import File Requirements
A successful upload requires that the import file follow a specific format- it must adhere to the column order and rules as shown below.
The first row of your CSV file must contain the column headers.
The table below outlines each header name, its description, and the specific logic used to process your data during import.
| Column Header | Description | Logic |
| Yard | Matches on Yard ID or Yard Name.
| If empty and Site is empty, or a match is not found, the record will be rejected. |
| Site | Matches on Site ID or External ID.
| If empty and Yard is empty, or a match is not found, the record will be rejected. |
| Equipment Type | Matches on Equipment Type ID or Equipment Type Name.
| If empty, or a match is not found, the record will be rejected. |
| Quantity | Required
For non-serialized equipment, enter the Quantity of the equipment type that should be recorded from the upload.
For serialized equipment, enter a value of "1." | If the equipment type IS NOT serialized a quantity is required or the record will be rejected.
If a site inventory or yard inventory record already exists for the same site or yard and equipment type, the quantity will be updated. Otherwise, a new record is created.
|
Serial Number
Serialized | Required - For Serialized Equipment Only.
Enter the serial number of the equipment being added.
For serialized equipment types, create a new record (row) in the file to separate. | If the equipment type IS serialized, a serial number must be added or the record will be rejected.
If a site inventory or yard inventory record already exists for the same site or yard, equipment type and serial number, the record will be rejected.
|
| Note | Available to capture notes that should display along with the equipment in the inventory screens.
| N/A |
RFID
Serialized | Optional - For Serialized Equipment Only.
Enter the RFID number of the Equipment Type being added.
For serialized equipment types, create a new record (row) in the file to separate. | If the equipment type IS serialized, a RFID can be added. If left blank, the record will still be processed. |
CSV Import File Examples
Serialized and non-serialized inventory can all be included in one CSV file. The first row MUST be column headers.
Non-serialized
Review the highlighted cells for an example of adding non-serialized inventory.

Serialized
Serialized equipment types must be itemized and can not include more than one serial number. Review the highlighted cells for an example of adding serialized inventory. The RFID can be added but is not required.
Enter a "1" value in the Quantity field for serialized equipment; otherwise, the record will be rejected.

This image includes an example using Yard Name and Yard ID to map the inventory to a yard.
Just like yard, site name or site ID can be used to map inventory to a site.
Import Results
After an upload is complete, the user will receive a notification alert along with a Confirmation popup that provides access to an Import Response file. In that file, users will see all of the same column information as their import file, with the addition of Status and Rejection Reason columns.
If a record is rejected, correct the information mentioned in the Rejection Reason column and upload the file again.
Best Practice Tip: remove the records that were successfully uploaded to prevent the possibility of duplicates.

Related Articles
Inventory Management
Site Inventory (Equipment)
Site Inventory (Trucks)


