Tax Region Setup
Last Modified on 05/26/2026 9:57 am PDT
Pathway: Setup > Accounting > Tax Region
The Tax Region Setup screen defines geographic areas where specific tax sets apply to a site such as state and local county taxes. When a tax region is assigned to a site, the associated taxes are automatically applied during billing. This screen also offers an optional setup for default tax regions, allowing you to define areas using an interactive perimeter mapping tool and will apply the tax region based on the customer's address.

Permissions
The following permissions are required to create tax regions:
| Permission ID | Permission Name |
22
| Setup \ Accounting |
435
| Tax Region Map |
Logic
The following logic applies to tax region use after regions have been established:
Online Order and Quick Order Entry
- When assigning a tax region to a newly created site, the system will automatically assign a tax region based on the current geocoded map area.
Prerequisites
Before creating a tax region, confirm taxes have already been established in Setup > Accounting > Tax. Further information on Tax Setup can be reviewed here: Tax Setup
Create a Tax Region
Add Tax Region
To add a new tax region, click the green 'add' icon, enter a Tax Region ID and Name, and set Active to 'Yes' to make it available for use. After a tax region has been added, it will display on the screen in alphanumeric order by Tax Region ID.
Geocode a Tax Region - Map Area
An optional setting enables the creation of default tax regions through an interactive map. These tax regions are automatically applied when a new account or site is created within the defined perimeter boundary.
Configuration
To configure, click the tax region icon to open the 'Map Area' popup window. Use the perimeter tool within the map to define boundaries around the tax region. Multiple perimeters can be defined for a single tax region.
- Green icon: Indicates the service region includes a mapped boundary.
- Red icon: Indicates the service region has no mapped boundaries.
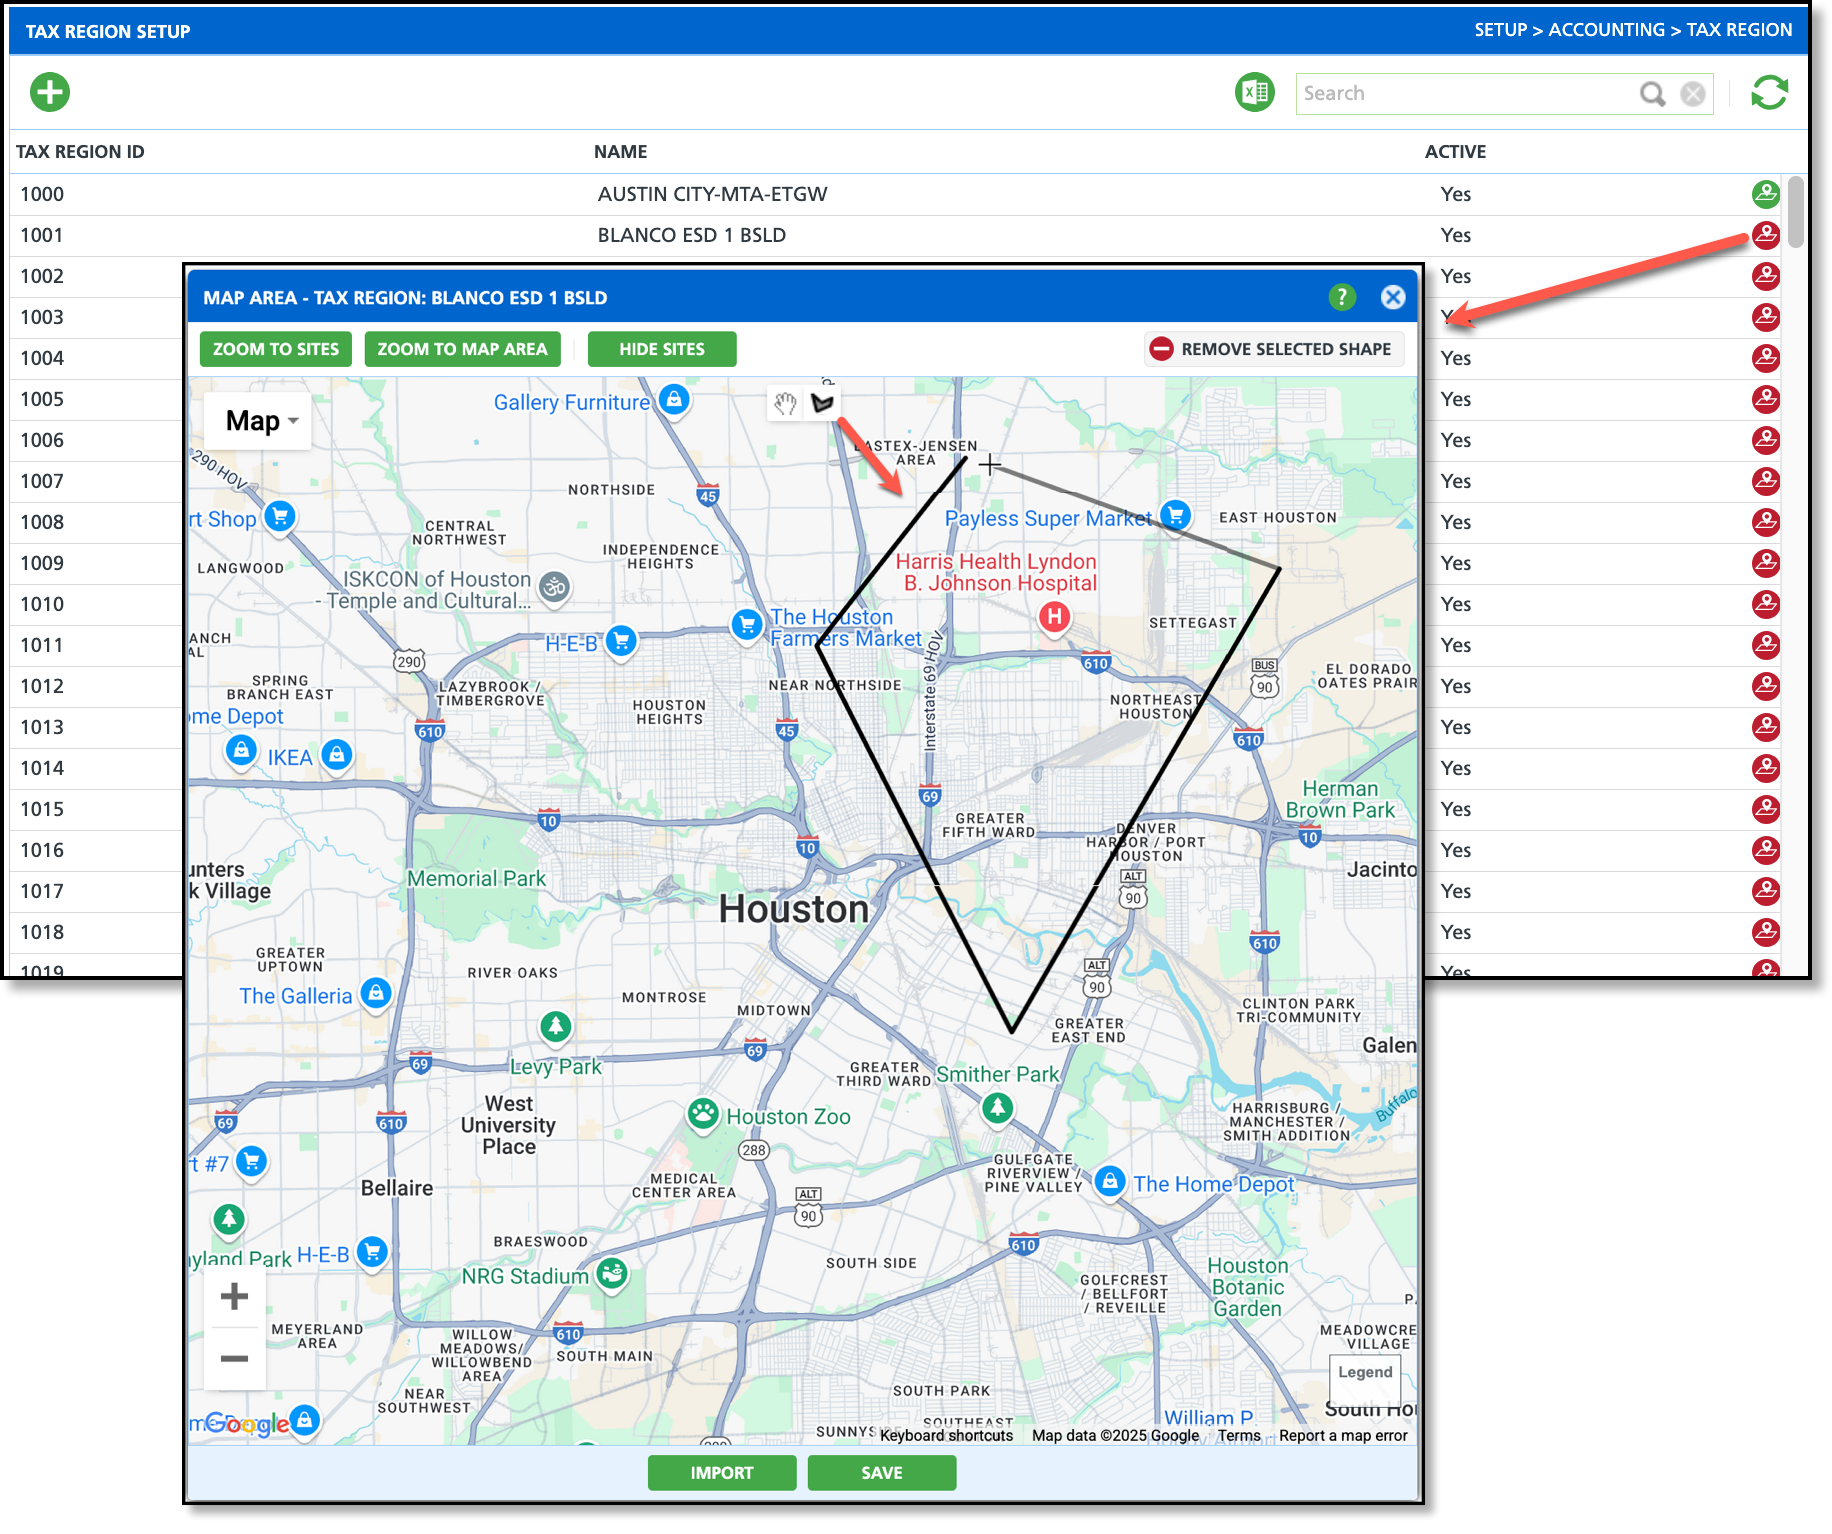
- Click on the perimeter icon at the top of the map screen to turn your cursor into a perimeter mapping tool.
- Draw a perimeter around the area by left-clicking to set each anchor point. The perimeter is complete when fully enclosed.
- Continue this process if more than one geographic grouping exists for a tax region.
- Click Save when finished and the Map Area popup editor will close. The map icon on the Tax Region Setup screen will now display green.
Add Tax Rate
After a tax region is created, applicable taxes and their rates are added under the Tax Rate tab. Tax rates can be updated or removed as needed.

- Select a Tax Region from the upper grid.
- If this is a previously existing tax region, the taxes it includes display in the lower grid.
- For a new tax region, the lower grid will remain empty until taxes are added.
- In the lower grid, select the green 'add' icon to add a new tax rate. This will display the Add / Edit Tax Rate popup editor.
- Select a tax from the Tax drop down.
- Enter the Effective Date when the tax becomes applicable.
- Enter a Rate for the tax.
- This can be edited at a later time by clicking within the Rate column for the tax.
- Click Save when finished.
Related Articles
Tax Setup
Tax Class


