Accounts - Add Payment Method / Make Payment Method Inactive
Last Modified on 06/01/2026 12:40 pm PDT
Pathway: Accounts > Search > Accounts
Manage payment methods for an account by using the Wallet link on the AR History screen. Displayed with the Wallet link is a numeric value in parentheses to indicate the current number of payment methods associated to the account. In addition, if there is a maximum amount set for auto pay, then this will be indicated.

Field Descriptions
Field |
Description |
Account Holder Name
|
The name for the account holder for the credit card or bank account
|
Type |
The type of payment that will be used: Credit Card or Bank Account.
|
Last 4 Digits |
The last four digits of the credit card or the bank account.
|
Expiration |
The expiration date of the credit card.
|
Status
|
Displays Active or Inactive based on the current status of the credit card.
|
Auto Pay
|
If the payment method can be processed automatically with auto pay and if so, when the auto pay occurs.
- No - If selected, disables auto pay for the wallet.
- Scheduled Day - auto pay process will occur on a specific day of the month using the wallet.
- At Billing - If selected, auto pay will use the wallet for payment processing at the time the account is billed.
To learn more about Auto Pay and how it is set up, review the Auto Pay Setup article.
|
Day of Month
|
If Auto Pay is set to Scheduled Day, then the Day of the Month that it has been scheduled for is displayed.
|
| Auto Pay Max |
If enabled in the Customer Portal tab of the System > System Options setup, the value entered which is the max amount that can be charged during auto pay processing.
|
| Created By |
The person that entered the wallet entry.
|
| Processor |
The processor that is to be used when processing the bank account or credit card.
|
| View History (hyperlink) |
Click on this link to open the Account Payment Method History screen which lists all payments made against that payment method in the wallet.
|
| Post a Payment (icon) |
Make a payment against that payment method.
|
Wallet Setup Requirements
The following settings must be enabled or the option to add a payment method will be hidden:
System Options Setup
Pathway: Setup > System > System Options
In the Integration tab of System Options, the Enable ERP Integration setting must be configured to any option other than 'External System' to ensure the Wallet feature is displayed. A selection here supersedes all other settings that enable the Wallet.

Division Setup
Pathway: Setup > System > Division
In the Credit Card / ACH Processing tab of Add/Update Division screens, set the Enable Credit Card Processing field to one of the available options:
- Yes (Credit Card & ACH)
- Yes (Credit Card Only)
If this field is set to 'No,' the Add icon in the Account Wallet popup will be hidden.

Account Class Setup
Pathway: Setup > Account > Account Class
In the Payment Processing tab of the Add/Update Account Class screens, set the Disable Account Wallet field to 'No' for the Add option to appear in Wallet.
This setting also enables a 'Save for Reuse' checkbox in the Add Payment popup when using a credit card to pay on a work order (Service Record > Payments > Add Payment).
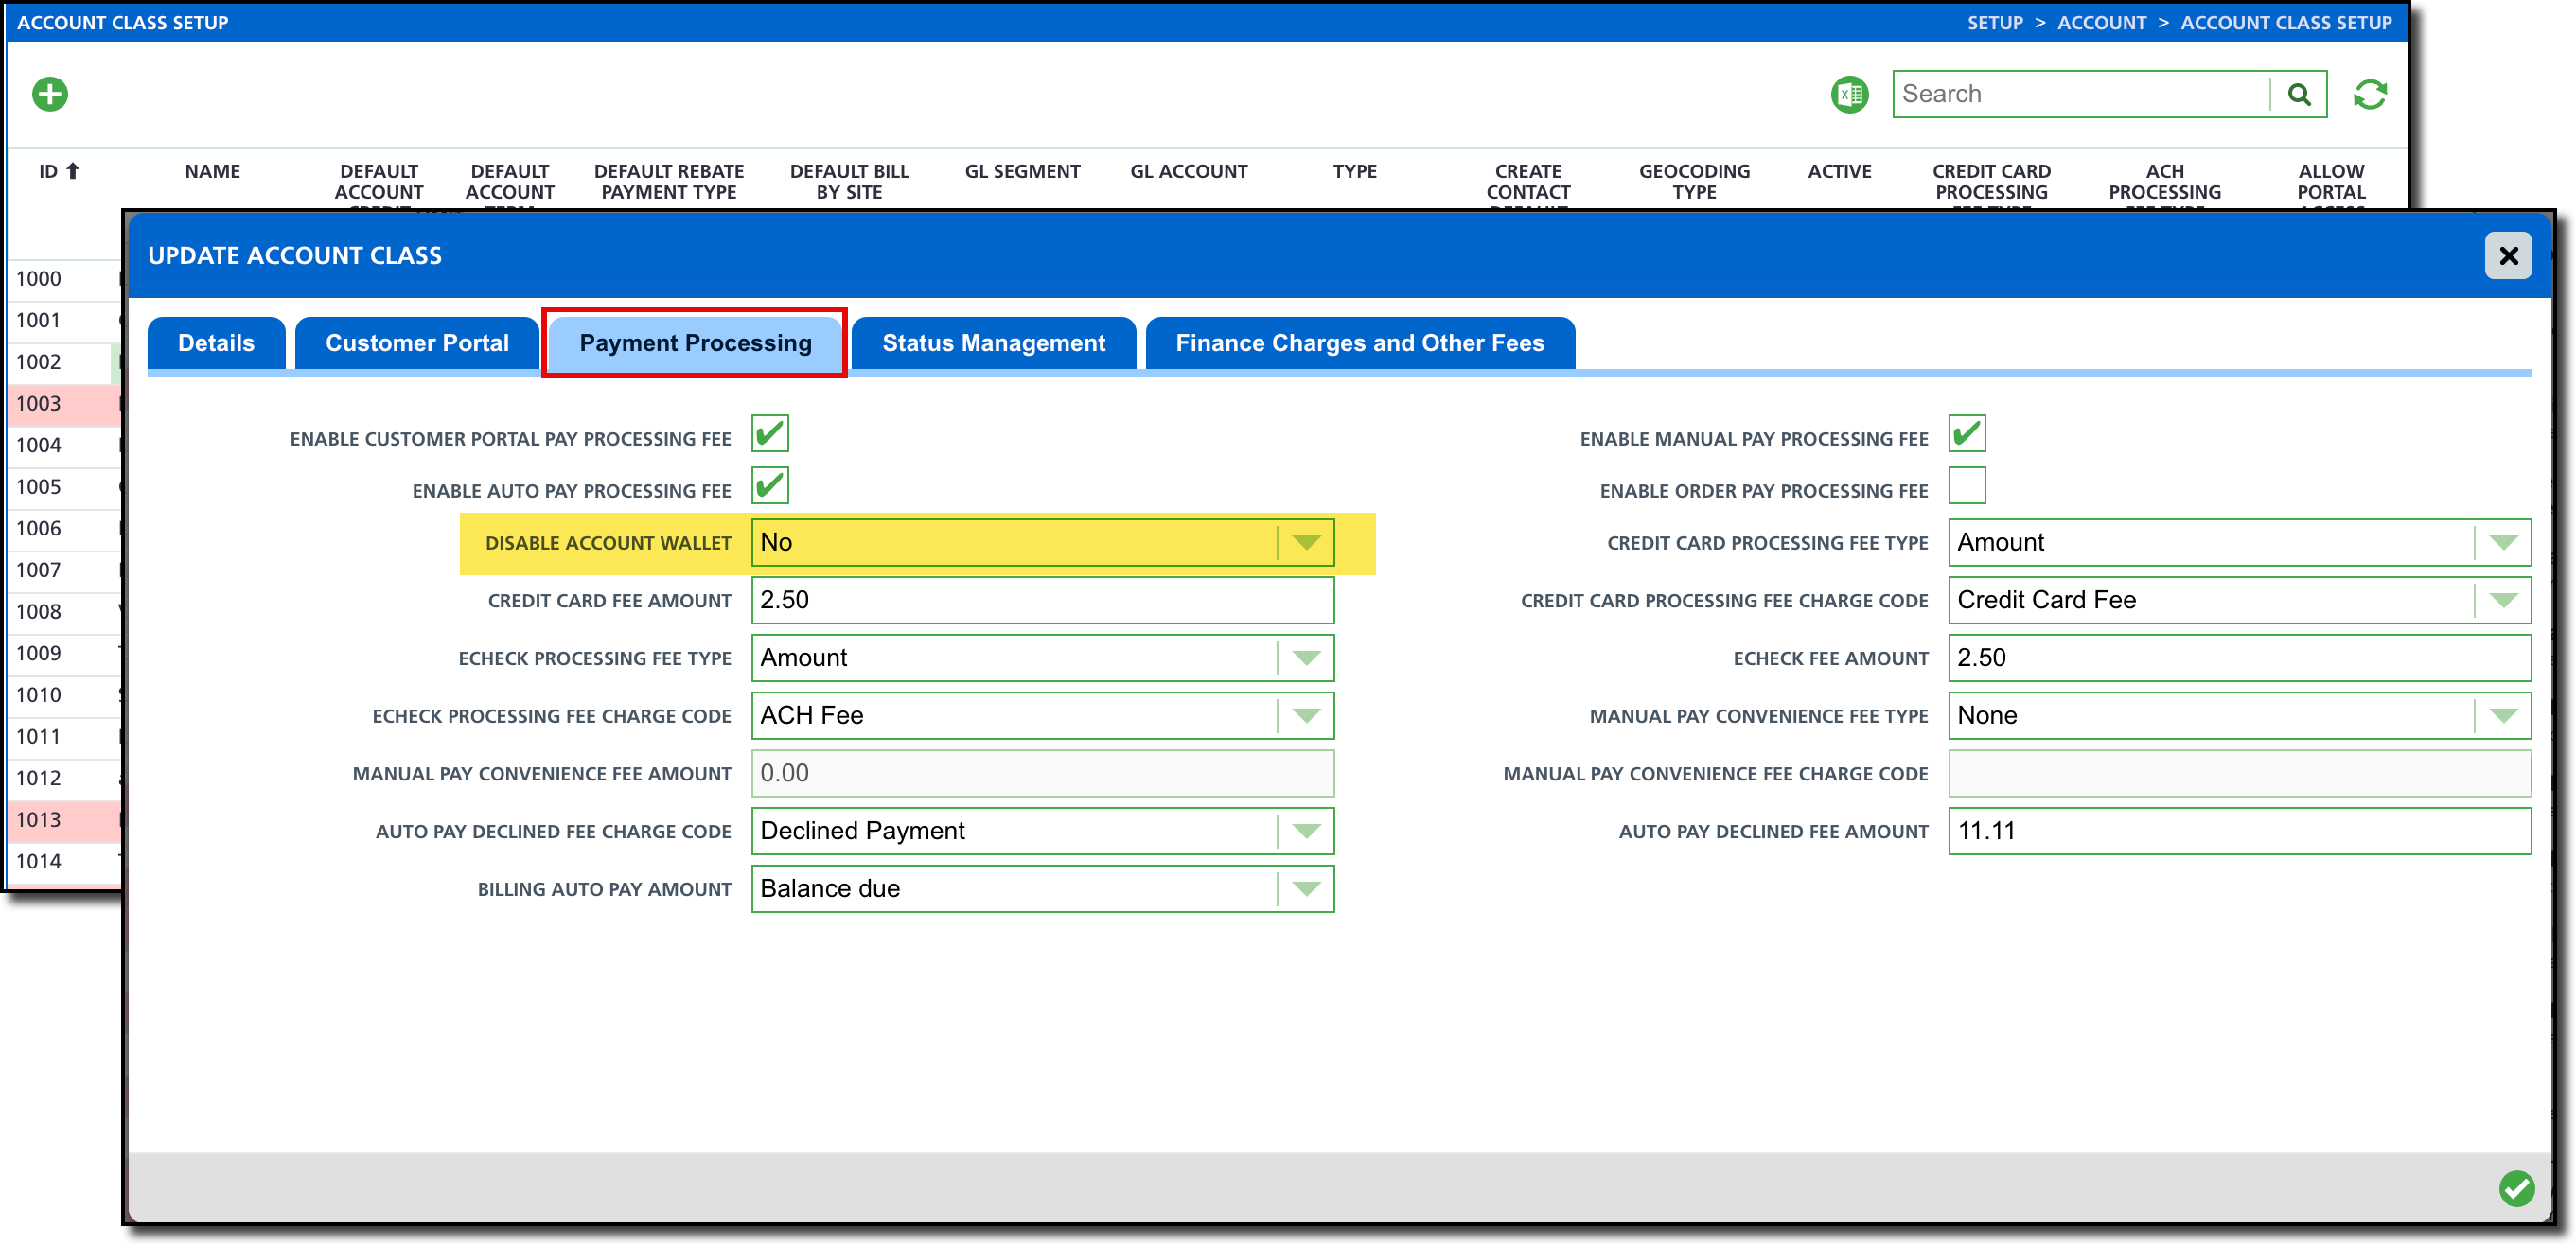
To learn more about the configurations for the Payment Processing, refer to the Account Class Setup article.
Add to Account Wallet
Just like a personal wallet can hold many credit cards, Account Wallet can have many credit cards and bank accounts associated with it.

Field Descriptions
Field |
Description |
Type
|
Identifies the payment method type to be used, either a credit card or bank account. Based on the selection, additional fields will be displayed to capture the required payment method details.
|
Name
|
Identifies the name on the credit card or bank account.
|
Automated Payment
|
Determines if the payment method can be processed automatically with auto pay.
- No - If selected, disables auto pay for the wallet.
- Scheduled Day - If selected, a 'Day of Month' field is displayed to identify which day of the month auto pay should process using the wallet.
- At Billing - If selected, auto pay will use the wallet for payment processing at the time the account is billed.
|
| Autopay Amount | The amount that can be automatically charged to this payment method.
|
Description
|
Option to add additional information associated to the payment method.
|
Add Payment Method
- From the Account Wallet, select the green + icon to open Add Account Payment Method window.
- Complete the following required fields:
- Select the payment method type, either Bank Account or Credit Card. Based on the selection, the appropriate fields will be displayed to enter the payment method details.
- Enter the Name of the person/company associated with the payment type.
- Select the Automated Payment option the payment method should follow.
- Click Save when finished.
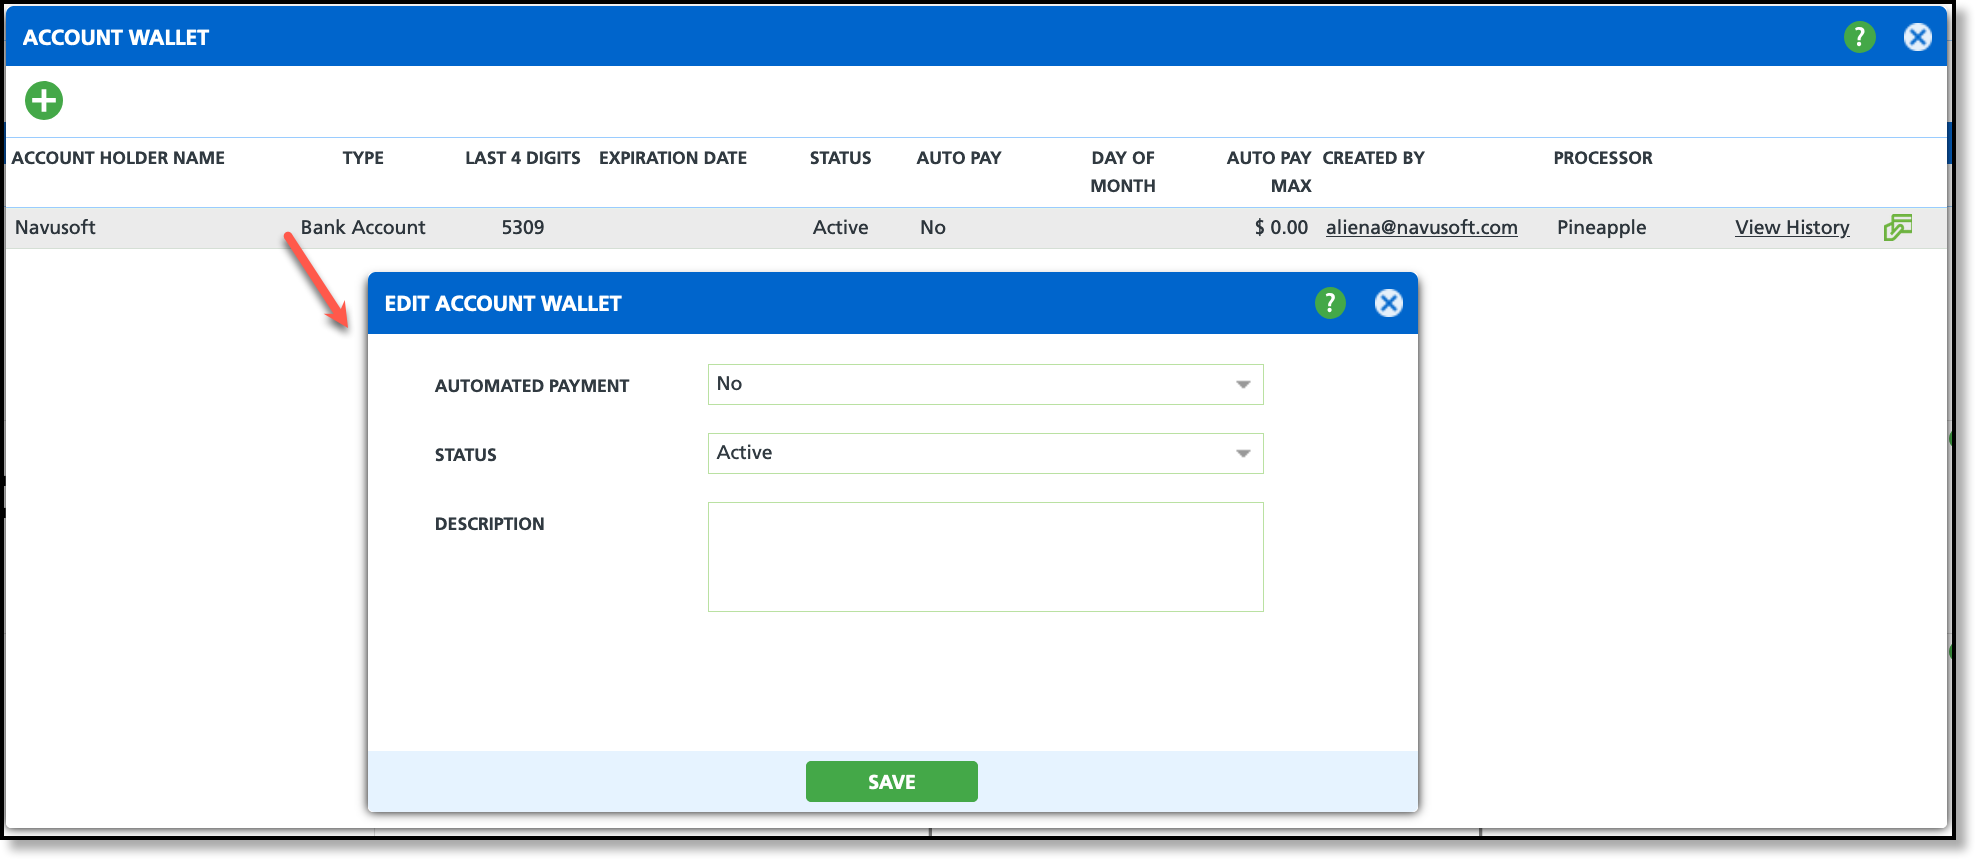
Edit Account Wallet
Update an account's payment method to either enable or disable auto-pay, or to activate/inactivate the selected payment method. Payment methods cannot be deleted but can set to inactive.
Field Descriptions
| Field |
Description |
Automated Payment
|
Enables the payment method into auto pay. If no is selected, auto pay can not be processed with the payment method. Auto pay options include:
- At Billing: auto pay will use the payment method to process payment at the time of billing.
- Scheduled Day: auto pay will use the payment method to process payment on the chosen day of month. A 'Day of Month' field displays if this option is selected.
|
Status
|
Determines if the payment method is active and available for use.
|
Description
|
Additional details regarding the payment method.
|
Edit Payment Method
- Double click on a payment method to open the 'Edit Account Wallet' popup window.
- Edit the necessary fields for the payment method.
- Click Save when finished.
Permissions
The following permissions are required to add payment methods:
| Permission ID |
Permission Name |
| 5 |
View Account |
| 6 |
View Site |
| 41 |
View AR History |
| 278 |
Add Account Wallet |


