Add Appointment
Last Modified on 06/26/2026 1:27 pm PDT
Pathway: Accounts > Search > Accounts
Add an appointment to a customer's account for future meetings, events and followups. An appointment can be added from the account's menu option, or by right clicking within the calendar.
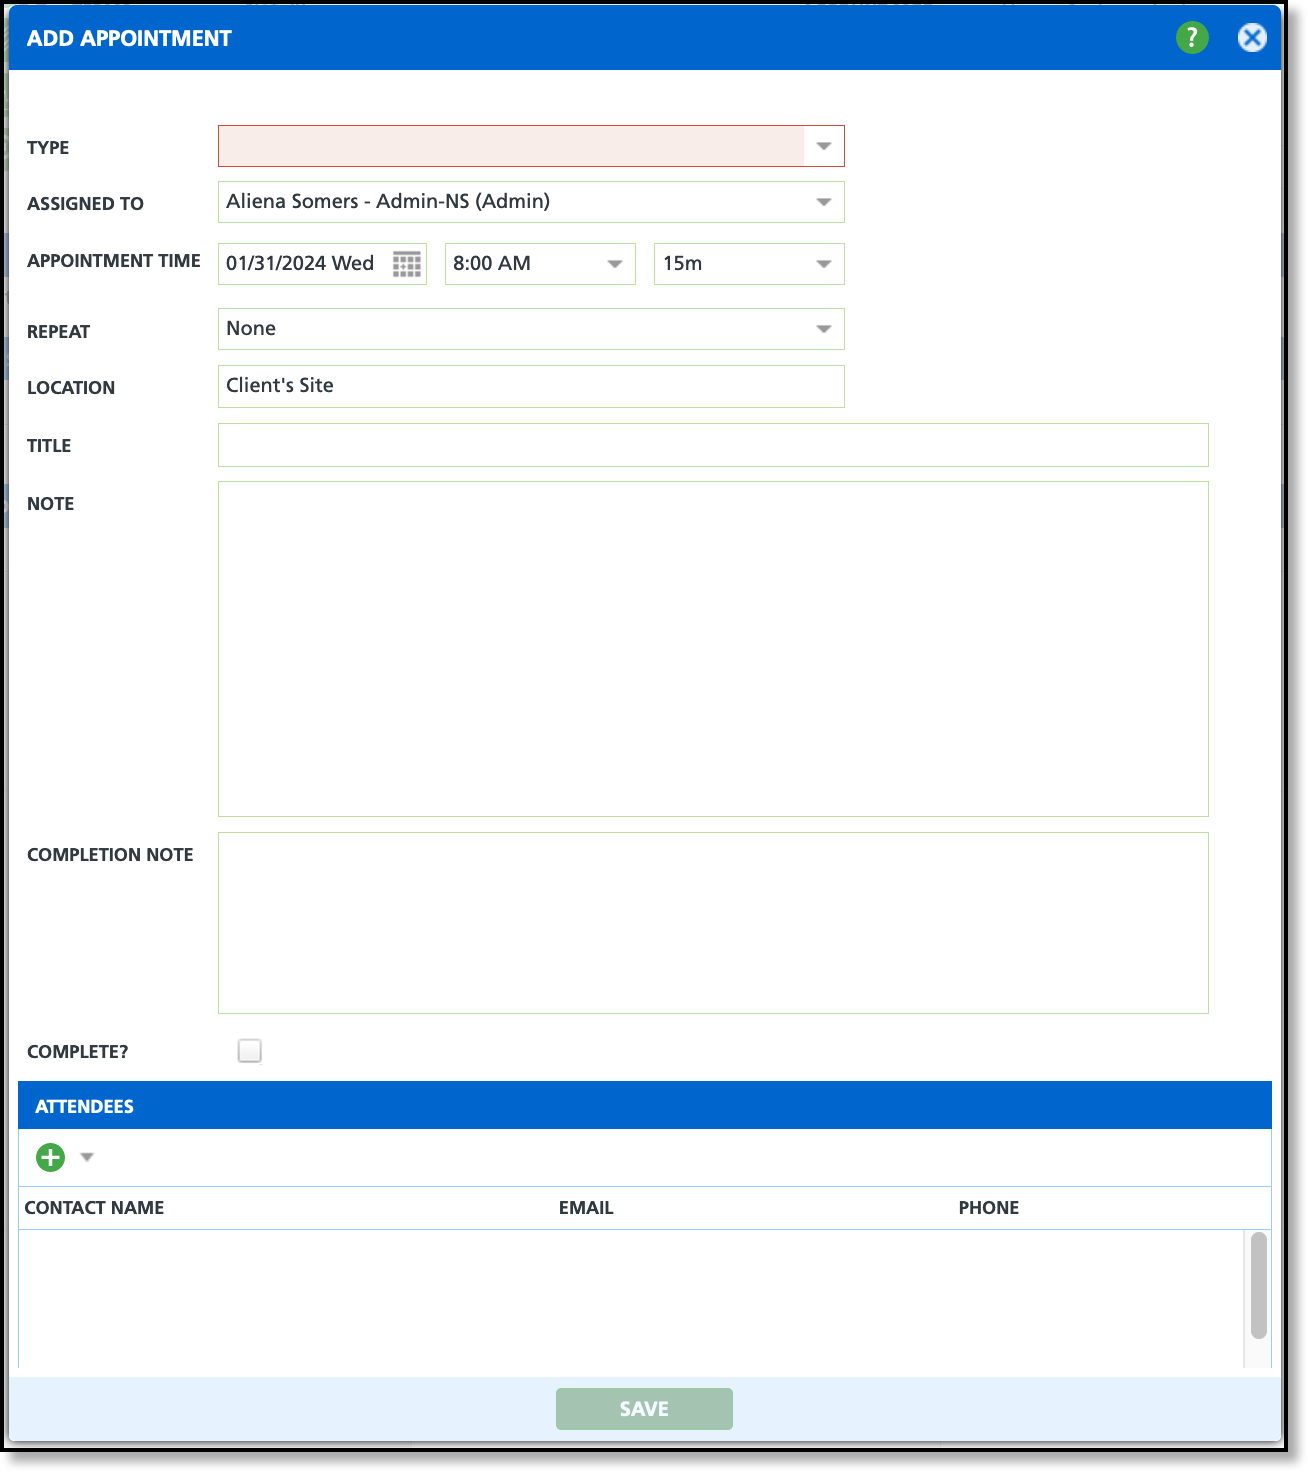
Field Descriptions
|
Field
|
Description |
| Type |
Select from a list of Appointment Types which are defined in Setup > Account > Appointment Type. The type should be descriptive and provide a way to categorize appointments.
|
| Assigned To |
The user the appointment is assigned to. Select from the dropdown or, by default, the user creating the appointment is assigned.
|
| Appointment Time |
The date, time and duration of the appointment.
|
| Repeat |
Select an option from the dropdown to set the appointment up on a recurring schedule. If this is a one-time appointment, leave 'None' selected.
|
| Location |
Where the appointment will be taking place. If Other, consider adding additional information such as online meeting links in the Note box.
|
| Title |
The title that will display on the Customer Service Calendar and the User Calendar/Appointments.
|
| Note |
Additional space to add internal notes regarding the appointment.
|
| Completion Note |
Option to add any completion notes after the appointment has ended.
|
| Complete |
Select the Complete check box only after the appointment is complete.
|
| Attendees |
Includes a list of account contacts who will be attending the appointment.
|
Add Appointment
Appointments can be added from two locations, the Account Menu and the Account Calendar.
Account Menu
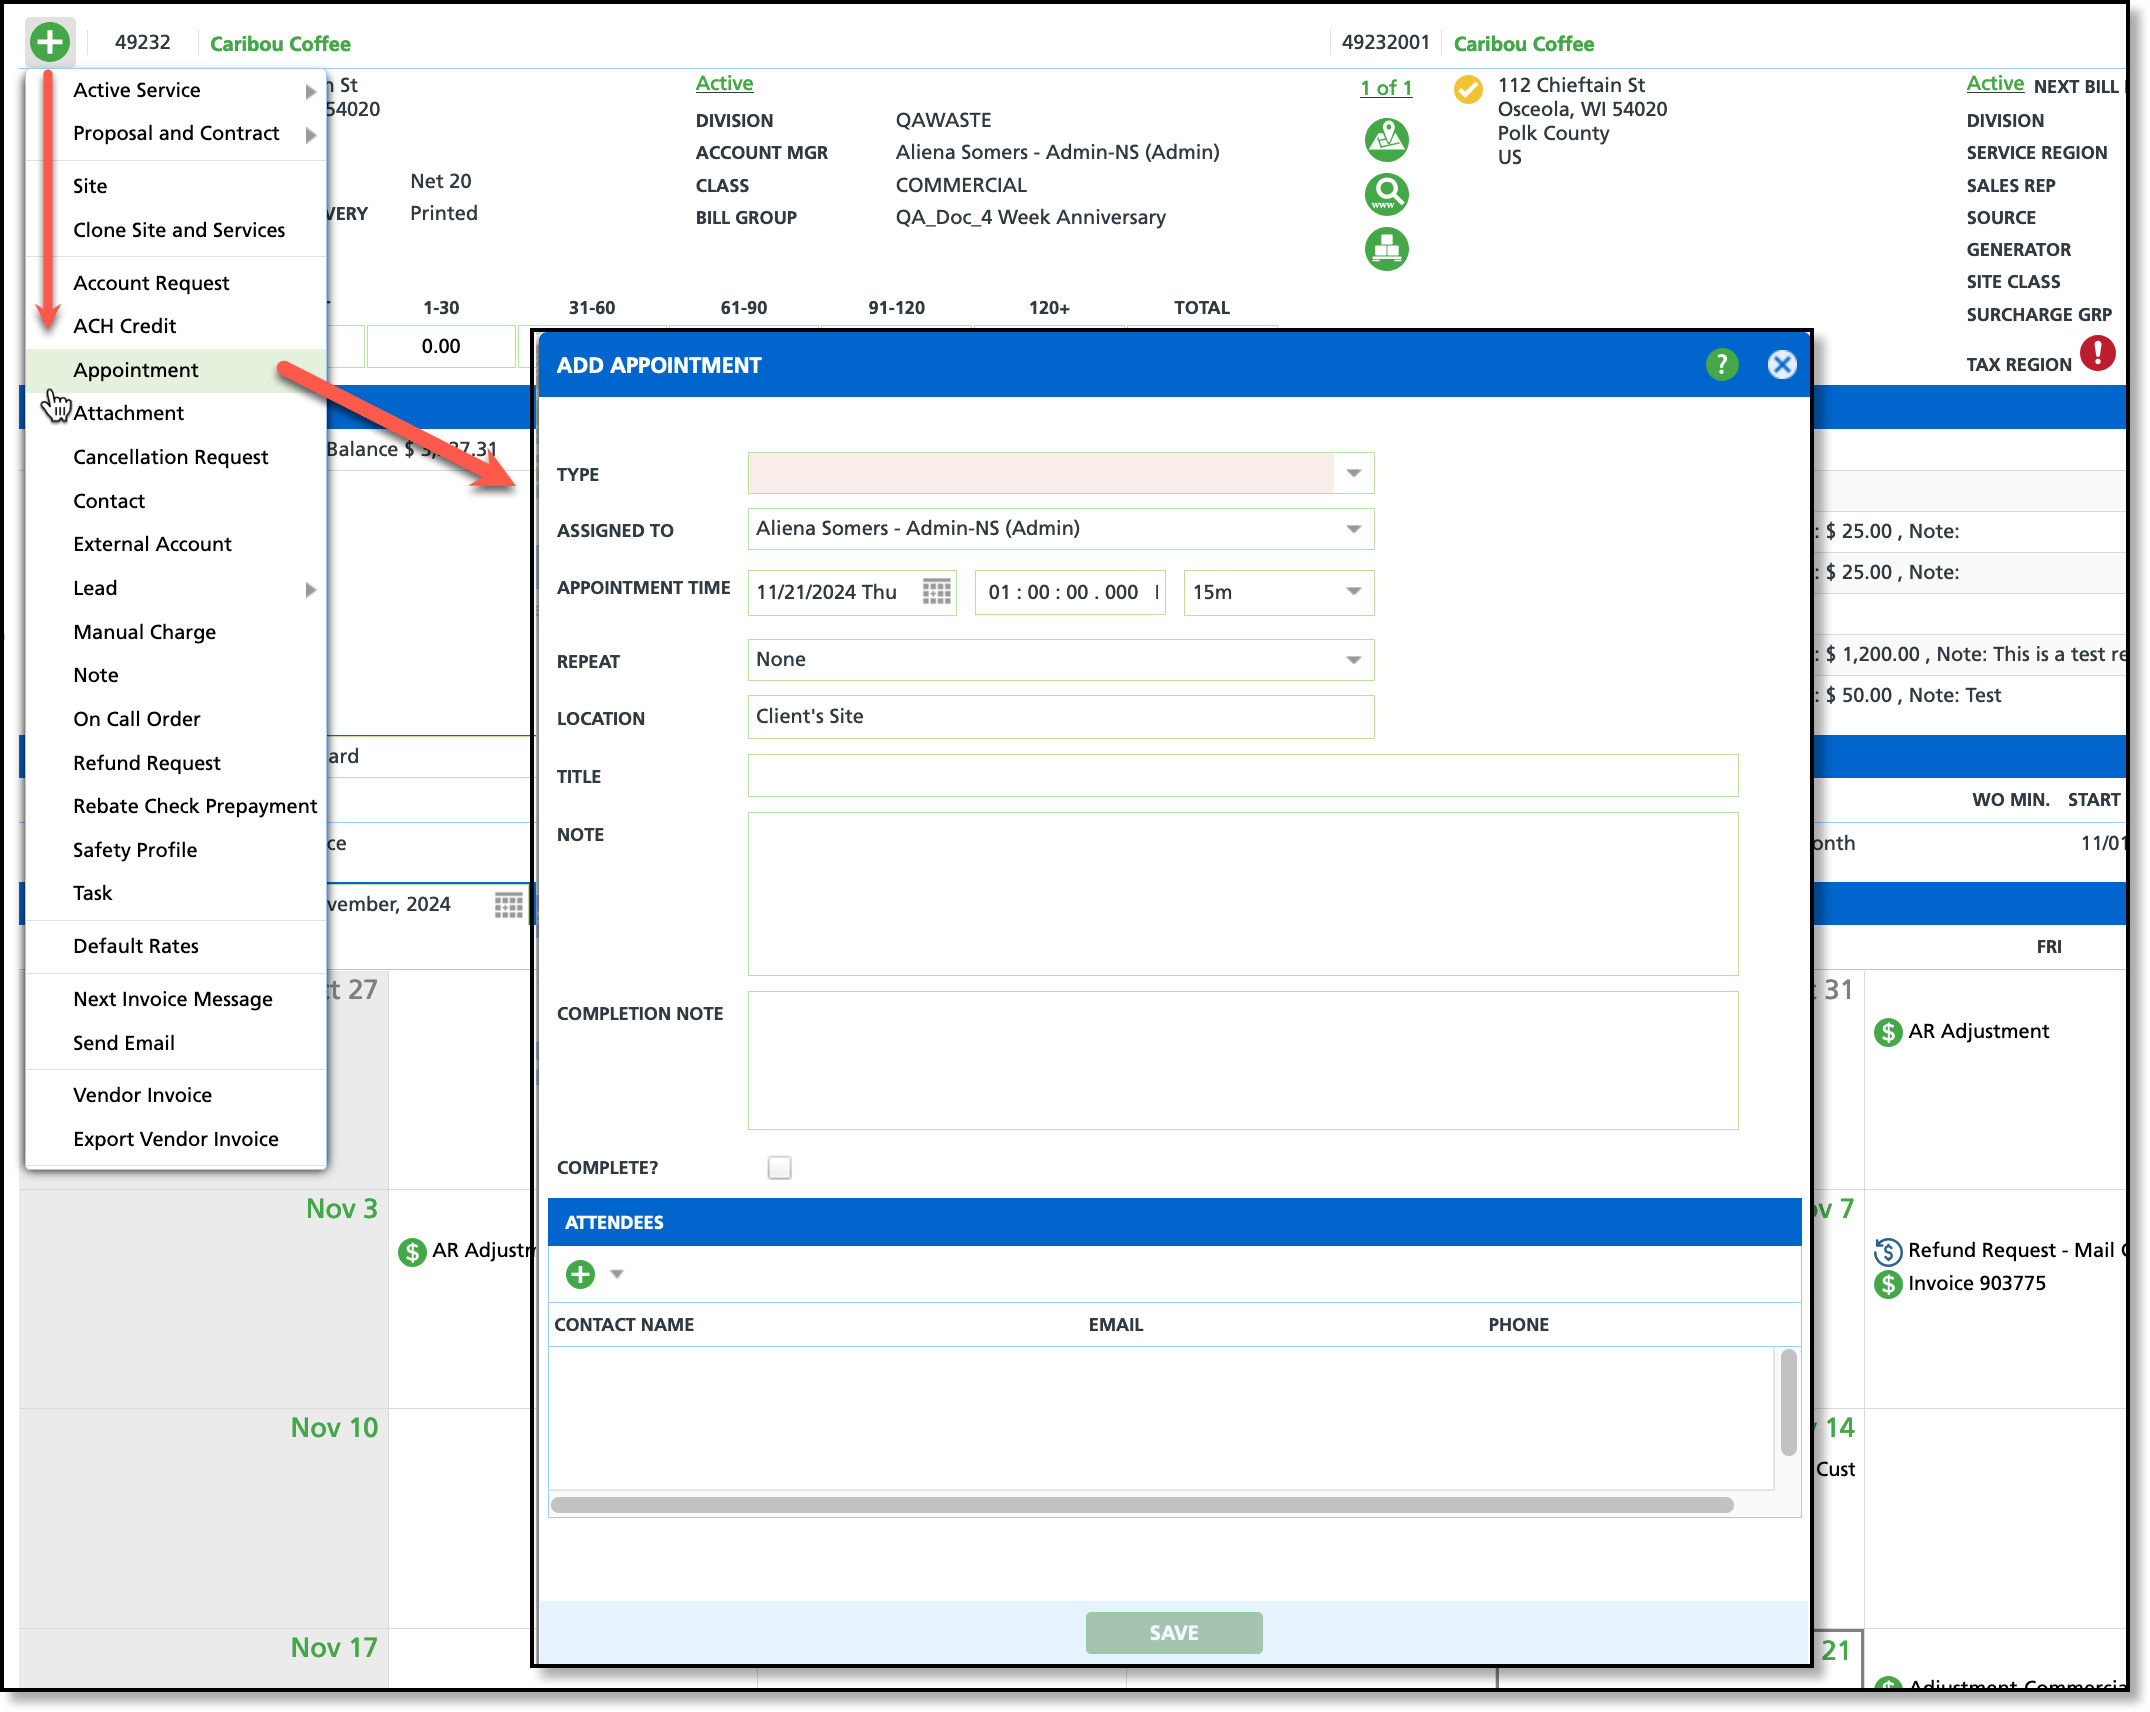
- Click on the green + icon at the top left of the account screen.
- Select 'Appointment' from the list of options. This will open the Add Appointment editor.
- Complete all necessary fields.
- Do not enter a Completion Note, or select the Complete check box until after the appointment is complete.
- Select and add Attendees to record who the appointment will include. Only contacts for the account/site display for selection.
- Click Save when finished.
Calendar
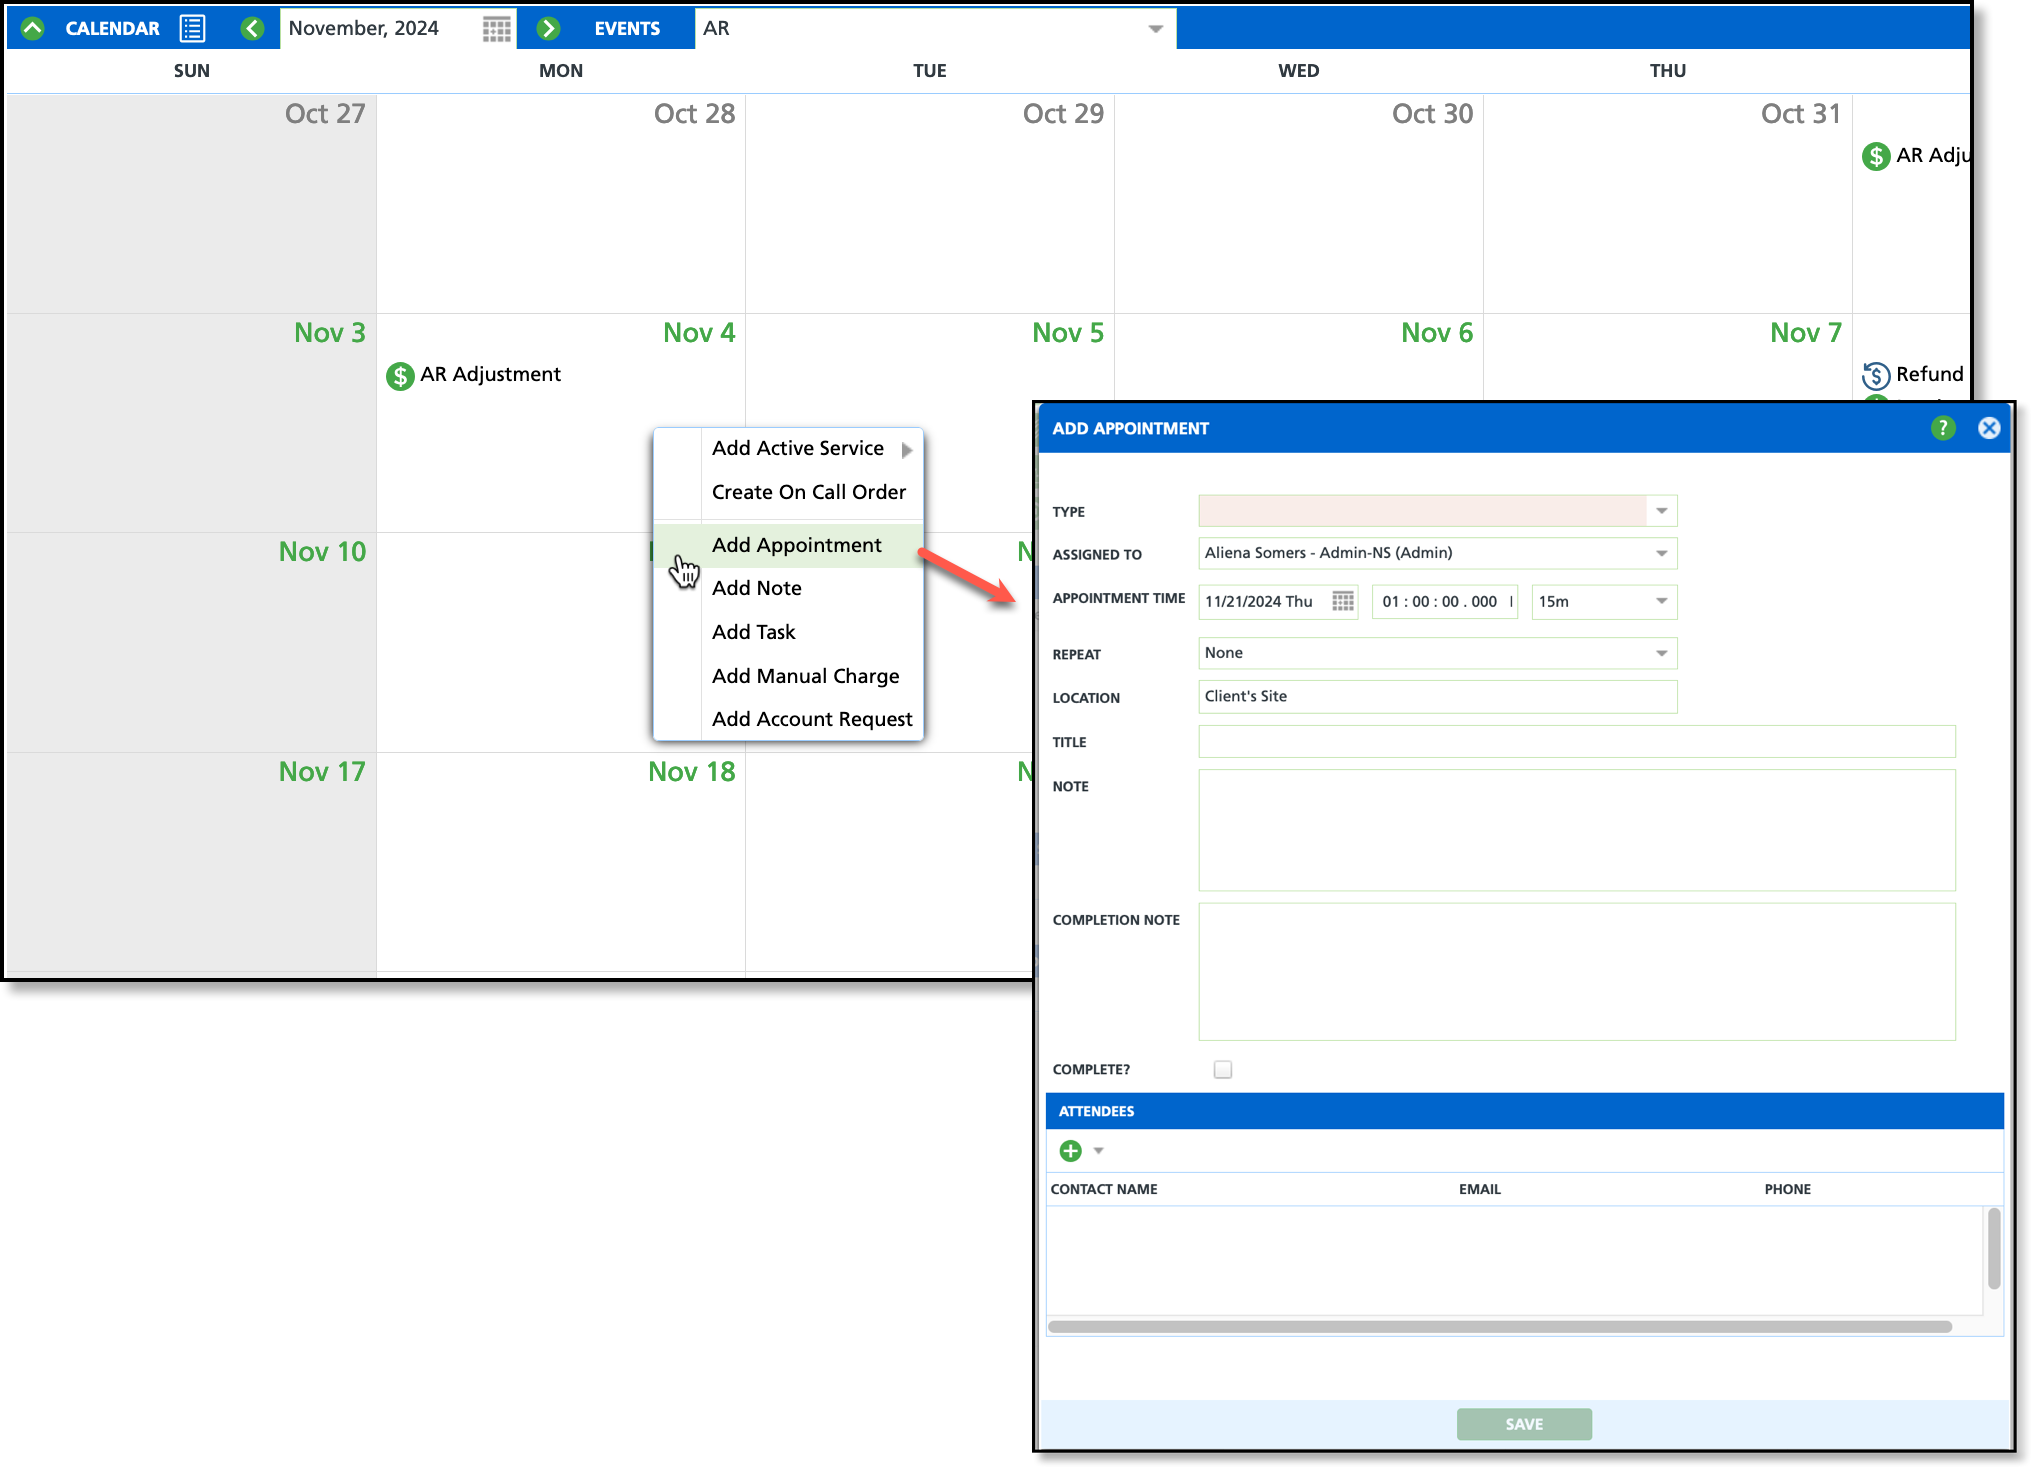
- Right-click on the calendar date the appointment applies.
- Select 'Add Appointment' from the popup that displays.
- From the Add Appointment popup editor, complete all necessary fields.
- Do not enter completion notes, or select the Complete check box until AFTER the appointment is complete.
- If necessary, select and add Attendees. Only contacts for the account/site display for selection.
- Select Save when finished.
Screen Locations Appointments are Displayed
Appointments will display in on Home screen, the Notification toolbar, and the Pending section until the appointment has been marked 'complete.'
Appointments Column of the Home Screen
Pending Section of the Account
Permissions
The following permissions are required for adding, editing and deleting appointments:
| Permission ID |
Permission Name |
5
|
View Account |
6
|
View Site |
9
|
Add Appointment |
10
|
Edit Appointment For Self |
11
|
Delete Appointment For Self |
12
|
Edit Appointment For Others |
13
|
Delete Appointment For Others |
Database Query Mapping
Use the Database Query Tool to audit appointment history or generate lists of scheduled customer interactions.
Database > Database Query
Entity: Customer Service Activity History
| To Find |
Use Display Fields to Filter By |
|
All Appointments
|
Type = "appointment"
|
| Appointments for an Account |
Type = "appointment" AND Account ID = a specific account ID
|
| Upcoming Appointments |
Type = "appointment" AND Appointment Datetime >= today's date AND Appointment Status = "pending"
|
Related Articles
Appointment Type Setup


