Add a New Site & Move Between Sites
Last Modified on 06/29/2026 3:08 pm PDT
Pathway: Accounts > Search > Account Details Screen
From the Customer screen, users can navigate between various site locations under the parent account, add new sites, and edit existing ones.
Permissions
The following permissions determine what a user can do beyond viewing a site when editing it:
| Permission ID |
Permission Name |
| 5 |
View Account |
| 6 |
View Site |
| 8 |
Edit Site Status |
| 67 |
Add Active Site |
| 282 |
Edit Site Billing Settings |
| 337 |
Edit Site Service Address |
| 338 |
Edit Site Division and Service Region |
| 339 |
Edit Site Source |
| 340 |
Edit Site Sales Rep |
| 451 |
Add or Edit - Override Account or Site Surcharge Rates |
Field Descriptions - Add Site
Basic Settings
The Basic Settings tab includes vital site details like address, site name, notes, and other essential information for accounting and operational purposes.
Field |
Description |
|---|
Contact/Location Information
(Name, Address, Phone)
|
Enter the contact and location information for the site.
|
Signature Required
|
If selected, the driver will be required to collect a signature each time they service the location.
|
| LEED Reportable |
If selected, data will be collected for environmental reporting.
|
| Division |
The division to which the site belongs. The division assigned to a site determines who manages the site in areas such as dispatch and operations and facilitates billing processes.
|
Service Region
|
Identifies the region the site belongs to.
|
Tax Region
|
Identifies the tax region the site belongs to.
|
| Source |
Indicates how the site originated and helps with future sales and marketing campaigns.
|
| Sales Rep |
The sales representative that manages the site.
|
Status
|
Indicates the current status of the site.
|
| Site Class |
The Site Class the site is included in.
|
| Generator |
The amount of waste expected to be generated by this site.
|
| EPA |
The EPA ID for the site.
|
| State ID |
The State ID for the site.
|
| Additional Service Minutes |
Expected additional service minutes needed to complete services for this site. This helps with route optimization, if being used.
|
Note
|
Displays in the site details section when viewing the Customer screen.
|
Warning on Open
|
Displays as a site-specific pop-up warning anytime the site is accessed.
|
Access Information
|
Used for conveying information the driver will need to access a location. Displays every time the location is serviced.
|
Business Hours / Service Window
|
Used to identify a site's hours of operation. Select the calendar icon to add a schedule.
|
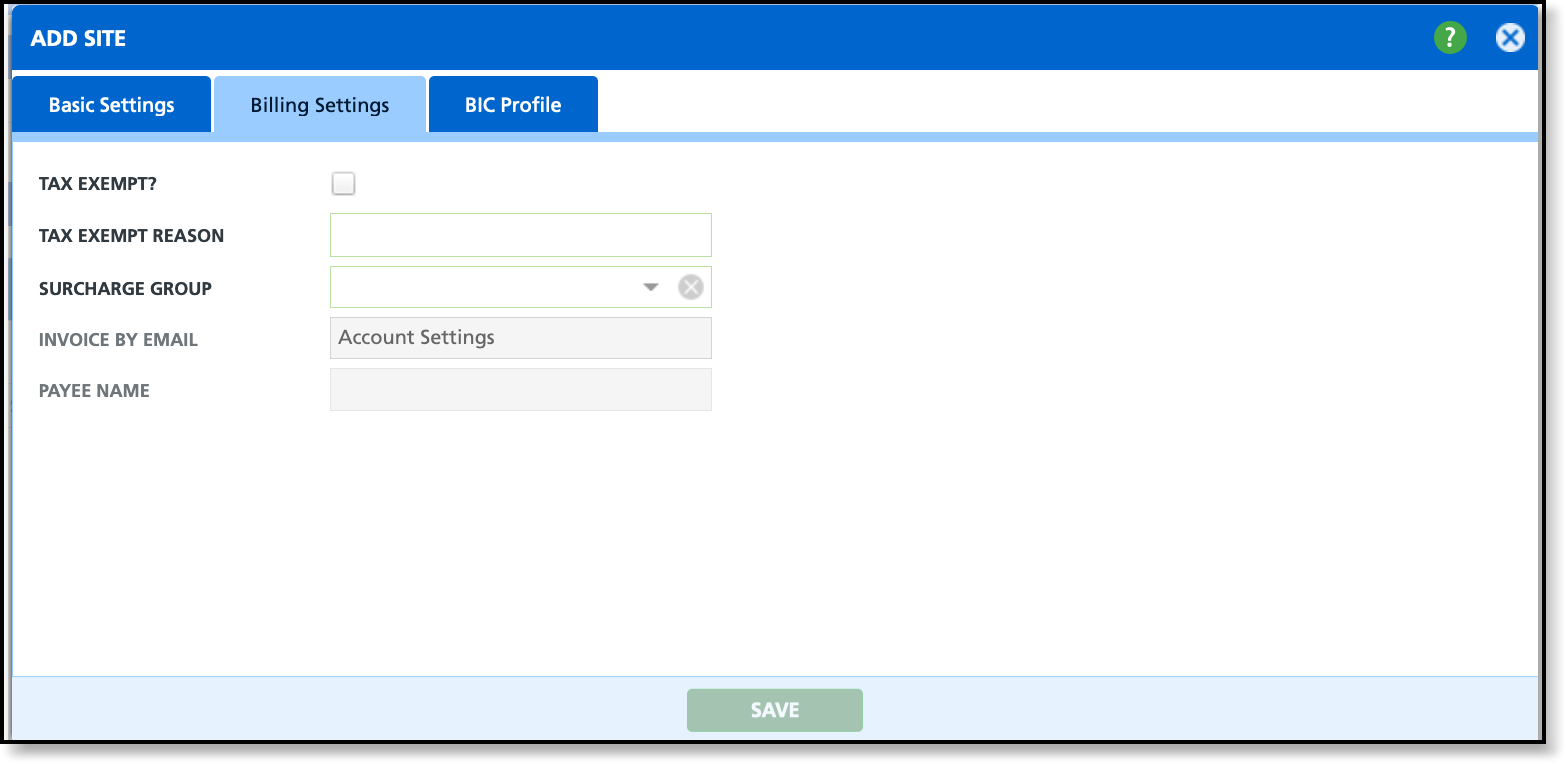
Billing Settings
The Billing Settings tab establishes the billing requirements for the site, including the receipt method for invoices and the designated billing contact.
| Field |
Description |
Tax Exempt
|
If the site is tax exempt and no tax region was selected when the site was created, select the Tax Exempt check box.
|
Tax Exempt Reason
|
If the Tax Exempt box is checked, enter supporting information for the reason why the site is exempt.
|
Surcharge Group
|
Select a Surcharge Group if the site is subject to a surcharge.
|
Invoice By Email
|
If the site is receiving invoices by email, select:
- Account Settings and the site will follow the parent account’s settings.
- Email With Link and the site will receive a URL link to open the invoice.
- Email With PDF Attachment and the invoice will be attached to the email as a PDF.
|
Payee Name
|
Select the name of the site's billing contact if the contact is different than the account contact. Contacts are only assigned here. To create a contact, the Contacts tool must be used.
|
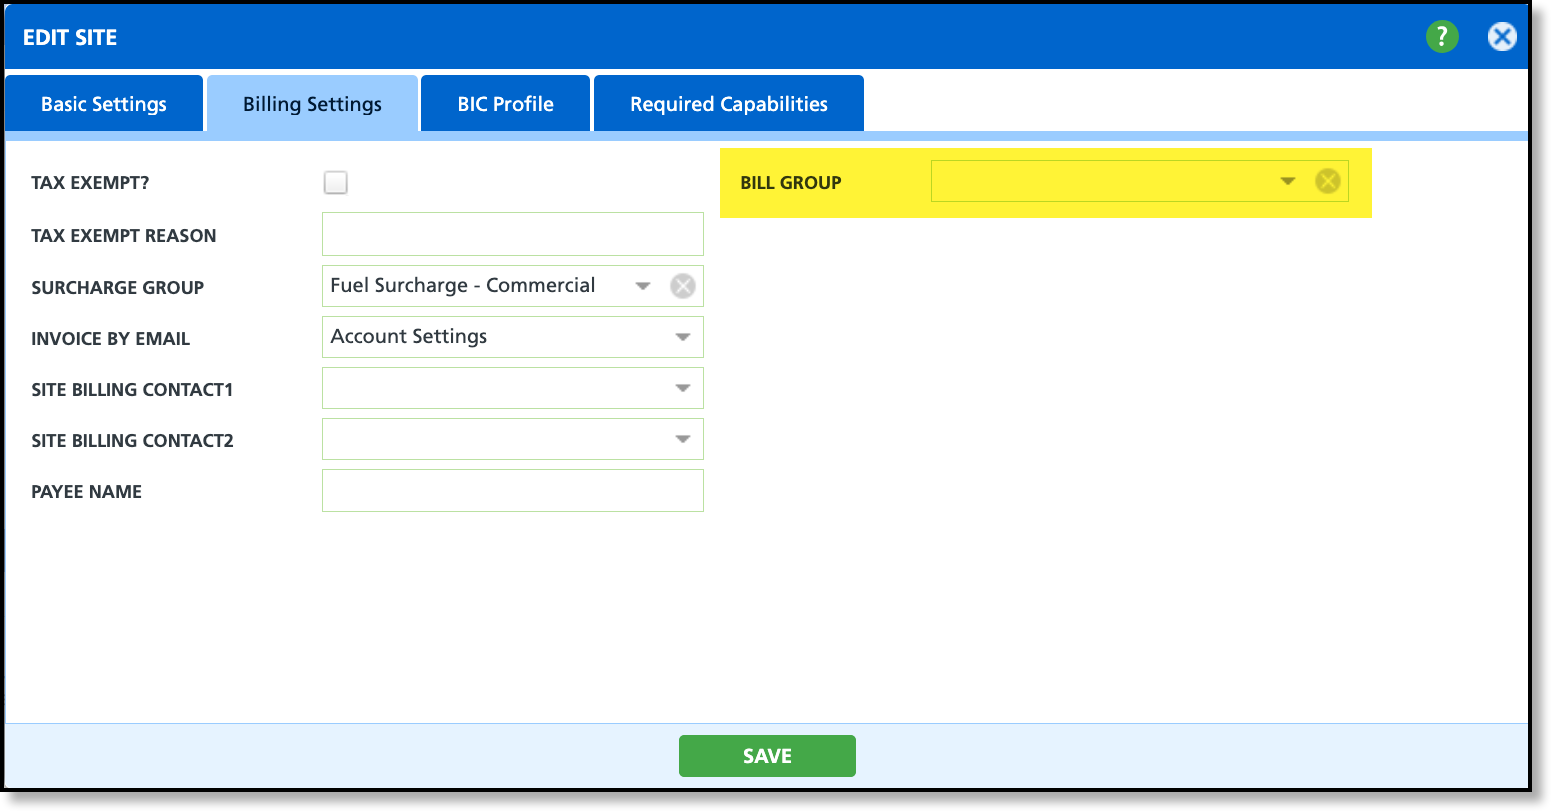
Bill Group
|
Only displays if the 'Bill By Site' check box for the account is selected and settings in System Options are also enabled. See the Bill By Site section at the end of this article for additional details.
|
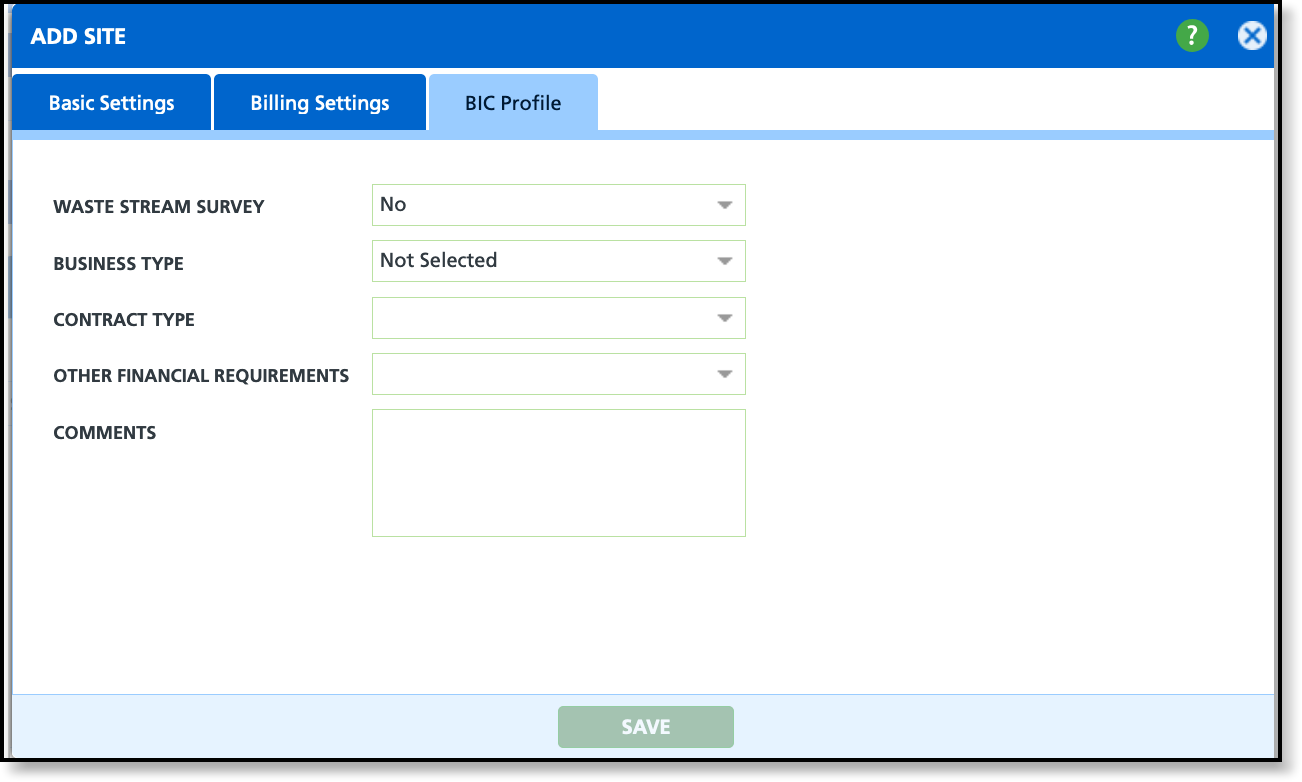
BIC Profile
The BIC Profile tab pertains to commercial establishments in New York mandated by law to arrange for the collection of their putrescible waste and recyclables through a hauler licensed by the Business Integrity Commission (BIC).
| Field |
Description |
Waste Stream Survey
|
Indicates if a waste stream survey was completed for the site.
|
Business Type
|
Specifies the business categorization used to identify the type of waste generated by the site.
|
Contract Type
|
Indicates if the contract between the customer and hauler was written or oral.
|
Other Financial Requirements
|
Indicates if the site has other financial requirements.
|
Comments
|
Option to provide addition comments regarding the site's BIC profile.
|
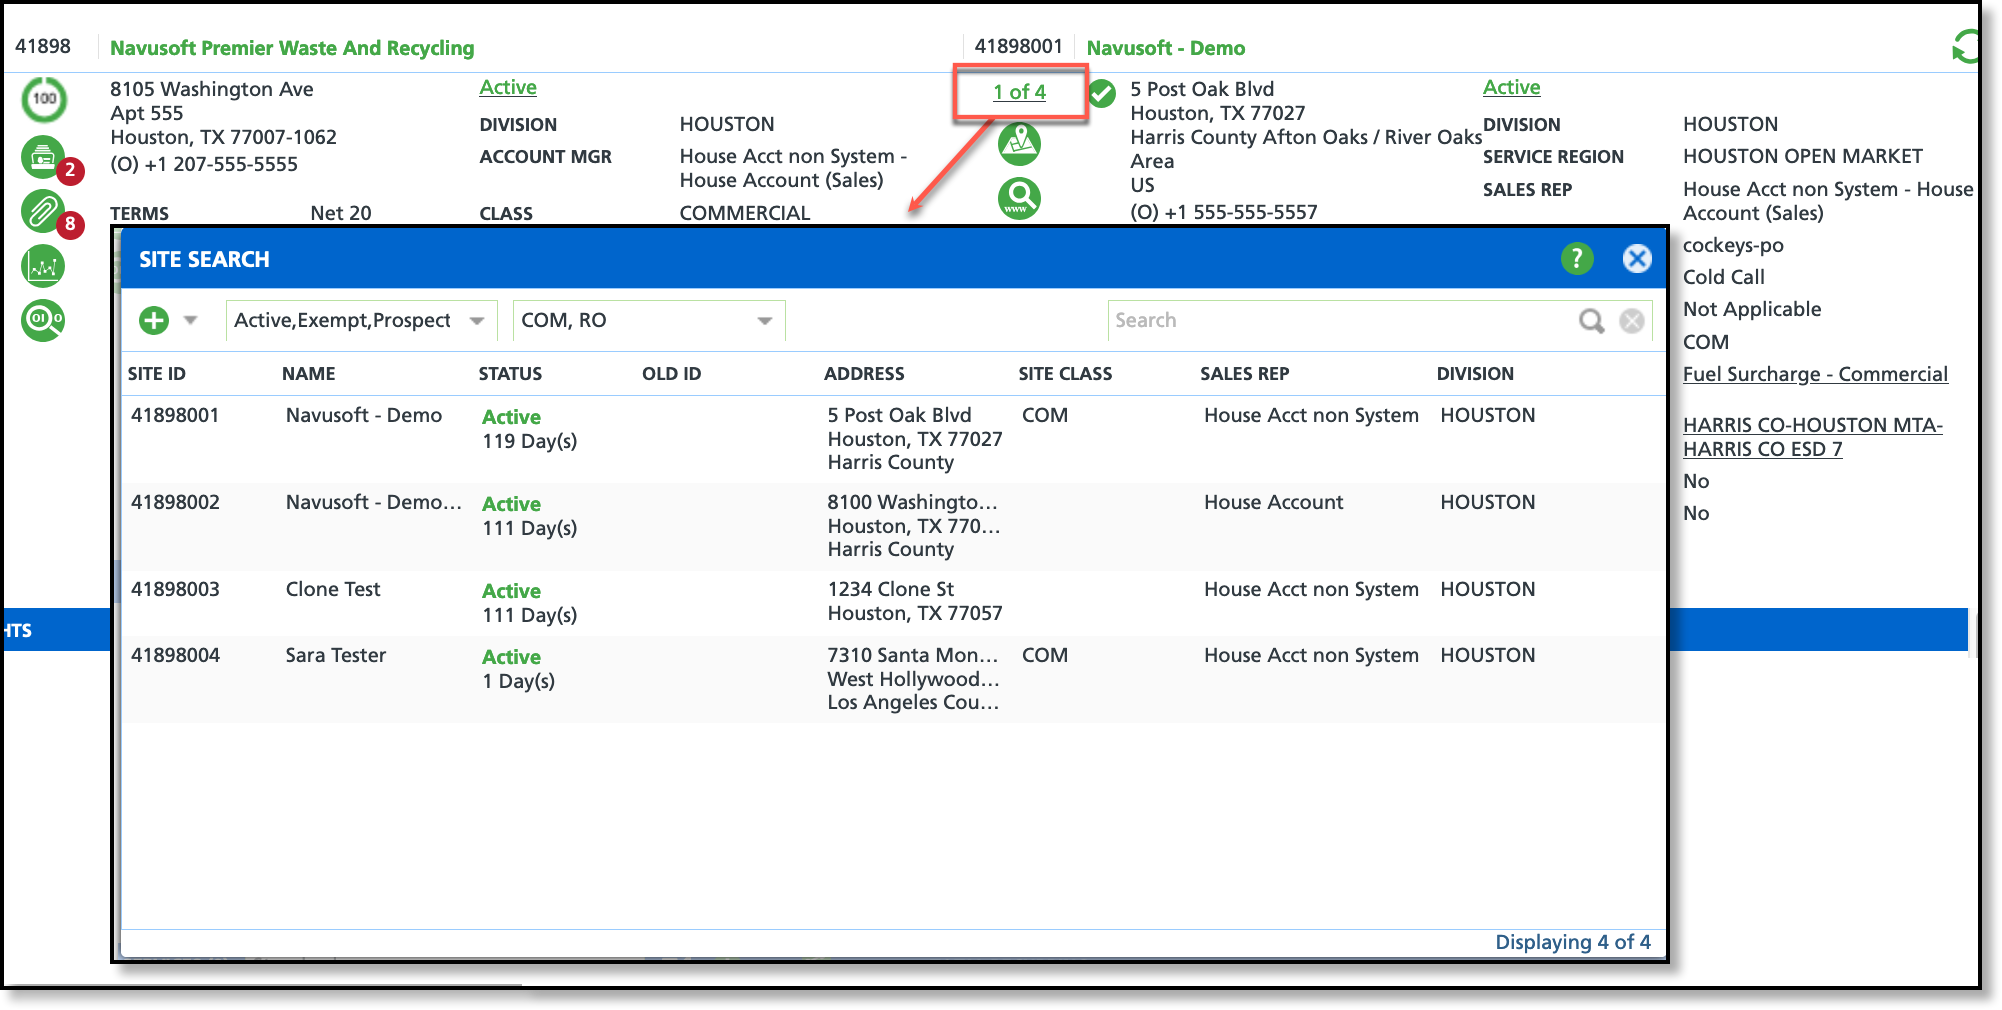
View All Sites
- Select # of # (example: 1 of 2) to display the Site Search popup window.
- TIP: Use the filtering options at the top of the Site Search screen to narrow down the types of sites displayed. For example, if an account has many sites, you can filter to show only those with an "Active" status.
- Double-click within the row of the desired site. The site will open in current window's tab.
Add a New Site
- Select # of # (example: 1 of 2) from the Customer’s screen to display the Site Search popup window.
- Select the green ‘+' icon from the upper right corner in Site Search and select Site. A new 'Add Site’ popup window will display.
- Complete all required fields highlighted red in the Basic Settings tab and click Save. Additional fields should be completed based on your company’s data entry procedures.
- Select the Billing Settings tab and minimally complete all fields highlighted red and click Save. Additional fields should be completed based on your company’s data entry procedures.
Bill By Site
In Billing Settings, a site can be configured to bill independently from its account when the site is added or edited. This option requires additional setup; without it, the Bill Group setting will not be available in the site's Billing Settings tab.
System Options Setup
Pathway: Setup > System Options > Account [tab]
At the system level, settings apply universally. In System Options, the Enable Site Bill Group setting must be set to Yes. If it is not enabled, the Bill Group dropdown will not appear in a site's Billing Settings tab.
Account Setup
Pathway: Customer Service Screen (Accounts)
At the account level, the Bill By Site setting must be enabled in the Settings tab. If this option is not enabled, the Bill Group drop-down will not appear in the site’s Billing Settings tab.
Related Articles
Add a New Account (Prospect)
Create Site Templates


