Import Fuel Record
Last Modified on 08/06/2026 3:38 pm PDT
Pathway: Database > Import > Import Fuel Record
The option to import fuel records is available in the Database module. When imported, fuel records display on the Dispatch screen using the Route Productivity view where manual adjustments and entries can also be entered.
This process cannot be undone. Before proceeding with the import, ensure the accounts in the file are accurate.

Permissions
The following permissions are required to import fuel records into Navusoft:
| Permission ID | Permission Name |
| 426 | Import Fuel Record |
Import File Requirements
The following requirements must be met to successfully import fuel records.
The Import file:
- Must be a Comma-Separated Values (CSV) text file
- Must have a Header Row
- Must have the Required fields (see Import File Formats below) in the header row.
- Expects that each following row after the Header row is a Fuel record
Column Headers
To import a file successfully, it must contain the following three required columns in the order shown in the example below. Column headers must be placed in the first row.
| Field | Description | Format |
truckname
Required
| The unique name given to a truck. | Text |
date
Required | The date that this fuel record is for. | Date |
amount
Required | The amount of fuel added to the truck for that day. | Text |
| route | The Route ID or External Route ID. Review processing logic to learn how the system handles no route or an invalid route. | Text |
Example File (.csv)
Viewed in excel

Viewed in a text editor:
truckname,date,amount,route,
2000,8/3/26,10,1058,route provided
2004,8/3/26,10,1054,route provided
2004,8/3/26,10,1085,route provided
751,8/3/26,10,,"route not provided, should be 751"
2004,8/3/26,10,xyz,route provided but not valid
Import Processing Logic
The following logic is used when processing the Fuel Record Import file.
- Headers should be in the first row in the following order: truckname, date, amount, route.
- If there are additional columns that are not required, those columns will be disregarded.
- The route must be either the Route ID or the External Route ID.
- When assigning the route, the following logic is used:
- Valid Route ID: The fuel record is assigned to that route for the associated truck and day.
- No Route ID: The system will use the truck name and date to find the route.
- If a match is found, the imported record is assigned with that route.
- If no match is found, the imported record is created but has no route.
- Invalid Route ID: The imported record will be rejected and marked as a Failure in the results file.
- Importing again will add another record, not overwrite the existing one.
- 'Fuel Type' is not supported by the import and will be set to 'Other' by default.
Import Fuel Record
After setting up the import file, the process of importing fuel records is a simple.
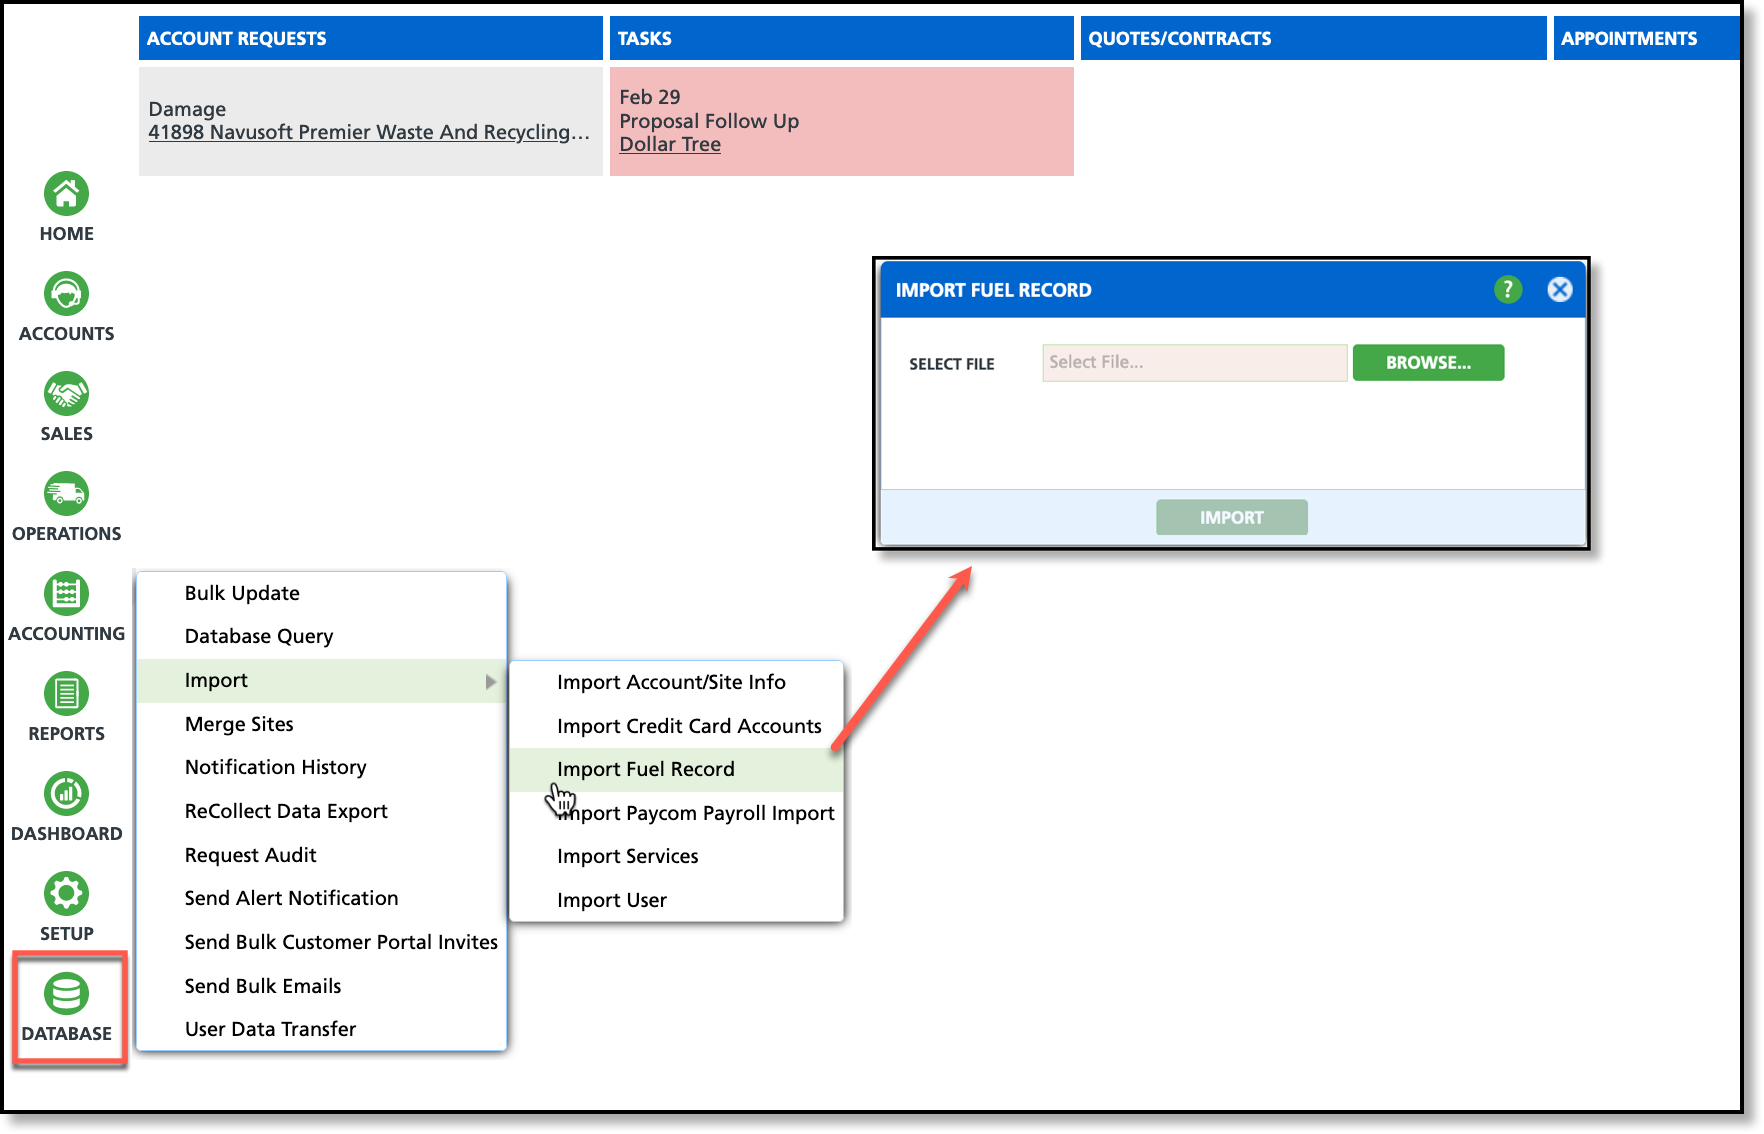
- Select Import Fuel Record from Database > Import.
- Use the provided file browser to select the import file.
- Select Import.
- If the import file is formatted correctly, the following message will be displayed. Select OK.
Import Results
After a Fuel Record Import process is successfully run, the system notifies the initiating user with a blue Notification note and, if an error occurred, a confirmation dialog providing the option to view a results file.
The returned results file is provided to indicate success/failure at a record level. It includes additional "Rejection Reaston" and "Status" columns that indicate which fuel records were successfully imported and highlight any failures with the reason for rejection.

View Fuel Records in Dispatch
After fuel records have been imported, they will display in Dispatch under the Route Productivity view. To review/edit an individual record, select the value displayed in the Fuel column for the route.

The Fuel Source, Fuel Type, UOM, Cost, and Note can be manually entered from the Fuel Receipts screen. Receipts can be attached via the paperclip icon. The Volume can be modified.


