Database Query
Last Modified on 03/28/2024 2:03 pm PDT
Pathway: Database > Database Query
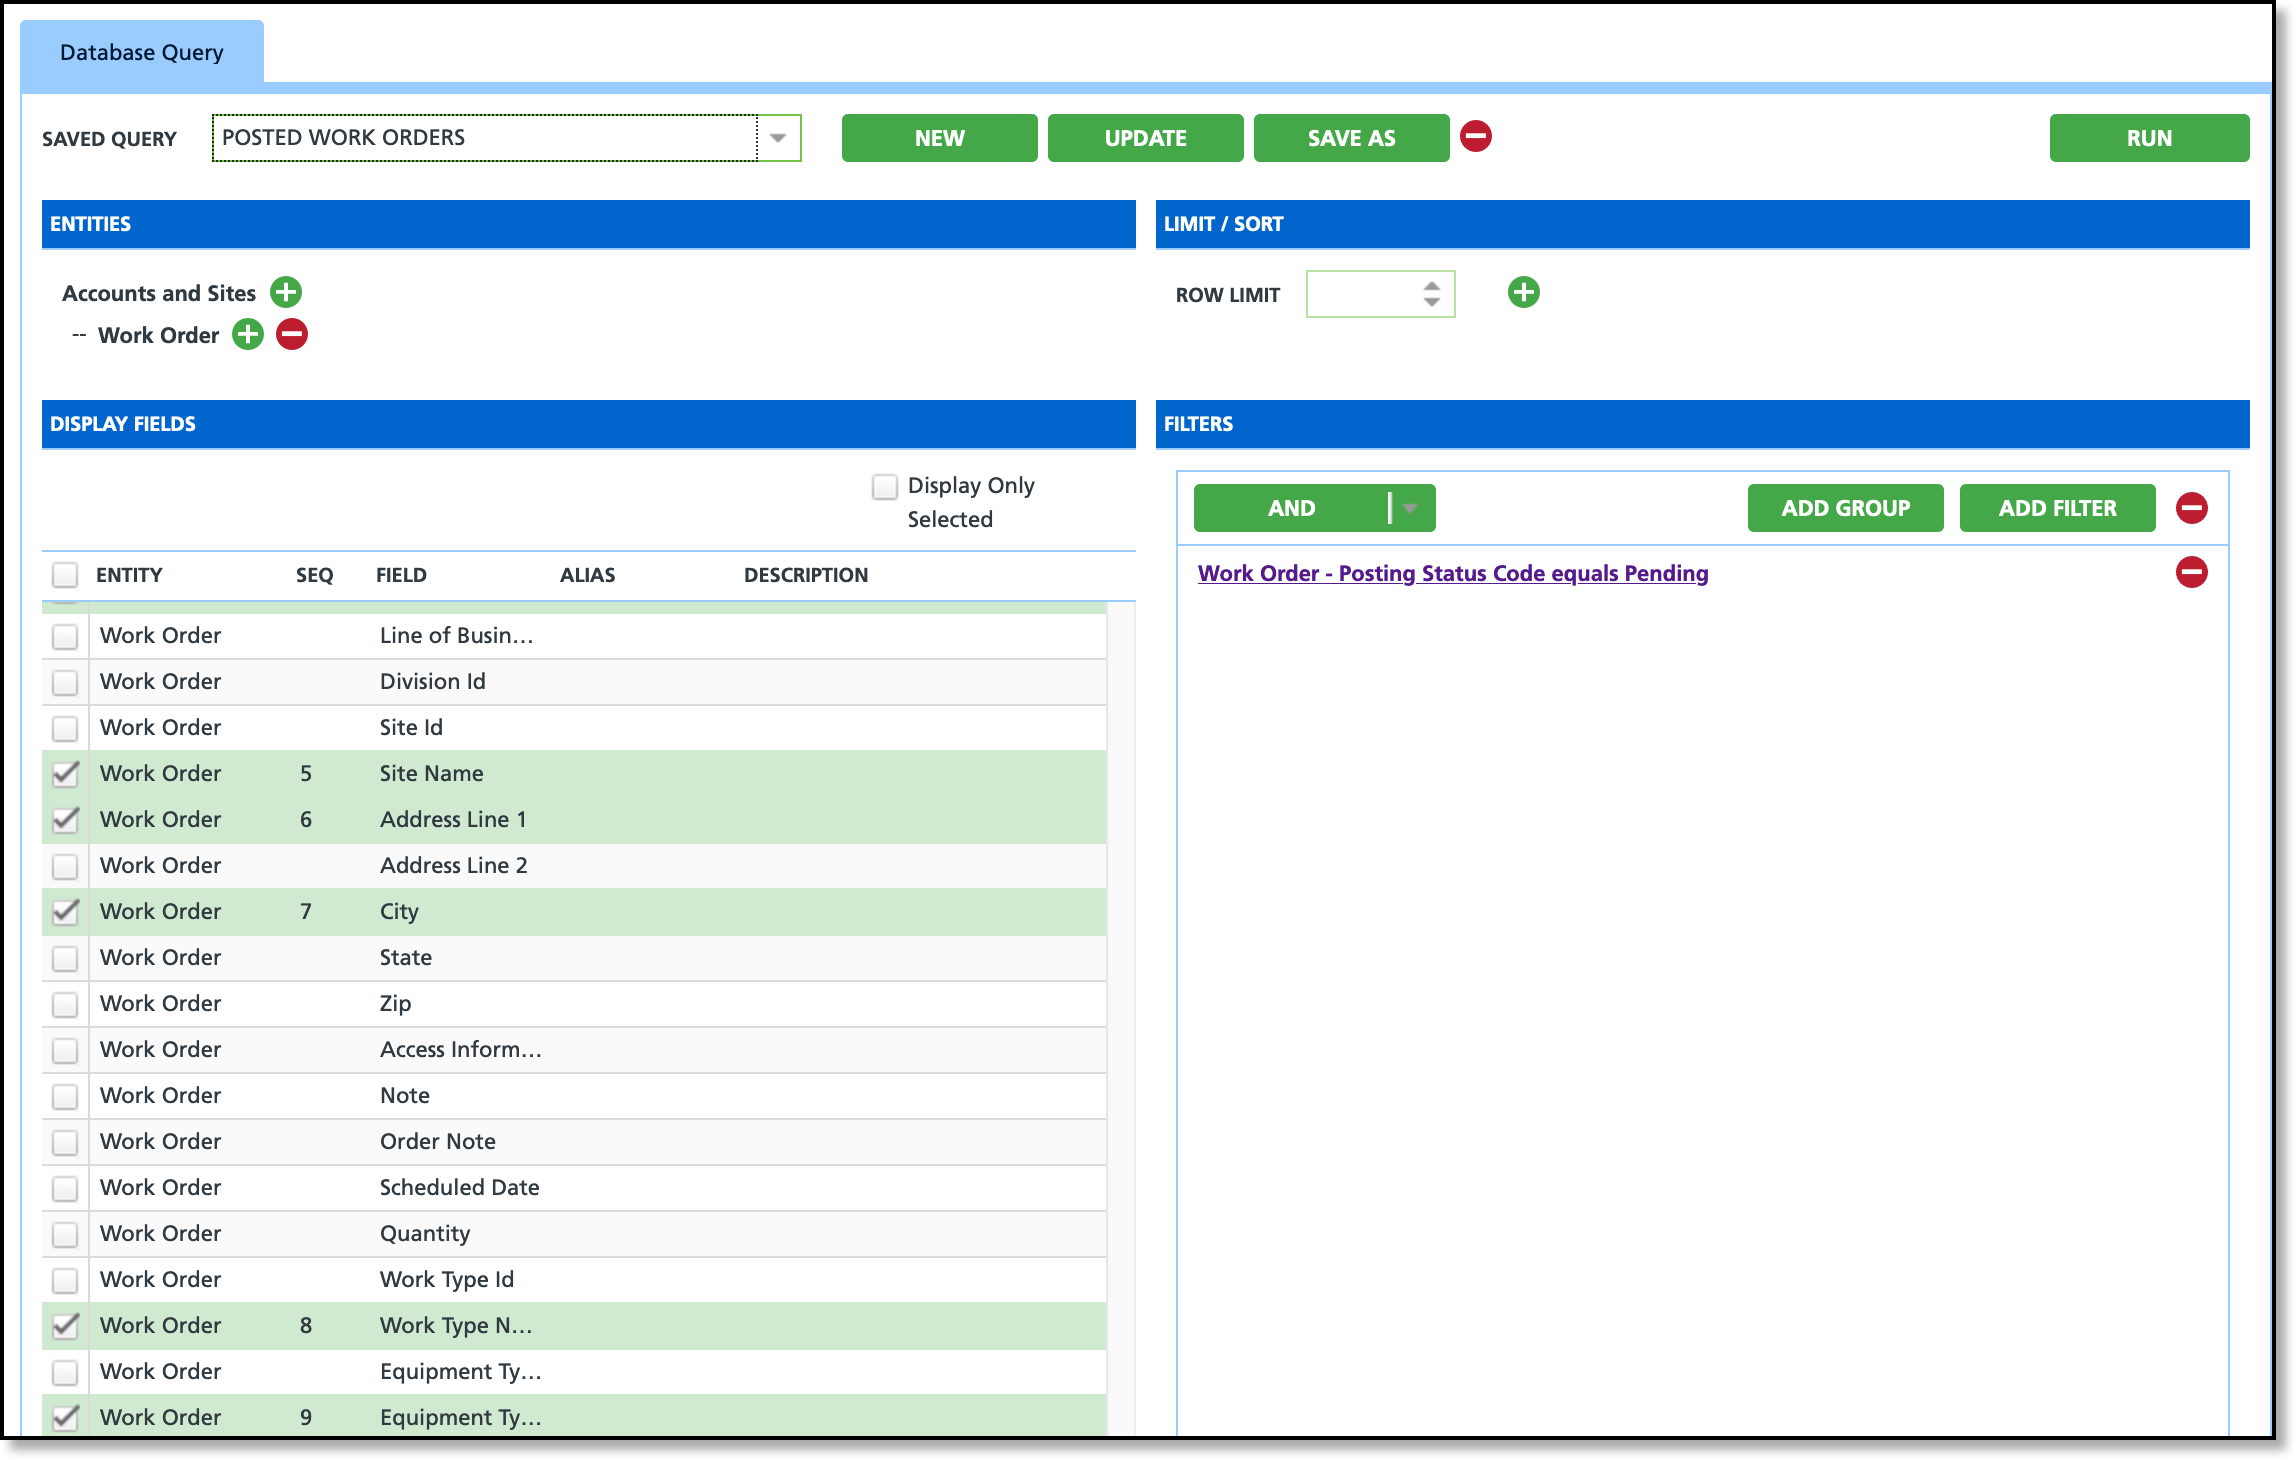
A database query is a request for specific information from modeled data sources in the database. It allows you to retrieve, export, and review data stored in the database by specifying certain criteria or conditions. After a query has been generated, the results can be exported to Excel and the query can be saved to allow users easy access to re-run the report at a future date.
Permissions
The following permission is required to create a query:
| Permission ID | Permission Name |
| 416 | Database Query |
Field Descriptions
| Field | Description |
| Saved Query | Includes a drop down selection of saved queries/reports.
|
| New | Creates a new query.
|
| Update | Saves any changes made to a query (added/removed fields, filters, limit/sort and etc.).
|
| Save As | Saves the query to the system for future use. Upon saving a popup editor displays to enter a name for the query and includes a 'Public Query' check box. - Public Query - if checked, the query is available for any user to view and edit. Otherwise, only the user who created the query will be able to see and use it.
|
| Run | Runs the query based on the selections and filters. Reports generate in a new tab.
|
| Sections |
| Entities | Determines the data table the system retrieves information from. Also controls what displays for selection in the Display Fields window. |
Limit/Sort
| Optional; Controls the number of rows output and how the data is sorted when it is returned. - Limit: Caps the report to only return the number of results entered.
- Sort: Sorts report columns in either ascending or descending order. All reports default to ascending sort order.
|
Display Fields | Data points that can be included in the query results. Fields displayed are unique to the entity selected.- Display Only Selected (check box): select to only display the fields you have selected for easier review. Uncheck it to continue adding or removing field selections.
|
| Filters |
| And/Or | Select to toggle the filter between the And/Or option to filter on. - And: Requires all filter parameters in the group to be true for a record to return. Limits the report's results.
- Or: Requires only one of the filter parameters in the group to be true for a record to return. Broadens the report's results.
|
| Add Group | Creates another filter group to further refine the data set that is returned.
|
| Add Filter | Opens the 'Add New Filter' popup to define the filter parameters the report should use.
|
Create a Query: No Filter(s)
In some cases, users may need a simple report that pulls information from the database without a need for any filters. In that case, the following process can be used:
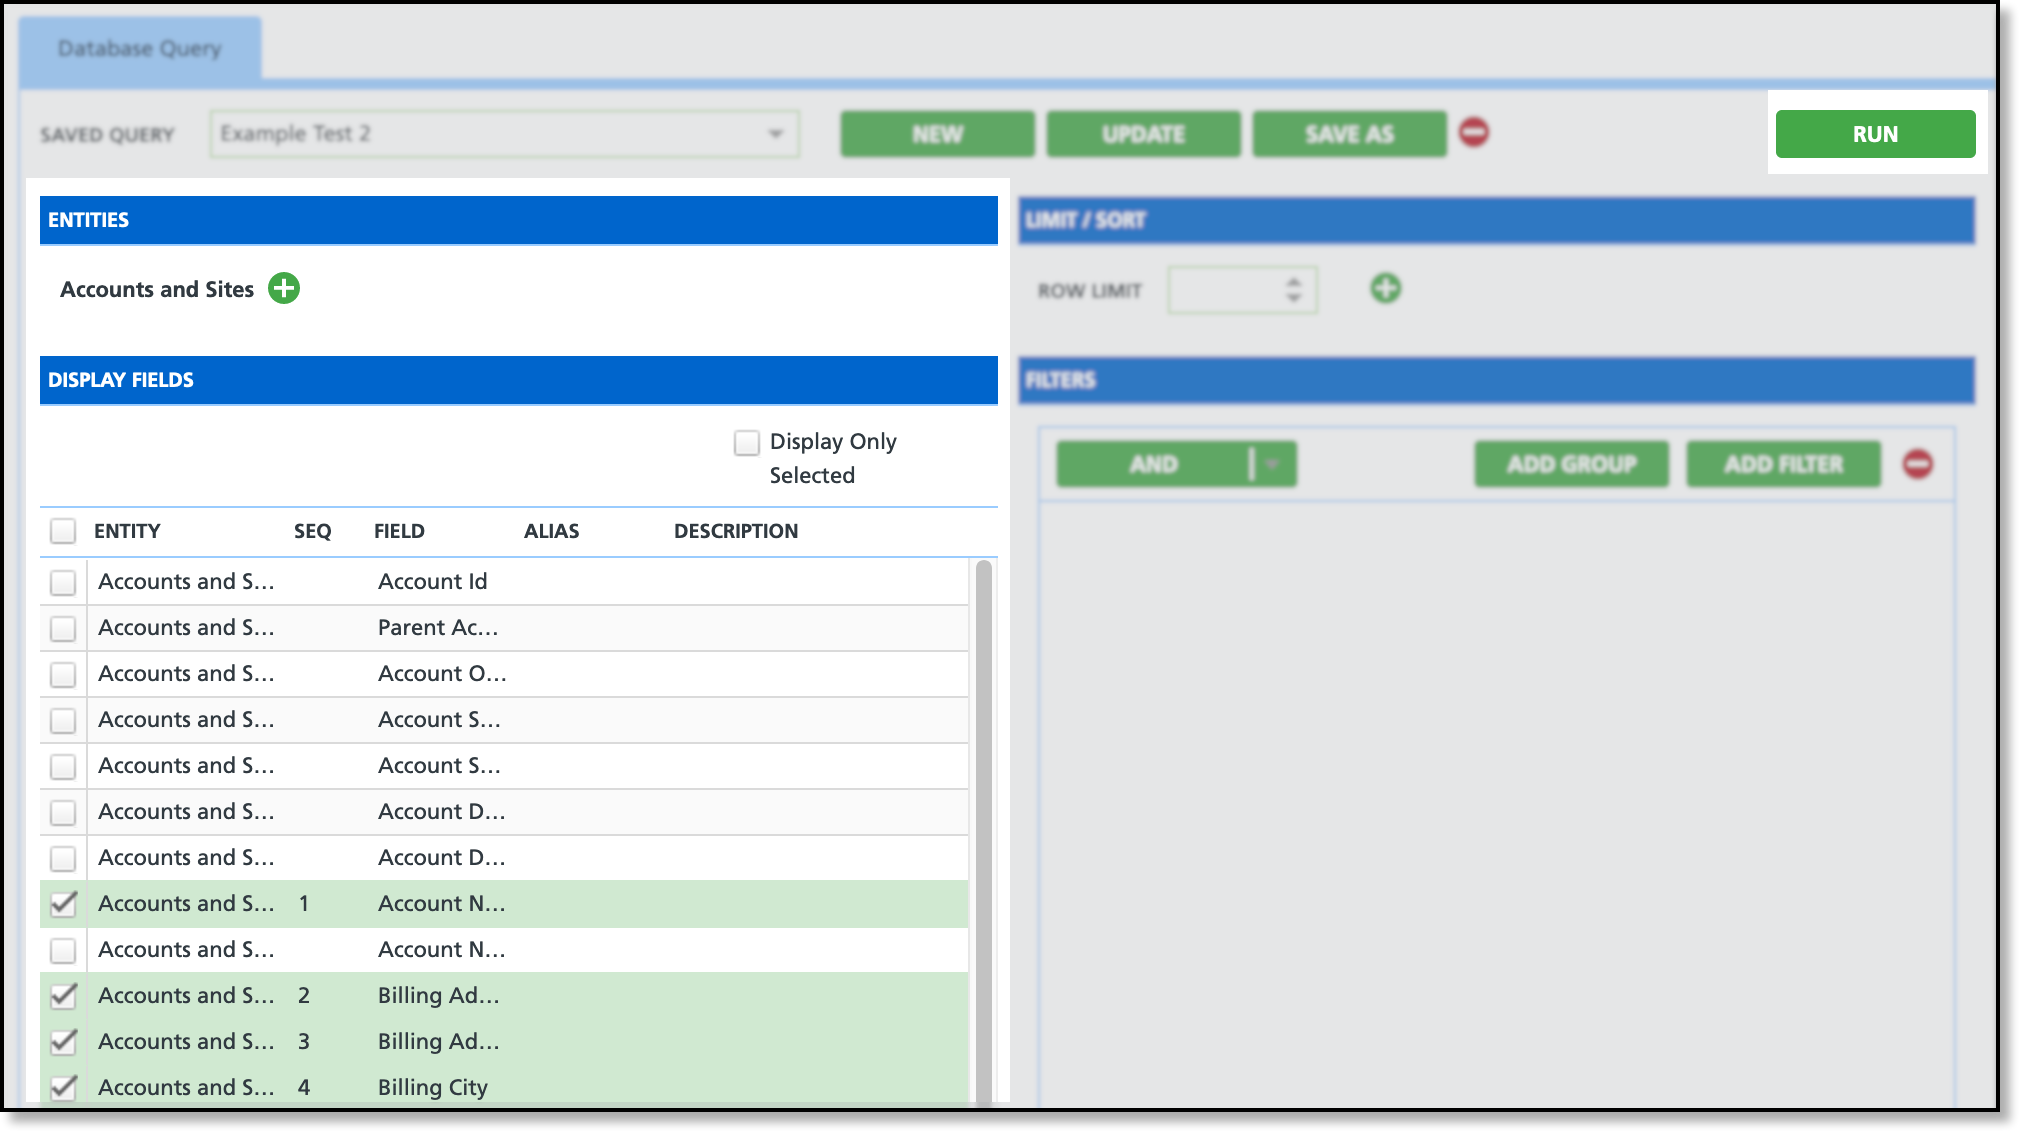
- Click on 'New' from the top of the screen and the 'Select Main Entity' popup window will display.
- Select the 'Entity' (database table) from the drop down.
- Optional: Enter an Alias to change how the database table displays in the report header when the query is run. This will also change how the entity's name is displayed in the Display Fields.
- Select Save and a new query will open.
- Select the check box for each display field you would like the report to include.
- ✔After all selections are made, check the 'Display Only Selected' check box to review your selections and confirm all desired fields are included.
- Click Run and the query will generate in another tab.
Create a Query with Filter(s)
Some reports require the use of a filter to refine the results to a specific data set, such as accounts assigned to a specific zip code. In scenarios similar to this, the following process can be used:
- Click on 'New' from the top of the screen and the 'Select Main Entity' popup window will display.
- Select the Entity (database table) from the drop down.
- Optional: Enter an Alias to change how the database table displays in the report header when the query is run. This will also change how the entity's name is displayed in the Display Fields.
- Click Save and a new query will open.
- Select the check box for each display field you would like the report to include.
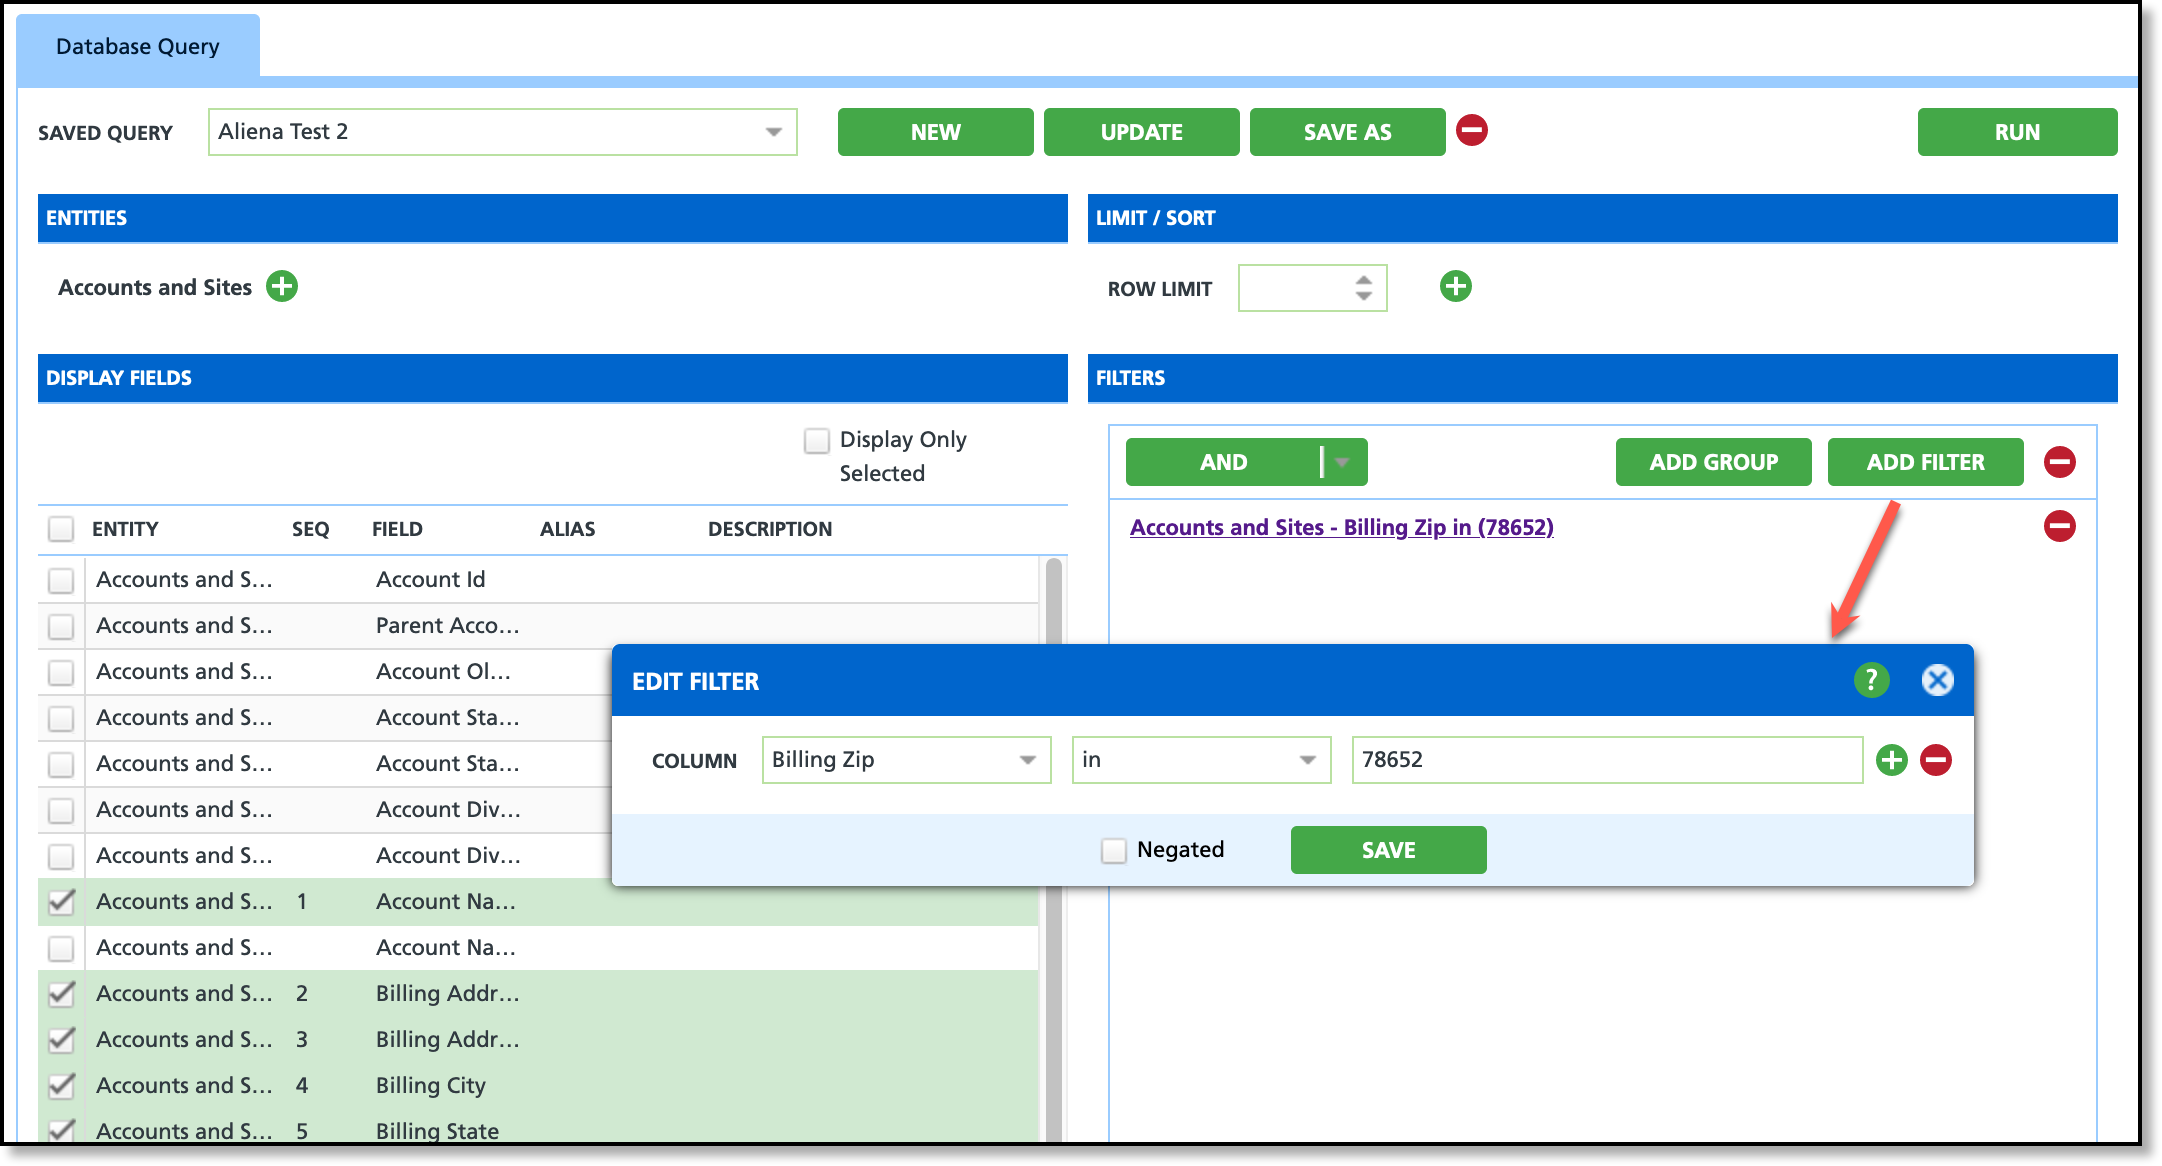
- Select the And/Or toggle button to indicate how you would like the system to look at the data. This is important if more than one filter is used. If only one filter is used, the And/Or toggle does not affect what is returned.
- Click on 'Add Filter' to display the 'Add New Filter' popup.
- Select the column you would like to filter the data on (first drop down box).
- Select the operator you would like to perform the filter on (middle drop down box).
- Enter the value of the filter the data should be filtered on.
- Click Save when finished.
- Click "Run" when all filters are added and the query will generate in a new tab.
Filter Operators
Operators control how the filter will process the data and return results. Different results are returned based on the operator that is used as detailed in the examples below.
Operator Examples
Example 1:
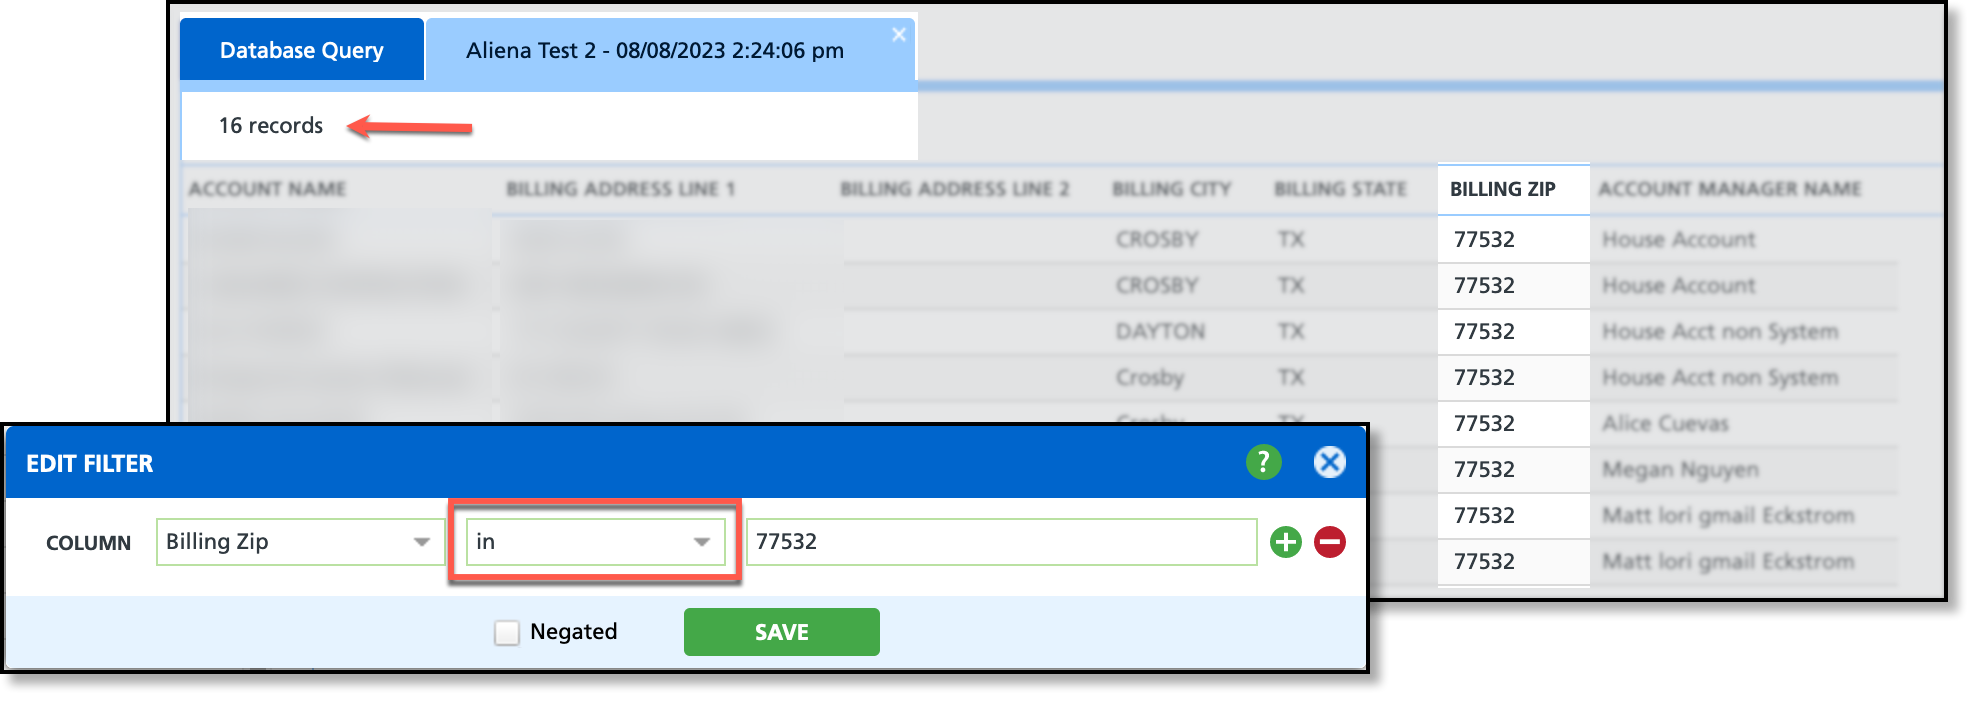
In the example below, the "In" operator was used and the results were limited to only billing zip codes that were an exact match to the filter parameter entered. In this example, 16 records were returned.
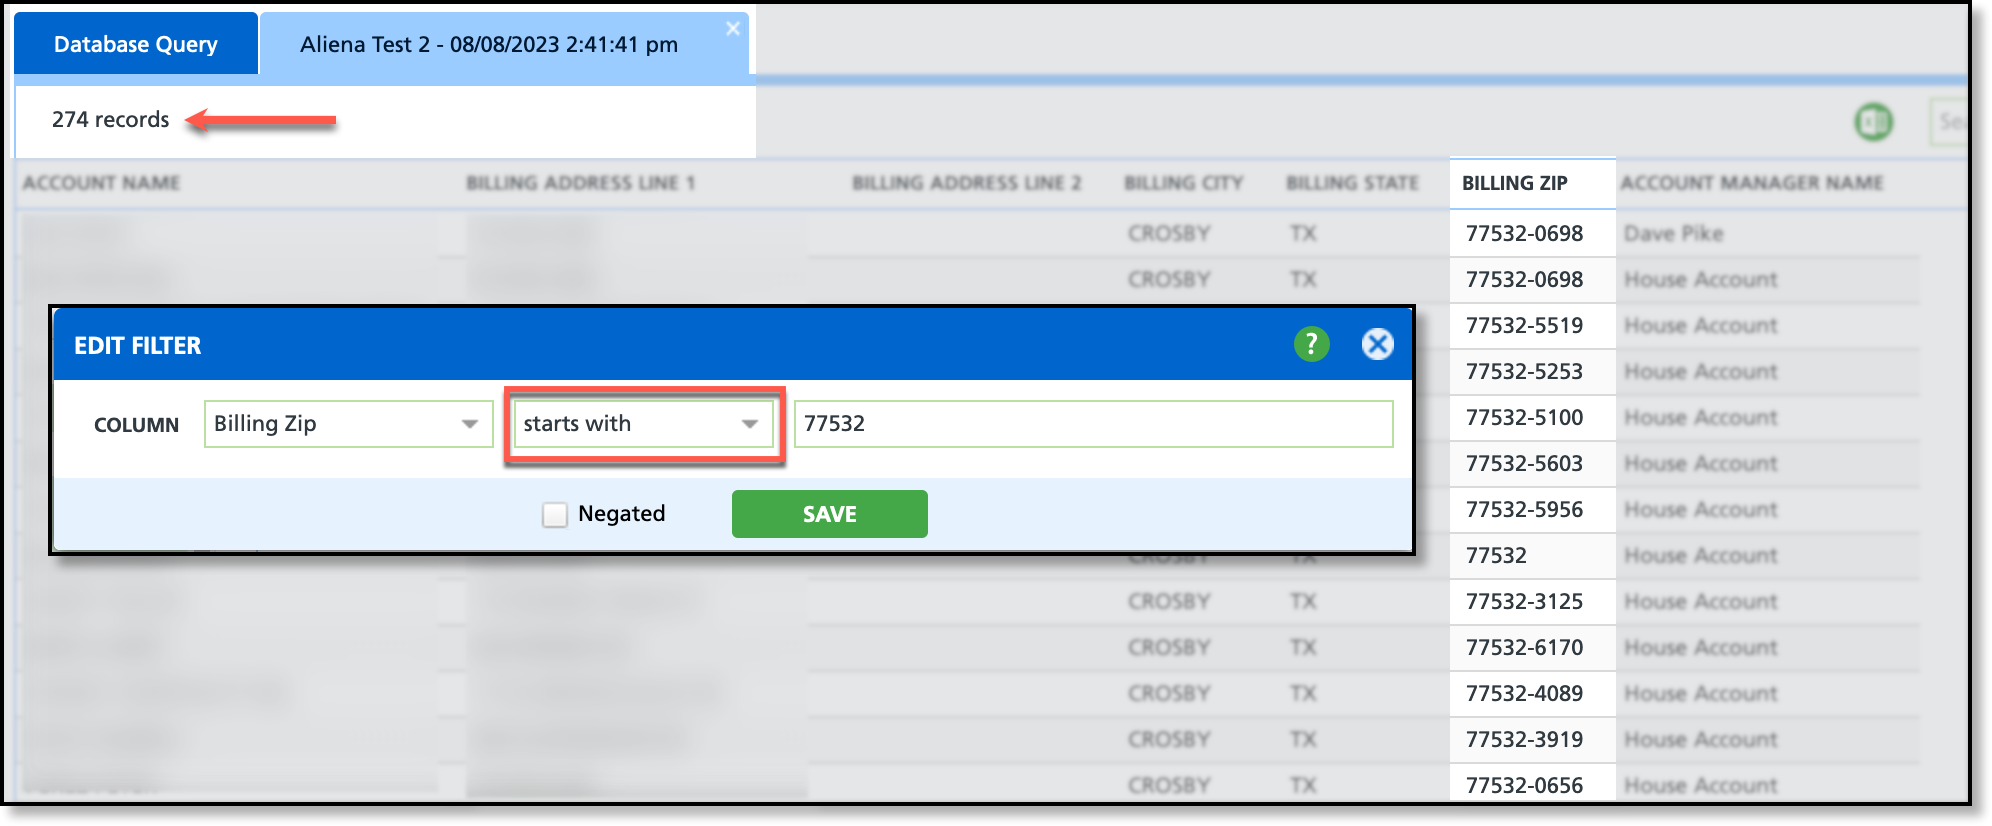
Example 2:
In the example below, the operator "Starts With" was used and results were broadened to include any account/site that started with the values entered for the billing zip code. In this case, the results included the zip code's "plus-four" codes or "add-on" codes that a user included at the time the zip code was entered into the system. In this example, 274 records were returned.
Examples: Groups and Filters
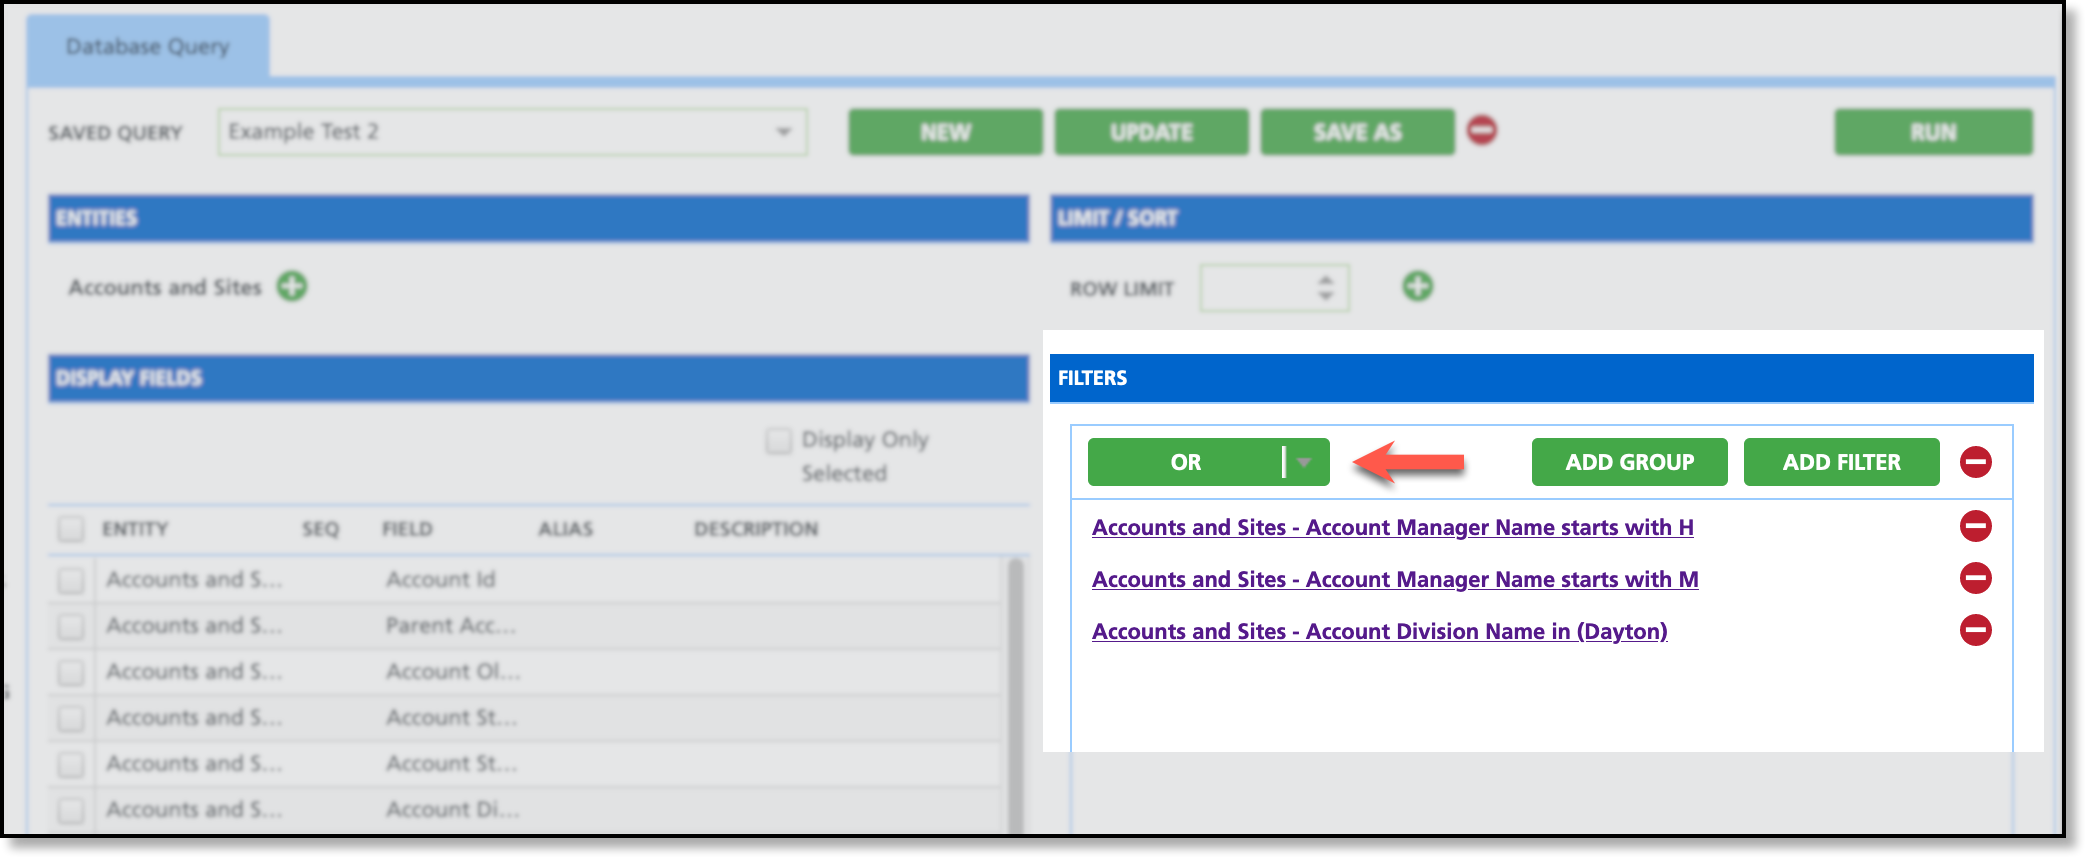
Example: Single Group, Multiple Filters (OR Statement)
In the example below, the OR statement is used for each filter that is added to the group. This will broaden the results that are returned as only one of the filter parameters must be true for the account to be included in the report.
Expected Results:
- Accounts and Sites will be returned if any of the following are true:
- Account Manager's name starts with H, OR
- Account Manager's name starts with M, OR
- The account's division is in Dayton.
In this example, the following operators are used:
- Starts With: Searches and pulls the results based on the first value of the data point. If large amounts of data are being searched, it is recommended to use another operator to better refine the results.
- In: Specific search and data must be an exact match to be included in the returned results.
Example: Single Group, Multiple Filters (AND Statement)
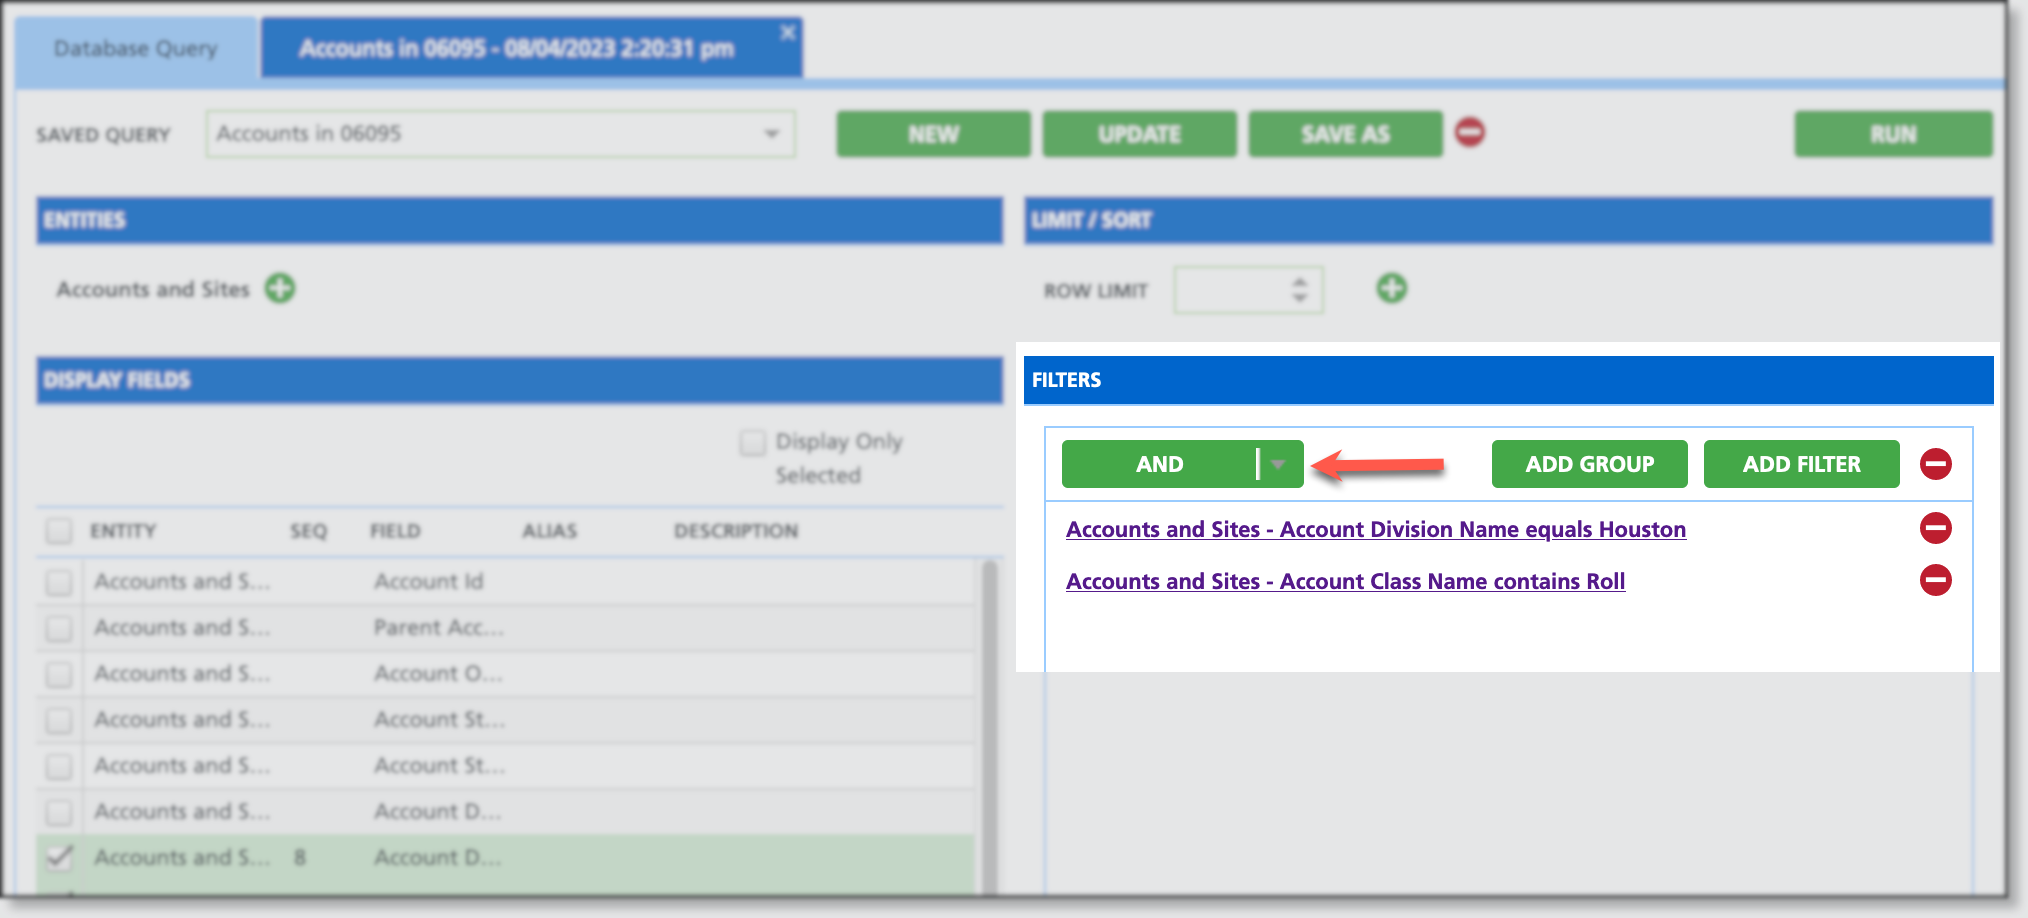
In the example below, the AND statement is used for each filter that is added to the group. This will restrict the results that are returned as it requires all to be true for the account.
Expected Results:
- Accounts and Sites will be returned if both of the following filter parameters are true:
- The account is in the Houston division AND
- The Account Class Name contains 'Roll'.
In this example, the following operators were used:
- Equals - requires an exact match of the parameter (Houston) to the division of the account/site.
- Contains - provides flexibility in how results are searched. Users may find this option helpful if they aren't sure how data was entered in the system, but do know it contains specific character values.
Example: Multi-Group with Filters
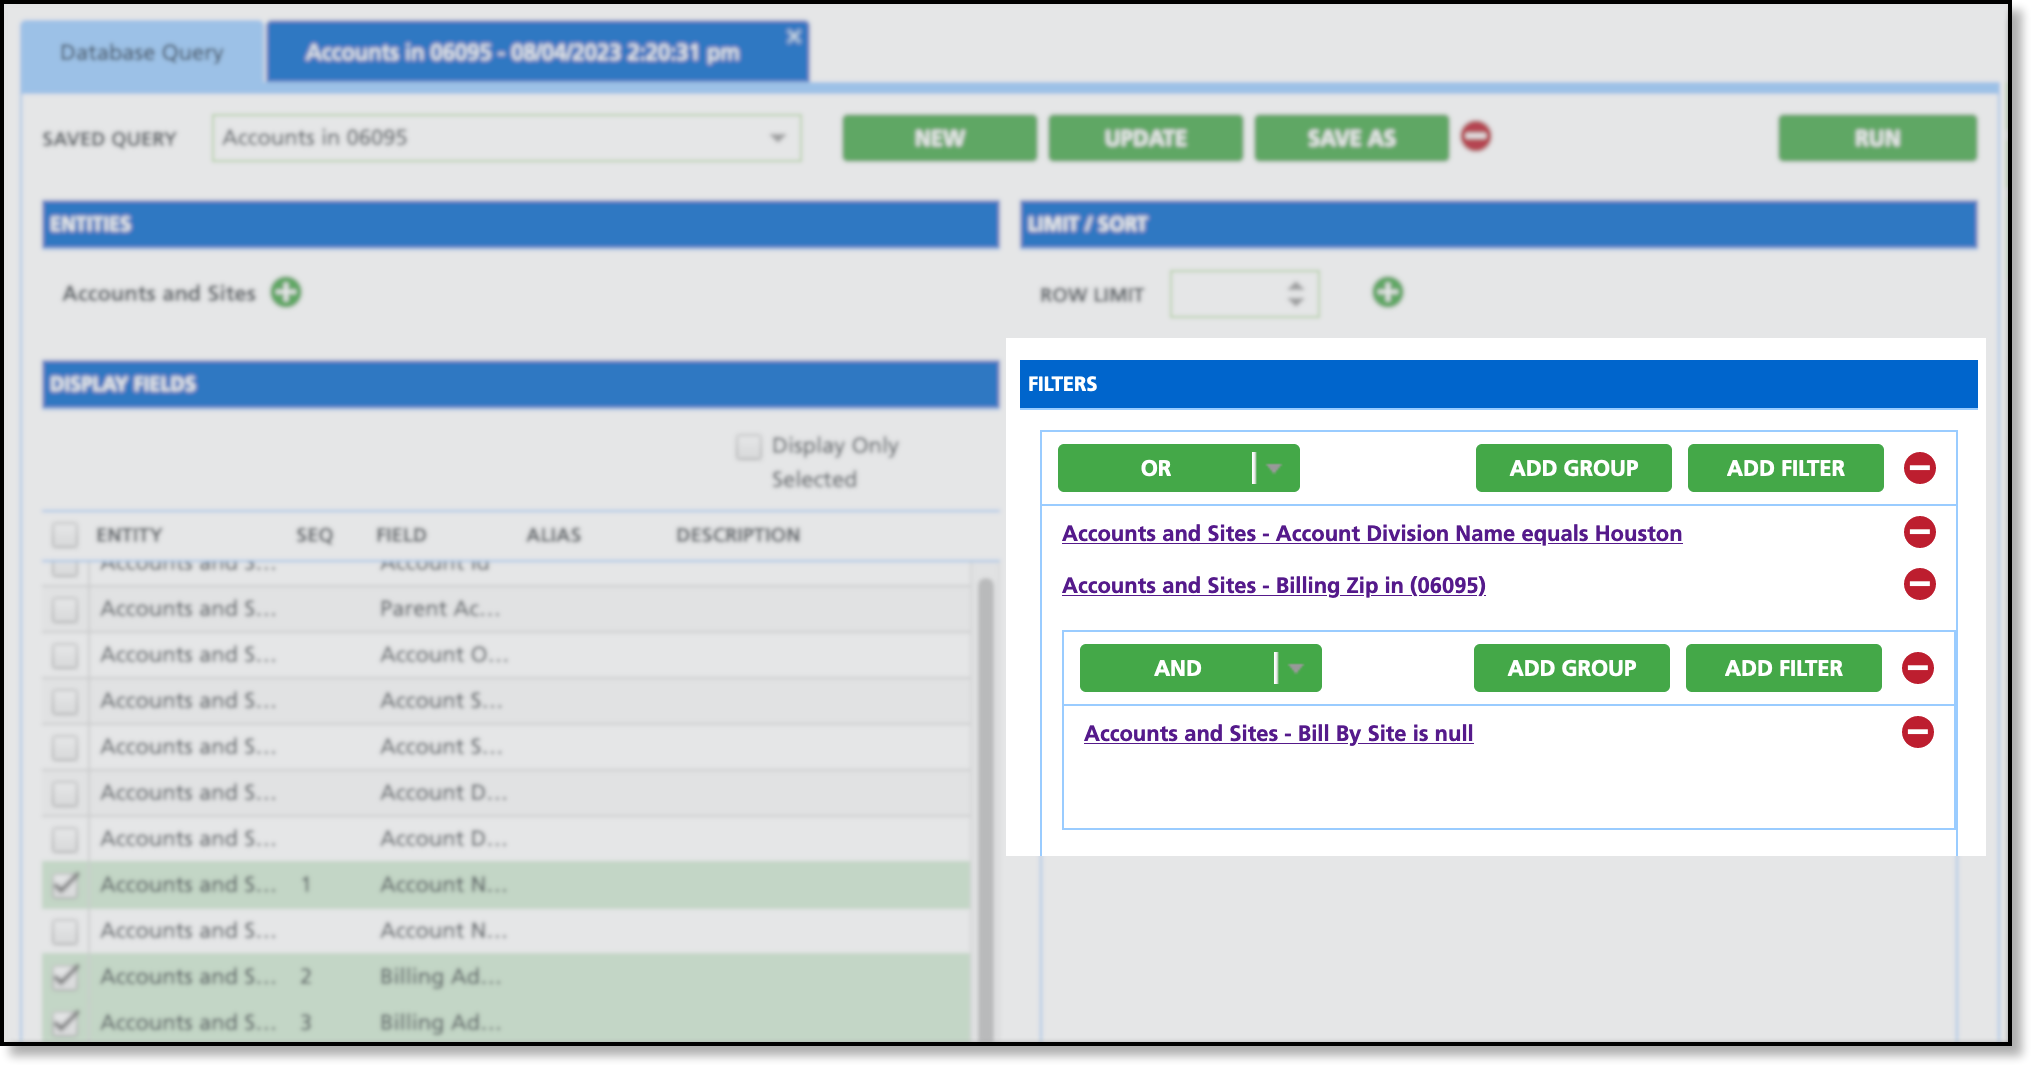
The option to add another group with its own set of filters allows users to further narrow down the results they would like the query to return. Building from the first example, the example below depicts what a report will look like with multiple groups and filters using the AND/OR statements.
Expected Results:
- Accounts and Sites will be returned if any of the following are true from the first group:
- The division for the account equals Houston, OR
- The Billing Zip is in 06095
- AND any the following MUST also be true from the second group for an account to be included in the report.
- The 'Bill By Site" must be null/blank for the account.
In this example, the following operators were used:
- Equals - requires an exact match of the parameter (Houston) to the division of the account/site.
- In - Specific search and data must be an exact match to be included in the returned results.
- Is Null - Checks for the absence of a value in the database. In other terms, it's a way of finding missing or unknown information. Example: Find all account contacts who do not have a phone number.
Run an Existing Query
To run an existing query, select the name of the query from the Saved Query drop down field and click 'Run'. When a query is run, it will open in another tab where it can be reviewed and exported to Excel.


